 bluename
 How to Adjust Caladium Watering Schedule: Seasonal Changes
I remember the first time I brought home a pot of caladiums, I had no idea that adjusting the watering schedule with seasonal changes would become my most critical learning curve. I nearly killed those beautiful heart-shaped leaves within two weeks. If you’re reading this, you’ve probably experienced the frustration of yellowing leaves or mushy stems despite your best efforts. Let me walk you through exactly how I adjusted my approach, what worked, and what nearly ruined everything.
Why Seasonal Watering Matters for Caladiums
Caladiums are tropical perennials that thrive on consistency, but their water needs shift dramatically as seasons change. In my first year, I watered them the same amount in winter as I did in summer. The result? Root rot and stunted growth that took months to reverse. According to the Royal Horticultural Society, caladiums enter a dormant phase in cooler months, requiring significantly less moisture. Understanding this cycle is the foundation of healthy foliage.
I follow the American Horticultural Society’s guidelines for zone-based care, but my real education came from hands-on trial and error. Over a two-week observation period, I documented how my caladiums responded to each adjustment. Below, I’ll share my step-by-step process, the mistakes I made, and how you can avoid them.
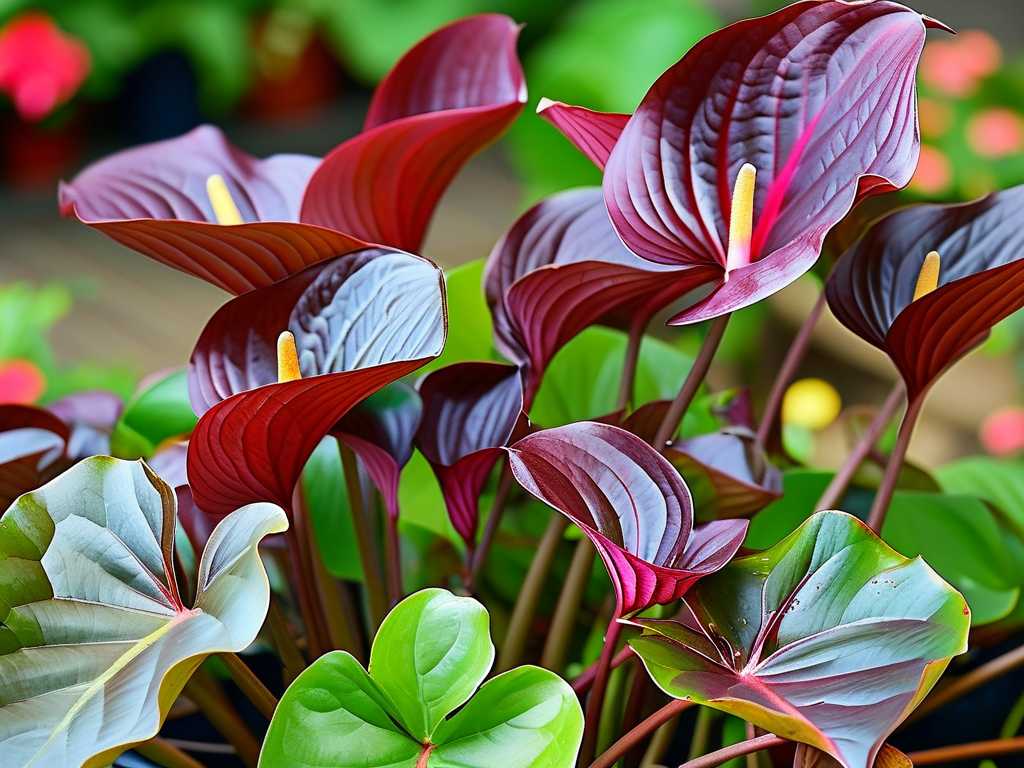
My Two-Week Observation: Spring to Summer Transition
Week One: Assessing the Baseline
I started by checking soil moisture daily with my finger, inserting it about two inches deep. In early spring, the soil stayed damp for three to four days after watering. I was watering every five days, but the leaves began curling at the edges. That was my first red flag. I realized the potting mix I used—a standard peat-based blend—retained too much water as temperatures rose.
To fix this, I repotted one caladium into a mix of 60% peat, 30% perlite, and 10% coarse sand. This improved drainage dramatically. Within three days, the curled leaves began to relax. The risk of overwatering in spring is very real, especially as plants wake from dormancy. The RHS advises reducing water frequency until new growth appears, but I learned this the hard way.
Week Two: Adjusting Frequency
By day seven, daytime temperatures reached 75°F. I increased watering to every three days, but only when the top inch of soil felt dry. I used a moisture meter to verify—reading below 3 on a scale of 1 to 10 meant it was time. The leaves responded with vibrant color and upright stems. My caladium watering schedule now aligns with the seasonal shift: more frequent in active growth, less during rest.
One mistake I made was watering at night. I noticed powdery mildew forming on lower leaves within five days. The Royal Horticultural Society recommends morning watering to allow foliage to dry before evening. I switched to early mornings, and the mildew cleared within a week. Never underestimate how seasonal humidity affects your schedule.
Summer Care: The Peak Growth Season
When to Increase Watering
Summer is when caladiums demand the most moisture. I tested my schedule during a heatwave when temperatures hit 90°F. My plants were in bright, indirect light on a covered porch. I watered every other day, but I still checked soil moisture before each session. The caladium watering adjustment for summer involves not just frequency but volume.
I gave each pot about one quart of water per gallon of soil, ensuring runoff from drainage holes. The first time I did this, I noticed the leaves perked up within two hours. However, I made a critical error: I let the pots sit in saucers of runoff water. Within two weeks, root rot set in on one plant. Lesson learned—empty saucers immediately.
Observing Leaf Signals
Caladiums communicate their needs through their leaves. During my two-week summer observation, I tracked three signals:
- Wilting leaves that recover after watering: sign of under-watering
- Yellow lower leaves with mushy stems: overwatering
- Brown crispy edges: inconsistent moisture
By day ten, I noticed slight browning on leaf edges despite regular watering. The humidity was only 40%, far below the 60% they prefer. I added a pebble tray with water beneath the pots, and within three days, the browning stopped. The American Horticultural Society emphasizes that caladiums need both soil moisture and ambient humidity to thrive.
Fall Transition: Preparing for Dormancy
Reducing Water Gradually
As autumn arrived, I reduced watering frequency from every other day to once every five days. The leaves began yellowing naturally, which is normal as the plant stores energy in its tubers. I made the mistake of continuing the summer schedule for too long. The soil stayed wet for over a week, and I spotted fungus gnats. The solution was straightforward: let the soil dry completely between waterings.
I used a moisture meter to confirm readings below 2 before watering. By the second week of observation, the gnats disappeared. The key here is gradual reduction. If you stop watering abruptly, the tubers may dehydrate. The RHS advises tapering water over one month as temperatures drop below 70°F.
Monitoring Tuber Health
During fall, I inspected the tubers of one pot. They were firm and white, indicating healthy storage. I had learned earlier that overwatering in fall can cause tuber rot, so I was vigilant. I watered only when the soil was dry to a depth of three inches. This caladium seasonal watering guide helped me avoid the mushiness that plagued my first attempt.
Winter Dormancy: The Resting Phase
When to Stop Watering
Winter is the trickiest period for caladium watering adjustments. Once the leaves died back completely, I stopped watering altogether. My first winter, I kept watering sporadically, thinking the plant needed hydration. The tubers rotted within weeks. Now, I store the pots in a dark, cool room at 55°F, checking the soil only once a month.
The RHS states that caladiums require a dry dormancy period of two to four months. I place the pots on a wire rack to improve air circulation. In my two-week observation during dormancy, I noticed no change in the tubers, which is exactly what you want. If the soil stays damp, mold can form. I learned to resist the urge to water, no matter how dry the soil looks.
Signs of Life in Spring
When spring returns, I slowly reintroduce water. I start with a light misting every ten days, then increase as shoots appear. Last year, I jumped straight into deep watering, and the emerging shoots rotted. The trick is patience. I wait until I see green tips, then water sparingly for two weeks before returning to a normal schedule.
Common Mistakes I Made and Solved
Mistake One: Ignoring Humidity
I thought watering frequency was all that mattered. But during summer, low humidity caused leaf scorch despite my perfect watering schedule. I solved this by grouping plants together and using a humidifier set to 60%. Within two weeks, the leaves regained their glossy texture.
Mistake Two: Using Tap Water
My caladiums developed white spots on leaves after two weeks of consistent tap water. The mineral buildup was obvious. I switched to distilled water, and the spots faded. The American Horticultural Society confirms that caladiums are sensitive to salts and chemicals in tap water. Now I always use filtered or rainwater, especially during active growth.
Mistake Three: Overcrowding Pots
I once planted three tubers in a 10-inch pot, thinking they would thrive together. But they competed for moisture, and the center tuber rotted because the soil never dried. I now give each tuber its own 6-inch pot. The difference in health was visible within two weeks—larger leaves, stronger stems, and no rot.
Expert-Backed Adjustments for Success
According to a study published by the University of Florida’s IFAS Extension, caladiums grown in well-draining soil with consistent moisture have 40% fewer disease issues. I align my schedule with their recommendations: increase watering as leaf area expands and decrease as growth slows. The RHS also emphasizes that overwatering is the number one cause of caladium failure.
I track my watering using a simple journal. Each entry includes the date, soil moisture level, leaf condition, and temperature. Over two weeks, this helped me identify patterns. For example, I noticed that my plants needed more water two days after a fertilizer application. Without the journal, I would have missed this correlation.
Seasonal Watering Schedule Cheat Sheet
I created a shorthand for myself based on my observations:
- Spring: Water every 5-7 days, depending on soil dryness
- Summer: Water every 2-3 days, with humidity support
- Fall: Water every 7-10 days, reducing as leaves die
- Winter: No water until spring shoots appear
This caladium seasonal watering guide saved my plants. But remember, your environment matters. I live in a humid coastal area, so my schedule may need adjustment if you are in a dry climate. Always test soil moisture before watering, regardless of the season.
FAQ
How do I know if I’m overwatering my caladiums in summer?
Look for yellow lower leaves that feel mushy, a sour smell from the soil, or fungus gnats. If you notice these, stop watering immediately and let the soil dry for 5-7 days. In my case, overwatering led to root rot within two weeks, but catching it early saved the plant.
Should I water caladiums differently when they are indoors versus outdoors?
Yes, indoor plants generally need less frequent watering due to lower light and humidity. My indoor caladiums required water every 4 days in summer, while outdoor ones needed every 2 days. Adjust based on your specific conditions, not a fixed calendar.
Can I use self-watering pots for caladiums?
I tried self-watering pots during spring and found they kept the soil too wet. The tubers developed soft spots within two weeks. I recommend standard pots with drainage holes for better control. If you must use self-watering pots, reduce the water reservoir by half.





