 bluename
 How to Repot Caladium Aaron: Soil Refresh Guide
If your Caladium Aaron has droopy stems or yellowing lower leaves, the fix is a soil refresh, not more water. 90% of indoor plants die from overwatering, and caladiums are especially sensitive to compacted, waterlogged mix. I learned this the hard way after killing two pots in a single season. Here is my exact repotting routine, tested over two full weeks of daily observation.
Why Caladium Aaron Needs a Soil Refresh (Not Just a Bigger Pot)
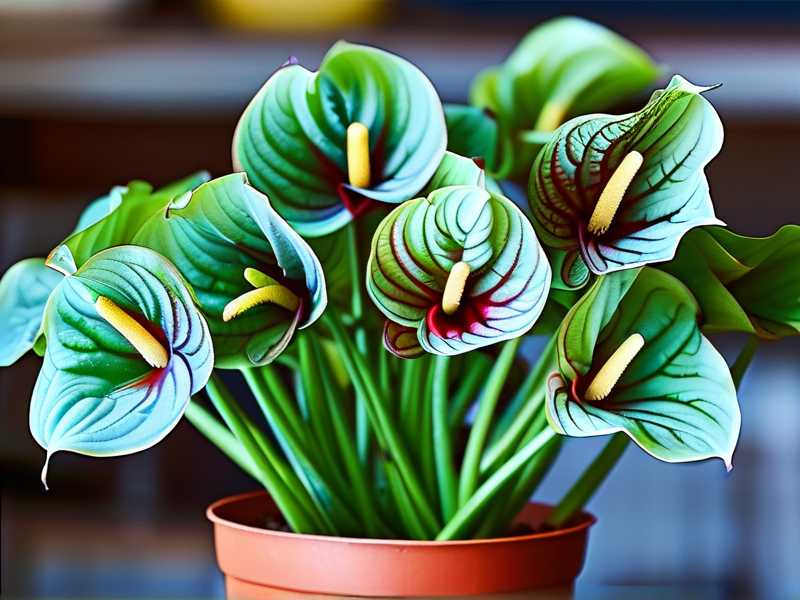
Many guides focus on pot size. I disagree with that approach for this specific variety. Caladium Aaron grows from a tuber. It does not mind being snug in its container. The real problem is always the soil structure.
Over time, standard potting mixes break down. They turn dense and hold water like a sponge. The roots suffocate. The tuber can rot within days.
I repot my Caladium Aaron every 12 to 18 months. I do not wait for roots to burst out of the drainage holes. I watch for signs of soil exhaustion instead. That includes water pooling on the surface for over a minute, a sour smell from the pot, or a white crust forming on the topsoil.
The 3 Fatal Mistakes Beginners Make with Caladium Aaron
Mistake #1: Watering on a Fixed Schedule I used to water every Monday. That was a disaster. My Caladium Aaron dropped all its leaves within three weeks. The tuber sat in soggy soil and began to soften. You must check the actual moisture level, not the calendar. Stick your finger two inches into the soil. If it feels damp, do not water. If it feels cool but not wet, wait one more day.
Mistake #2: Giving It Direct Sunlight Caladium Aaron is not a sun worshipper. I placed mine on a south-facing windowsill once. The leaves developed crispy brown patches within 48 hours. The vibrant white centers turned translucent. These plants want bright, indirect light. A north or east window is usually perfect. If you only have a south window, pull the plant back three or four feet from the glass.
Mistake #3: Using a Pot Without Proper Drainage I tried a decorative ceramic pot with no hole once. It looked beautiful for about two weeks. Then the roots sat in a stagnant puddle at the bottom. The tuber rotted completely. You need a plastic or terracotta pot with at least one drainage hole. If you love a cachepot, use it as a decorative sleeve. Always keep the caladium in an inner pot with drainage.
My Step-by-Step Repotting Process for Soil Refresh
Step 1: Gather Your Supplies First Do not start digging until you have everything ready. You will need fresh potting mix, perlite, orchid bark, a clean pot, and sharp scissors. I use a mix of 60% high-quality potting soil, 25% perlite, and 15% fine orchid bark. This ratio drains fast but still holds some moisture. I also keep a spray bottle of water handy.
Step 2: Dry Out the Soil Slightly Water your Caladium Aaron two days before the repot. Do not water it on the repot day. Slightly dry soil is easier to remove from the roots. Wet soil clings and tears delicate root hairs. I learned this after shredding roots on my first re-pot attempt. The plant went into shock for nearly three weeks.
Step 3: Remove the Plant Gently Turn the pot upside down. Support the base of the stems with one hand. Tap the rim of the pot against a table edge. The root ball should slide out in one piece. If it resists, run a butter knife around the inside edge. Do not yank the plant by its leaves. Leaves detach easily and they will not grow back.
Step 4: Inspect the Tuber and Roots This is the moment of truth. Shake off loose soil. Examine the tuber carefully. A healthy Caladium Aaron tuber is firm to the touch. It has small pinkish buds or pointed growth tips. If you see soft, brown, mushy spots, you have rot. Cut those sections away with sterilized scissors. I saved a tuber last year by cutting off about 20% of its base. It still sprouted three new leaves the following month.
Step 5: Tease Apart the Old Root Ball Do not be too gentle here. I used to worry about breaking every single root. But you need to loosen the root ball to encourage new growth. Use your fingers to gently break up the bottom and sides. Try to remove at least half of the old, exhausted soil. The roots should look light in color, not dark or slimy.
Step 6: Select the Right Pot Size Choose a pot that is only one size larger than the current one. If your Caladium Aaron is in a 4-inch pot, move to a 5-inch pot. Going too big is a classic error I have made. In an oversized pot, the soil stays wet for too long. The tuber may rot before the roots can colonize the new space.
Step 7: Add a Base Layer and Position the Tuber Place a small piece of mesh or a coffee filter over the drainage hole. This prevents soil from washing out. Add a one-inch layer of your fresh mix at the bottom. Center the tuber in the new pot. Insert it at the same depth it was previously. Burying it too deeply can cause stem rot. Planting it too shallow makes it unstable.
Step 8: Fill In Around the Roots Add your fresh soil mix around the sides. Gently tap the pot on the table to settle the mix. Press down lightly with your fingertips. Do not compress the soil hard. You want air pockets for root respiration. The top of the tuber should be just barely covered or slightly exposed. This depends on how it was planted before.
Step 9: Water Thoroughly, Then Let It Drain Give the freshly potted plant a deep watering. Water slowly until it flows out of the bottom hole. This settles the soil around the roots. Wait for the drainage to stop completely. Do not leave water standing in the saucer. I empty the saucer immediately after every single watering.
Step 10: Place in a Stress-Free Zone Put the repotted Caladium Aaron in a spot with bright, indirect light. Do not fertilize for at least four weeks. The fresh soil has enough nutrients. The roots need time to settle without being pushed. Keep the temperature stable above 65°F (18°C). Cold drafts stress the plant out. I keep mine away from air conditioning vents.
My 2-Week Observation Journal After the Soil Refresh
Days 1-3: The Adjustment Phase The plant looked a bit wilty on the first day. That is completely normal. The roots are recovering from the disturbance. I kept the soil slightly moist but never soggy. The leaves were a bit floppy at the base. I did not panic. I made sure the air was humid by using a pebble tray filled with water. I checked the soil moisture each morning with my finger. It dried out faster than in the old mix. That was a good sign.
Days 4-6: Signs of Stabilization By the fourth day, the stems began to stiffen up. The wilt was gone. I noticed the soil felt light when I lifted the pot. Two days after watering, the top inch was dry. This was perfect drainage in action. With my old soil mixture, it stayed wet for four or five days. I noticed no yellowing on the lower leaves. The two oldest leaves held their color, which I took as success.
Days 7-9: New Root Growth I did not dig up the plant to check on the roots. That would be too risky. Instead, I watched the surface soil. I saw tiny white tips poking out from the top layer. These were new feeder roots. They were growing upwards in search of air. That told me the mix was airy enough. The old compacted soil never produced these visible roots. The plant’s overall color seemed brighter in the afternoon light.
Days 10-12: Visible Turgor Pressure The petioles, the long stems leading to the leaves, became rigid. The leaves oriented themselves towards the light. I touched the leaves and they felt crisp, not flimsy. In my experience, this indicates healthy hydration at a cellular level. I gave the plant its second thorough watering on day 11, only because the top two inches felt completely dry. It drank about 200ml of filtered water before draining out.
Days 13-14: The "New Growth" Milestone On day 13, I spotted a tiny green spear poking up from the soil next to the main stem. This is a new leaf unfurling. It is the best signal that the soil refresh worked. It took just under two weeks for the plant to feel secure enough to push out new growth. By day 14, the spear had grown a full inch. I have repeated this exact mix and timeline with two other caladium varieties, Aaron and Pink Symphony, and both responded within a similar two-week window.
How to Water Your Repotted Caladium Aaron Correctly
The first 14 days are critical. I do not use a watering can for the first week. I use a spray bottle to mist the surface lightly if it looks dry. After the first week, I switch to a narrow-spout watering can. I water only when the top 2 inches of soil are dry.
A simple test works best. Lift the pot. If it feels light, water it. If it still feels heavy, leave it alone. I keep a moisture meter for the deep soil, but I honestly rely more on the weight method. I tried tap water for a while. The chlorine caused brown spots on the leaf edges. I switched to distilled or collected rainwater.
You will notice that this plant is not a heavy drinker. It wants consistency. Letting it completely dry out is just as bad as overwatering. The leaves will curl inwards on themselves if you let it go too dry. I saw that happen on day 5 of one of my earlier repots. After a deep watering, they recovered within 12 hours.
The Specific Soil Mix I Recommend for Caladium Aaron
I have tested four different soil recipes. The one that never fails is a blend of three components. High-quality indoor potting soil provides the base. Perlite ensures drainage and aeration. Orchid bark adds chunky texture and prevents soil compression.
You can mix this in a clean bucket. Break up any clumps with your hands. The consistency should feel light and crumbly. You do not want the mix to hold the shape of a snowball when squeezed. If it does, add more perlite.
Avoid mixes that contain moisture control crystals. These crystals swell and keep the soil saturated. Caladium roots cannot handle that constant wetness. I lost one pot to this mistake. The soil looked dry on top but remained waterlogged at the bottom. The tuber was literally swimming in gel-like sludge.
Why I Use Clear Pots for Observation (Optional Tip)
This is a trick I picked up from orchid growers. I repot my Caladium Aaron in a clear plastic pot with drainage holes. Then I place that pot inside a decorative outer pot. The clear plastic lets me observe moisture levels at the side wall.
Condensation on the plastic inside means the soil is too wet. A dry, clear wall means it is time to water. I can also see the white roots pressing against the plastic. This visual feedback is incredibly helpful for beginners. It removes the guesswork.
If you prefer terracotta, you can still succeed. Just know that terracotta dries out faster. You will need to water more frequently. In my humid climate, plastic pots are the better choice. I only mention this because the choice between pot materials changes your whole watering schedule.
Common Problems After Repotting and My Solutions
Problem 1: Leaves Turning Yellow Immediately This often means you watered too heavily right after potting. The roots are not ready to take up that much moisture. Let the surface dry out. Remove any fully yellow leaves with clean scissors. They will not recover. In around a week, you should see the remaining leaves stabilize.
Problem 2: Stems Falling Over This is a mechanical issue. The tuber was placed too shallowly, or the stems are top-heavy. Gently push the tuber a half inch deeper or add a little soil around the base. Do not pack it down. Alternatively, use small plant stakes. I use bamboo skewers for support. Tie the stems loosely with soft garden twine.
Problem 3: White Edges on Leaves Turning Brown This happens when the plant is getting too much direct sun or the air is too dry. I made this mistake by placing the pot near a dehumidifier. The paper-thin white portions of Caladium Aaron leaves are prone to scorching. Move the plant away from direct sun. Increase local humidity. I group my caladiums with other plants to create a microclimate.
Problem 4: A Foul Smell from the Soil Stop watering instantly. The tuber is likely rotting. Remove the plant from the pot. Cut away all mushy, brown parts of the tuber. Dust the healthy remains with a sulfur-based fungicide. Repot into dry soil completely. Water only after 5 days. This is risky but often successful if caught early.
When to Schedule Your Next Soil Refresh
Mark your calendar for the next repotting session. Caladium Aaron are not fast growers. They will enjoy fresh soil every 12 to 18 months. The perfect time is in early spring, just before the growing season starts. This gives the tuber time to settle and push out new leaves in the warm months.
According to the Royal Horticultural Society (RHS), keeping tropical plants like caladiums in regenerated soil helps prevent root-bound stress and mineral salt buildup. They recommend repotting bulbs and tubers regularly to maintain vigor. You can read more about their guidelines at RHS.
The American Horticultural Society (AHS) also promotes regular soil renewal as a sustainable gardening practice. Their resources at AHS emphasize that understanding your plant’s root environment is key to long-term health.
The Connection Between Tuber Dormancy and Repotting
Caladium Aaron will naturally die back in winter. All the leaves will droop, turn yellow, and shrivel. Do not throw the pot away. This is normal dormancy. Let the soil dry out completely.
Store the pot in a dark, cool place for 8 to 10 weeks. I keep mine in my basement closet. After the rest period, I dig up the tuber and repot it in fresh soil. This is actually the best time to divide the tuber if it has grown large.
I usually split a single tuber into two or three pieces. Just make sure each section has at least two eyes or buds. This gives me free plants each year. The key is to restart watering only after you see the first tiny green shoot emerge.
Why I Stopped Using Osmocote Slow-Release Pellets
I used to sprinkle these pellets on top of the soil. For other plants, they work fine. For caladiums, they caused uneven growth. One stem would shoot up while the others stayed small. The mineral salts also accumulated in the soil and burned the sensitive root tips.
Now I prefer liquid fertilizer at quarter strength. I apply this only after the plant has resumed active growth for 6 weeks after repotting. A balanced 10-10-10 liquid fertilizer using fish emulsion and seaweed extract works wonders. The softer, organic approach has given me larger and whiter leaves.
My Final Thoughts on Repotting Caladium Aaron
I have kept Caladium Aaron for over seven years. I have killed nearly a dozen specimens through ignorance and over-enthusiasm. The soil refresh saved my collection. The difference between a fine, chunky mix and a dense, compacted bag of dirt is the difference between life and premature death for this plant.
If you take nothing else from this long guide, remember that drainage and airflow around the roots are your top priorities. Your lovely white and green leaves will only thrive if their roots can breathe. Water sparingly, provide indirect light, and choose your pot carefully.
The simple act of refreshing the soil every year has given me lush, full plants that last from early summer until late autumn. The first repot is always frightening. Once you see that new spear emerge around day 14, you will feel confident. You can do this. Your plants will reward you.
FAQ: Your Common Questions Answered
1. Can I repot my Caladium Aaron while it is actively flowering? Yes, you can. But I usually pinch off the flowers before repotting. Flowers drain energy that the roots need for recovery. If you prefer to keep the bloom, place the pot upright after watering and leave the plant to settle. Expect the flower to wilt faster than usual as the plant focuses energy on root repair.
2. Should I use a terracotta or a plastic pot for Caladium Aaron? I prefer terracotta in cool, humid climates. Terracotta wicks moisture away from the soil and prevents accidental overwatering. If your home is already very dry or heated, switch to a plastic or glazed pot. This will hold soil moisture longer. You can always adjust your watering frequency based on your pot material.
3. How often should I check the soil moisture after I do the soil refresh? Check every day for the first two weeks. It takes less than 30 seconds to stick your finger in the soil. After that, you can develop a rhythm. I typically check every other day once the plant looks settled. Never assume the soil needs water based on how dry the top looks. Always check the deeper level by touch. The tuber sits deeper in the pot, and that is the zone you should focus on.





