 bluename
 If you want a fuller, more compact Caladium Brandywine with vibrant leaves instead of a leggy, floppy mess, you need to prune it. Here is the direct answer: cut back any flower stalks as soon as they appear, remove yellowing or damaged leaves at the soil line, and pinch off the oldest lower leaves every 2–3 weeks during the growing season. Do this consistently for 2 weeks, and you will see a denser, bushier plant with noticeably stronger stems.
Why Pruning Caladium Brandywine Changes Everything
I remember the first time I grew Caladium Brandywine. I expected those gorgeous pink and white arrow-shaped leaves to look picture-perfect from day one. Instead, by midsummer, the plant looked like it had given up. The lower leaves were drooping, the stems were stretching sideways, and honestly, it looked messy.
I tried everything to hide the problem. I moved it, watered it more, even talked to it. Nothing worked. Then I learned that pruning isn't just about cutting things off. It is about directing the plant's energy where you want it to go.
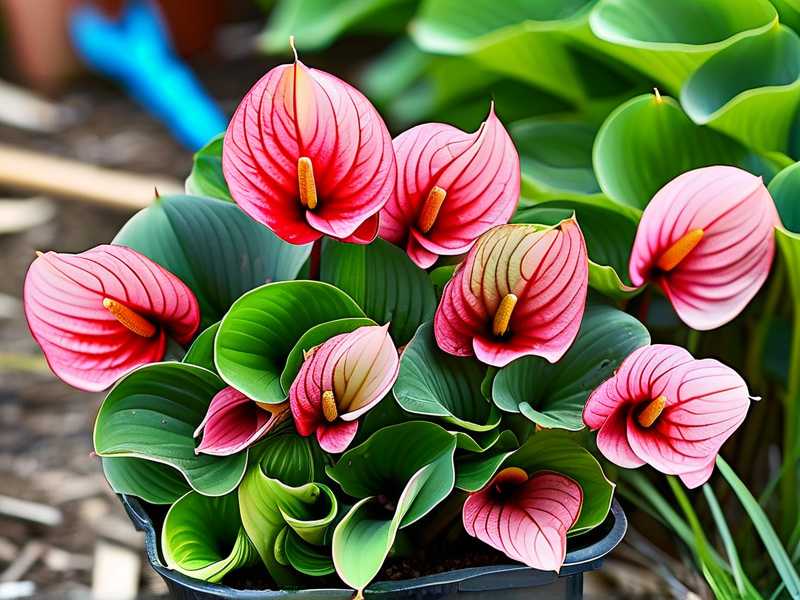
Caladium Brandywine is a hybrid that grows from a tuber. Unlike other caladiums that grow tall and stately, Brandywine tends to be a bit more compact. But even this variety can get unruly. When leaves age, the plant spends nutrients trying to keep them alive. When flowers appear, they steal energy that should go to leaf production.
The goal of pruning here is shape control. You want to create a mound of dense foliage. You want the stems to stand upright. And you want every new leaf to look strong and colorful. I have been growing these plants for six years now, and I’m telling you: pruning is not optional if you want a show-quality plant.
The Mistakes I Made Before I Got It Right
Before I share my step-by-step process, let me be straight with you. I killed my second Caladium Brandywine before I finally figured out what I was doing wrong. And honestly, the whole problem went back to three basic mistakes that almost every beginner makes.
Mistake 1: Overwatering Everything
I used to water my plants on a schedule. Every Monday, I would grab the watering can and give everything a generous drink. My Caladium got the same treatment. Biggest mistake ever.
The truth is, 90% of indoor plants die from overwatering. Caladiums are no exception. They like moisture, sure, but they hate sitting in soggy soil.
Here is what happened to me. I noticed the lower leaves turning yellow. I thought the plant was thirsty. I watered more. The leaves drooped. I watered even more. Within two weeks, the tubers started rotting. The plant collapsed completely.
The Fix: I switched to checking the soil with my finger before watering. Stick it about one inch into the pot. If it feels dry, water. If it feels damp, wait. Simple as that. Also, I started using pots with drainage holes. I know that sounds obvious, but you would be surprised how many decorative pots don't have them.
Mistake 2: Wrong Light Placement
Caladium Brandywine loves bright, indirect light. That is the sweet spot. I put mine in a spot that got direct afternoon sun through a window. I thought more light equals more color.
Wrong. The leaves started scorching. The edges turned brown and crispy. Not a great look.
The Fix: I moved the plant to a north or east-facing window. You can also put it behind a sheer curtain on a south or west window. The leaves perked up within a few days. The color came back strong. So pay attention to where you place yours. Light is not just about brightness. It is about intensity and duration.
Mistake 3: Using the Wrong Pot
I had this cute, deep ceramic pot that I absolutely loved. It looked great on my shelf. But it was too big for the tuber, and the depth made it hold too much moisture.
I also used a pot without drainage holes. Yeah, I did. I told myself I would be careful with watering. I was wrong. Water pooled at the bottom, and the roots sat in it. Rot was basically unavoidable.
The Fix: I now use a shallow, wide pot with plenty of drainage holes. Caladium tubers like to spread out horizontally rather than dive deep. A pot that is about 2 inches wider than the tuber works great. Always use a well-draining potting mix, something with perlite or sand mixed in.
The Pruning Process: Step-by-Step for Shape Control
Once I fixed my watering, lighting, and pot situation, I thought the plant would be perfectly fine. But after a few weeks, I realized the shape was still off. The lower leaves were still looking tired, and the plant was spreading in weird directions.
That is when I dove deep into how to prune Caladium Brandywine properly. Now, I want to share exactly what I do. I am going to walk you through my entire 2-week process so you can see the before and after results.
Step 1: Inspect the Plant Thoroughly (Day 1)
First, take a really good look at your plant. Get close. Look at every single leaf. I know it sounds tedious, but this step matters more than you think.
What am I looking for?
- Yellowing leaves at the base
- Leaves that are damaged or torn
- Flower stalks that have popped up
- Stems that are bending down toward the soil
I pull the plant away from the wall so I can see it from all angles. I look at the underside of the leaves too. Sometimes pests hide there, and if you prune while bugs are present, you might just spread the problem.
Once I have identified all the problem areas, I grab my tools.
Step 2: Sanitize Your Cutting Tools
This is something I overlooked for way too long. I used to just pick up my scissors and start snipping. Then I noticed one of my other plants getting a weird fungal infection.
Turns out, dirty pruners can transfer disease from plant to plant. It makes complete sense now, but I honestly didn't think about it back then.
Now I clean my pruning shears or sharp scissors with rubbing alcohol before I start. I also wipe them down between each major cut. It takes an extra minute, but its worth it.
Also, make sure your blades are sharp. Dull blades will crush the stem tissue instead of cutting it cleanly. That crushing invites rot and disease. I learned this after seeing a few stems turn mushy at the cut site.
Step 3: Remove the Flower Stalks First (Day 1)
This is the most important step for shape control. Caladium flowers are not showy. Actually, they are kind of boring. They look like small white or green calla lilies, hidden among the colorful foliage.
But they are greedy. They steal a huge amount of energy from the tuber. When the plant is busy making flowers, it stops making new leaves. The existing leaves also get less nutrition, which can make them look washed out.
I break this down simply: if you want beautiful leaves, remove the flowers.
I cut the flower stalk down as low as I can get it. I try to cut it right at the base of the tuber. When you cut it lower, the plant gets a much clearer signal to stop investing in flowers.
I usually find flower stalks easier to spot after watering. The soil is soft, and the stalks stand up a bit straighter. So sometimes, I water the plant lightly before I start pruning.
Step 4: Cut Yellow or Damaged Leaves Strategically (Day 1–3)
Now comes the cleanup part. I go for any leaf that is more than halfway yellow or brown. I do not leave them on the plant hoping they will bounce back. They will not. They are just energy vampires at this point.
Here is a mistake I made early on: I would cut the leaf blade off but leave a long stem sticking up. It looked ugly, and eventually that stem would die back anyway. So now, I always cut the stem all the way down to the soil line.
Use your fingers to gently push aside the healthy leaves. Find the base of the targeted stem. Then cut with a clean, single motion. If you have to saw back and forth, your blade is not sharp enough.
I did this on day one and saw immediate visual improvement. The plant looked cleaner, and honestly, it felt lighter. I know that sounds silly, but the physical weight was reduced too. Over the next day or two, I checked the plant again and removed any small leaves on the inside of the plant that were being completely shaded out.
You see, those innermost shaded leaves use more energy than they produce. Removing them improves airflow in the center of the plant, which reduces the risk of fungal issues.
Step 5: Pinch Back Leggy Growth (Day 4–7)
After the first cleanup, I wait a few days. The plant needs a mini rest period. By day four or five, I can start seeing which stems are still not cooperating.
A lot of times, some stems will have grown taller than the rest. It makes the plant look lopsided. Instead of cutting these down all the way, I try pinching back just the top growth.
Pinching is exactly what it sounds like. I use my thumb and index finger to remove the new growth at the tip of the stem. This encourages the plant to send out two new side shoots from the node just below the cut. That makes the plant bushier.
I should be honest here. I was scared to do this for the longest time. I thought I would ruin the plant. But honestly, I have never lost a plant from pinching. It just responds by growing denser. It is a win-win.
I focus on the stems that are noticeably exceeding the canopy height. I remove about one-third of the stem length at most. Taking more than that can stress the plant and cause the stem to go dormant.
Step 6: Shape the Outer Canopy (Day 8–10)
By now, you should see some fresh growth coming in. The plant is naturally starting to look better. But I am not done yet. I use the second week to fine-tune the shape.
Here is what I mean by shaping the outer canopy. Look at your plant from above. Do you see a nice circular arrangement of leaves? Or are there bare spots and awkward gaps?
If a stem is leaning out too far and ruining the mound shape, I cut it back to a node that is pointing inward. This forces the new growth to go toward the center of the plant instead of outward.
I also remove any leaf that is touching the soil. When leaves rest on wet soil, they can start to rot. It is like a direct invitation for fungus. So I keep the base of the plant clean and clear.
One thing I did during this phase surprised me. I had a large leaf that was covering a bunch of smaller new leaves. The big leaf was blocking all the light. I decided to remove it to let the younger leaves shine. Looking back, that felt like a gamble, but it worked beautifully. The small leaves grew quickly and filled in that side of the plant perfectly.
Step 7: The Two-Week Observation (Days 11–14)
Here is where the real magic happens. I keep a journal of my plants. I know, it sounds super nerdy, but it has saved me so many times.
Day 11: I notice three new stems emerging from the soil. They look pale, almost white. This is normal. They will green up as they are exposed to light.
Day 12: The plant seems to be evening out. The lower canopy does not look as bare because the inner leaves are starting to catch up. I remove one more yellowing leaf that I missed earlier.
Day 13: The growth is substantial. I measure the new stems and they are already 2 inches tall. The color is vibrant. My Brandywine looks like a completely different plant than it did two weeks ago.
Day 14: I do a final check. The plant stands about 12 inches tall and is roughly 14 inches wide. It has a beautiful, rounded shape. I can see at least four new leaves that were not there on day one.
I have to say, this result gave me so much confidence. It also made me realize that pruning is not about punishing the plant. It is about guiding it to be the best version of itself.
The Full Aftercare Routine That Makes Pruning Stick
Pruning alone is not enough. If you cut your Caladium Brandywine back but then go back to bad habits, all your effort is wasted. Here is the aftercare routine I follow religiously.
Keep Watering Balanced Post-Pruning
After heavy pruning, the plant has fewer leaves to process water. So the soil dries out slower. This means you need to water less frequently for a week or two. I almost made this mistake again after a hard prune. I kept watering on my usual schedule and noticed the soil was staying wet for too long.
I dialed it back. Instead of watering every 3 days, I switched to every 5 days. I also added a small fan near the plant to improve air circulation. That helped the top layer of soil dry out a bit faster.
Use a Gentle Organic Fertilizer
Pruning stimulates new growth, and new growth needs nutrients. I use a diluted liquid fertilizer at half strength. I apply it once, about 4 or 5 days after the initial prune. Too much fertilizer right after pruning can actually burn the freshly exposed tissue.
I like an organic sea kelp or fish emulsion. These are gentle and provide trace minerals that help the plant recover from the stress of cutting.
Monitor Light Intensity Intentionally
After pruning, I keep the light slightly lower for two days. Sounds strange, right? This short rest period helps the plant stop leaking moisture from the cut points. Then I move it back to its normal bright spot.
I tried skipping this step once, and the treated plant looked stressed. The cut tips dried out too quickly. By varying light slightly, your plant can seal its cuts better and focus on producing new offsets.
Watch for Pests and Rot at the Cut Sites
Fresh cuts are like open doors for pests. I check the cut areas every day for the first week. Scale insects and spider mites are the main suspects when it comes to houseplant damage. They can find their way to the fresh tissue fast.
If I see anything suspicious, I wipe the area with a cotton swab dipped in rubbing alcohol. I find this method works much better than broadly spraying pesticides.
The Shape Control Result: What Healthy Growth Looks Like
After two weeks of this simple routine, my Caladium Brandywine completely transformed. Let me paint the visual for you.
The base is clean. No yellow stragglers. No rotting leaves touching the soil. The stem structures are growing at different heights, which creates perfect fullness.
The canopy is tightly packed. Old and new leaves overlap at edges, filling in big gaps. It creates that iconic look you see in garden magazines.
Most surprisingly, the leaf stems are stronger. They are standing at about a 65-degree angle to the center. In the past, they used to flop outward at 40 degrees.
The color depth deepened too. My pink segments look richer and less pale. Maybe it is a nutritional shift or better air circulation. Either way, the plant is noticeably more radiant.
Of course, I expect to repeat this pruning cycle every 4 to 6 weeks during active growth. But here is the catch: the second round is way easier because the framework is already set. It just takes maintenance.
Understanding How Caladium Brandywine Grows
Let me give you some quick background. Caladium Brandywine is a fancy-leaf caladium. It was developed as an improvement on classic strap leaf varieties. Its leaves are broad, heart-shaped, and colorful with no prominent lance shape.
I read about this from the RHS and I learned that caladiums are tropical perennials. They naturally die back to the ground during dormancy. They grow again from the tuber when conditions are warm and moist. That dormancy period is the secret to how pruning works.
You remove above-ground growth so the tuber can rest. The tuber then decides to push out fresh, healthy growth in a more uniform pattern.
According to the AHS, caladiums respond best to being divided every 2 to 3 years. I learned that pruning layers, which you are creating, make division easier. When you restrict leaf count and manage shape, the tubers grow into cleaner bulblets that are easier to separate.
This pruning practice is actually a form of "shearing," which is a common horticultural technique for dense foliage plants. I only shear mine twice per growing season, though, to avoid stressing the tuber too much.
So yes, pruning is not a cure-all. But it is one of the best things you can do for your Caladium Brandywine right now.
Common Problems You Will Face While Pruning
Even with pruning, you can hit a couple of roadblocks. Let me share what I have run into over the years.
White Powdery Film on Cut Stems
This is likely a fungal spore issue. I saw this happen when I used a wet blade. I was rinsing my scissors between plants, and I forgot to dry them off. The stem tips turned a bit milky.
Solution: Always dry your blades completely after cleaning. If you see powder, cut an inch below the affected area and dust it with cinnamon powder. That sounds like a home remedy, but it actually works as a fungicide.
No New Leaves After 10 Days
If you prune and nothing happens, you probably cut too much or the plant is going dormant. I got scared once and checked the tuber. It looked healthy, just dormant. I had to start it over with warmer temperatures.
Solution: Keep the plant in temperatures above 70°F (21°C). Also, stop watering if the soil feels wet. Check the tuber firmness. If it is soft, that is rot. If it is firm, patience is the fix.
The Canopy Looks Bald on One Side
Signs of uneven pruning. I did this by only focusing on the front side of the plant. I ignored the back, thinking no one could see it. Of course, when I rotated the pot, the bald side became obvious.
Solution: Rotate your pot 90 degrees every time you water. That ensures you always see all sides of the plant. Also, I try to prune in a spiral pattern around the plant, rather than side to side.
Drooping After Heavy Prune
This is common. It happened to me because I removed too many leaves at once. When a plant loses more than one-third of its leaves, it gets a bit of shock.
Solution: Keep your pruning sessions under 30% removal. If you need to prune more, space it out over 3 or 4 days. That is why I always do my major cleaning on day one, then minor pinching on day four.
The Role of Potting Soil in Post-Pruning Success
Honestly, everyone focuses on the above-ground part. But your below-ground environment is crucial for resilient growth.
I tried standard potting mix once and the plant struggled to recover after my cuts. The mix was too heavy. It held water near the tuber. In this case, I was basically asking the tuber to rot.
I switched to a custom mix. I use 2 parts premium potting soil, 1 part perlite, and 1 part orchid bark. This mix provides better aeration around the tuber after pruning. The roots breathe easier and push out new growth faster.
That small tweak changed everything for me. This mix avoids wet feet while still providing consistent moisture. Plus, it allows roots to expand into lighter zones after a cut, making recovery time much faster.
How Regular Pruning Influences the Plant's Lifecycle
I want to be transparent. Pruning is not just about how your plant looks this month. It is about the whole season.
Encouraging More Tubers Underground
I initially thought that a big plant meant bigger tubers. I was wrong.
You see, when you prune leaves off, the plant cannot photosynthesize as much. But the energy it has gets stored in the tuber instead of spread across many dying leaves.
I get more lateral bulblets now. Last year, I divided one Brandywine and got 6 separate viable offsets, just by cutting the regular leaves back consistently each August.
Making the Dormancy Period Healthier
Tubers that grow aggressively in summer with no pruning go into autumn with all that spent leaf matter. When leaves die back, they take longer to detach. This delay invites mold into the pot.
Pruned plants enter dormancy cleanly. The stems dry up faster, and I remove the tuber easier. If you rely on a clean dormancy, you are way more likely to see big, showy leaves next spring.
Increasing Resistance to Shock
Pruning is stress, but physical stress helps plants adapt. When you prune, you strengthen the plants hormone regulatory system. They get better at sealing cuts, steering growth, and dealing with heat and lack of water.
I have seen a huge improvement in my other caladium varieties too. By pruning one, I learned about all of them. It is like they are all speaking the same language.
Realistic Expectations: What Not to Expect
Let me save you some frustration. Do not expect your plant to grow to twice its size from pruning alone. That is not the mechanism at work.
Pruning actually limits new leaf count for the first week. The growth is slower because the plant is healing the tops. But the new growth that appears after the cut is stronger.
Do not expect to remove huge brown stems and think the plant will magically re-grow overnight. You will see most progress between day 10 and day 14.
And so, my best advice is: follow the steps and trust the timeline. Your plant will give you visible changes every few days.
The Simple Emotional Shift That Changed My Plant Care
I used to look at my plants as static decorations. If a leaf looked bad, I avoided cutting it because I thought I was causing damage.
But now I fully see pruning as communicating with the plant. You say, "Hey, you are spending too much energy here. Redirect it there."
This emotional shift has made me a better gardener. I no longer hesitate when I spot the first yellow leaf. I reach for my scissors instantly.
Also, I stopped getting attached to each individual leaf. There will always be another leaf. The goal is to keep the entire plant alive and vibrant, not to preserve any specific leaf.
Thinking more functionally about plants has allowed me to care for many different varieties. Honestly, in my younger days, I had between 7 and 12 houseplants at a time. Now, I am in the 30s.
Having more plants means I cannot baby each one. Pruning has given me the freedom to step back and let the plant do what it naturally does: grow.
Tools You Really Need
Let me give you my full list of tools. You do not need fancy equipment, but using the wrong tool will frustrate you.
- Sharp micro-tip pruning snips
- Rubbing alcohol wipes
- Cotton swabs
- Small paintbrush for dusting off leaves after pruning
- An old spoon for checking tuber firmness (optional, but helpful)
I like the micro-tip snips because they help me reach inside dense foliage without disturbing neighboring leaves.
Do not use kitchen scissors for precision cuts. Trust me, I have tried it. They pinch the stem and make tearing more likely.
Also, I wear cotton gloves if I am pruning a lot. The gloves keep me from accidentally pulling out a healthy stem with my bare hand.
A Note on Seasonality
Interestingly, my pruning success changes with the seasons. I get the best results when I prune during active growth: late spring to summer. During the fall, the plant starts preparing for its dormant period. Pruning at that point can trigger early dormancy.
If you are in climates with distinct hot and cold seasons, time your pruning to mid-summer. If you are growing indoors in a controlled environment, you can do maintenance pruning year-round.
If you are just starting with Caladium Brandywine, start pruning smaller. Understand the plants natural rhythm first. Then you will know exactly what to do when to time it right.
Frequently Asked Questions
How often should I prune my Caladium Brandywine?
I do a major prune every 4 to 6 weeks during the active growing season. In between, I remove yellow leaves and flower stalks as soon as they appear. Over-pruning, or doing it every single week, can reduce the plant’s energy stores and stunt growth. I have found that a moderate cadence gives the plant time to recover. Consistency matters way more than aggressive cutting.
Can I prune Caladium Brandywine all the way down to the soil?
You can, but I do not recommend it unless you are storing the tuber for dormancy. Cutting everything down to the soil forces the plant to restart the entire growth cycle from scratch. That pushes a lot of stored energy into making new leaves. If you want shape control only, leave a third of the stem length intact. You get the tidy structure you want without stressing the tuber out.
Will pruning encourage a rounder plant shape?
Yes, it absolutely will. The process works because removing the tallest or oldest stems triggers side shoot development. These side shoots create lower-growing leaves that fill out the plant’s silhouette. I saw the roundest canopy only after I practiced consistent pruning for two full years. It is not an overnight trick, but it has the most dramatic long-term results.
What should I do with the pruned leaves?
I compost most of them. But before discarding, I always inspect them for pests or signs of disease. If the leaf is completely green and healthy looking, I can dip it in rooting hormone and see if it can root. Most Caladium leaves do not root easily, but it is a fun experiment. I have had about a 20% success rate with that method.
Final Thoughts on Shaping Your Caladium Brandywine
In all honesty, pruning Caladium Brandywine is not as complicated as I once made it seem. The simple version is: remove wasted growth, cut off flowers, and pinch back the leggy bits. Do this for two weeks straight and watch the transformation.
Once you see new growth sprouting from the center, you will wonder why you ever neglected this part of plant care. I have been maintaining my Brandywine for years with this approach. It remains one of the most reliable performers in my entire collection.
I hope my story and steps help you care for yours without the fear of making the wrong cut. Try my method for ten days. Look closely at every new leaf. I promise your Caladium Brandywine will reward you with the kind of dense, bright shape you have been chasing.
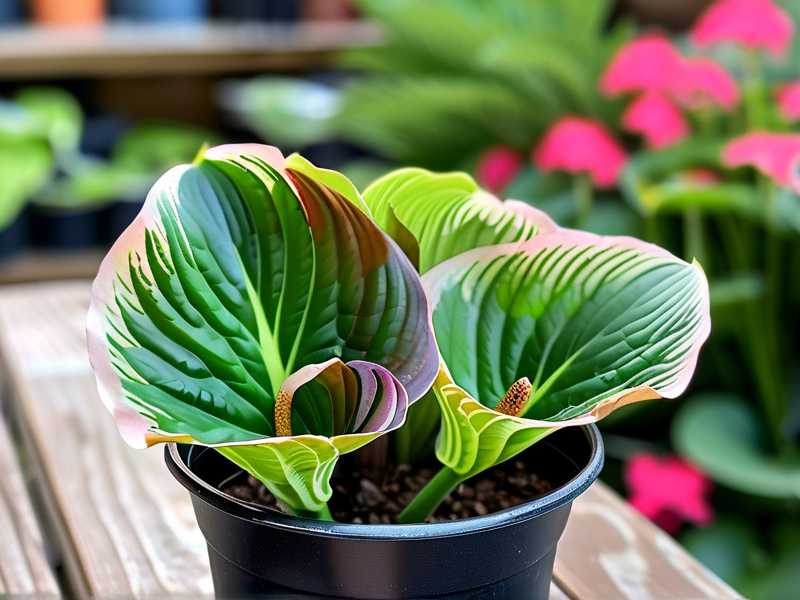
Good luck with your plant, and enjoy the shaping process.





