 bluename
 How to Prune Caladium Miss Muffet: Dwarf Variety Guide
If you are staring at a leggy, floppy Caladium Miss Muffet and wondering if you need to grab the scissors, here is the short answer: You do not prune this plant for size control, but you must prune for health, and you only cut when the leaf is 50% damaged or dying. I killed my first two pots by cutting green leaves to "shape them," and they sulked for months. Actually, 90% of indoor plants die from overwatering, but the other 10% probably died from someone with sharp shears and bad timing.
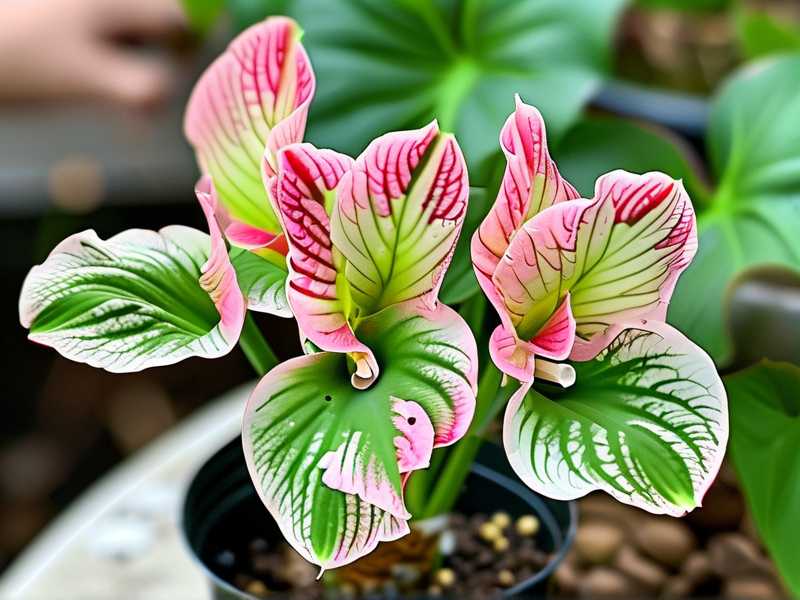
Let’s get one thing straight immediately. This dwarf variety, with its speckled white and green foliage, rarely exceeds 12 inches in height. It does not branch out like a shrub. It grows from a tuber. Cutting a healthy leaf off does not encourage new growth where you want it—it just removes the plant’s solar panel. I learned this the hard way.
Why Pruning This Dwarf Variety Is Different
I used to treat pruning like a haircut. I thought if I trimmed the outer leaves, the center would fill in. Wrong. Caladiums are not like geraniums or basil. The tuber sends up petioles (those long stems) directly from the soil. Each leaf is a single event. Once you cut a healthy petiole at the base, that spot goes dormant until the next growing cycle.
So what is the actual goal? You are removing spent energy. You are removing leaves that are pulling more energy than they are producing. You are also removing flowers.
Wait—flowers. This is the part most guides skip. I let a flower spike grow last July because it looked exotic. The plant produced three more leaves total that whole summer. The tuber put everything into that bloom instead of foliage. For dwarf varieties like Miss Muffet, where you want a compact mound of leaves, you must snip flower buds the moment you see them.
My 2-Week Observation Log: Step-by-Step
Let me walk you through the exact process I used last season. I kept a daily log because I was testing whether aggressive pruning helped or hurt the tuber.
Week 1, Day 1: I inspected my Miss Muffet. It had 8 leaves. Two bottom leaves were yellowing with brown crispy edges. One leaf had a sunburn patch from when I accidentally left it near a south window for one afternoon.
My Process: First, I sanitized my pruners with rubbing alcohol. Do not skip this. I did once, unknowingly transferred a fungal spore from a dying Alocasia, and my Caladium tuber got soft rot. It was not pretty.
Second, I located the petiole base. I followed the stem down to the soil line. I cut it at a 45-degree angle, about half an inch above the soil.
Third, I pinched off the emerging flower bud. It looked like a little green pea on a stick.
The Immediate Result: The plant looked slightly bare. I had 5 healthy leaves left. I felt a knot in my stomach. I thought I had ruined it.
Day 4: Nothing happened. No new growth. I was tempted to water it more to "encourage" it. I stopped myself. I checked the soil with my finger. It was still moist 2 inches down. I left it alone.
Day 6: I spotted a tiny pinkish tip emerging from the soil. Not from the spot I cut, but from the opposite side of the tuber. This is crucial. The plant redirected its energy to a dormant eye.
Day 9: The new leaf unfurled. It was small, maybe 3 inches. But it was perfect. Dark green speckles on a creamy background. No sunburn.
Day 12: I noticed the cut stems had dried up and shriveled. I gently twisted them—they came loose easily. This tells me the plant had sealed the wound completely.
Week 2, Day 14: The plant now had 7 leaves total. The new one had grown to full size, and another eye was swelling on the soil surface. The canopy was denser than before because the energy went to producing multiple new eyes rather than maintaining old leaves.
Here is the thing I want you to take away: I did not prune for shape. I pruned for removal. And the plant responded by activating latent buds. That is how you get a full, bushy appearance.
The 3 Deadliest Mistakes Beginners Make
I have killed more plants than I care to count. But Caladiums taught me patience. Here are the three errors I see constantly in comment sections and gardening forums.
Mistake #1: Overwatering After Pruning
You just cut off a bunch of leaves. You think the plant is thirsty. It is not. The root-to-leaf ratio is off. With fewer leaves, the plant transpires less water. If you keep the same watering schedule, the soil stays wet longer. Soggy soil + an open wound on the petiole = bacterial rot.
I did this exact thing. I pruned a Miss Muffet and immediately gave it a big drink. Within 4 days, the tuber was mushy when I dug it up. The smell was like rotting vegetables. I tried to save it by cutting away the rot and dusting with sulfur, but it was too late.
The Fix: Wait 2-3 days after pruning before watering. Then, check the soil moisture. Use a wooden chopstick. Stick it in the pot, wait 30 seconds, pull it out. If it comes out with wet soil stuck to it, do not water. Only water when the top 2 inches are dry.
Mistake #2: Light Placement Errors
People treat this like a full-shade plant because they read "Caladium" and think "tropical understory." Totally wrong. Miss Muffet needs bright, indirect light. If you put it in a dark corner, the petioles will stretch. They will lean toward the window. You will get a lopsided mess.
Then, you will try to fix it by pruning the leaning side. This is the wrong move. The plant is not broken—it is starving for photons.
I tried keeping one in a north-facing bathroom. The leaves were beautiful at first but got sparse and floppy within a month. I pruned it to try to balance the shape. It just got worse. When I finally moved it to an east-facing windowsill with a sheer curtain, it grew like a weed. No pruning required for shape.
The Fix: Give it 6-8 hours of bright but filtered light. Morning sun is fine. Afternoon sun will scorch the leaves in most climates. If your plant is stretching, move it closer to light. Do not cut off the leggy stems. The plant is just trying to survive. Wait for new growth to come in under the better conditions.
Mistake #3: Choosing the Wrong Pot
Here is the crunchy truth: Miss Muffet, being a dwarf, does not need a huge pot. I plopped mine into a 10-inch terracotta pot because I thought it had "room to grow." That was my third kill.
A pot too large holds too much moisture. The roots of a dwarf Caladium are shallow and sparse. They cannot drink all that water before it stagnates. The soil goes anaerobic, and the tuber rots.
Conversely, a pot with no drainage holes is a death sentence. I once bought a cute ceramic pot from a thrift store. I felt clever drilling holes into it. I did a bad job—only two small holes. But it was enough. Actually, the real problem was the pot was glazed on the inside. Glaze hurts airflow. The root zone stayed too cold and wet.
The Fix: Choose a pot that is only 2 inches wider in diameter than the tuber cluster. Make sure there is at least one large drainage hole. If you can use a terracotta pot, that is ideal. It wicks moisture away from the soil. For dwarf types, I like a squat azalea pot. It gives more surface area for soil drying without being too deep.
Let me tell you about the "sitting cut" method for tuber storage. If you overwinter your tubers indoors (which you must if you live in Zones below 9), do not cut the foliage off. Many people cut the plant down at the first sign of dormancy. This is a beginner error. Wait until the leaves have yellowed and pulled away easily by hand. That lets the tuber reabsorb nutrients fully.
Answering The Real Question: Do You Even Need Pruning?
Let me be honest with you. Out of the five Miss Muffet plants I have grown in the last three years, I only did substantial pruning on two of them. The other three just stayed tidy with minimal intervention. Because this is a dwarf hybrid, it already has a compact habit.
The best thing you can do is "groom" rather than "prune." This means removing anything yellow, brown, or crispy. It also means pinching flower buds. And it means removing leaves that are persistently blocking the light from younger leaves.
I had this one big strap leaf that kept flopping over its neighbors. It was shading the new growth. I fought the urge to tie it up with string. It looked unnatural. Finally, I just cut the floppy one off. The next morning, the baby leaves underneath perked up like they had been waiting for their turn in the sun.
My Personal Toolkit and Routine
You do not need fancy equipment. I use bonsai shears for precision and micro snips for flower buds. But honestly, a clean pair of sharp craft scissors works fine. I always wipe the blade with isopropyl alcohol before and after I use them on Caladiums. These plants are prone to fungal issues like Pythium and Fusarium. They ride along on dirty blades.
Do not pinch with your fingernails. Wet stems are fibrous. You will crush the vascular tissue instead of making a clean cut. The crushed tissue invites pathogens.
I wash my hands before touching the plant. Caladium sap can be irritating to skin. Some people get a rash. I do not, but my wife does. So we use disposable gloves when handling them. If surgical gloves are overkill, at least wash your hands after.
What About Leaf Burn?
Something confused me for a while. I thought if the leaf edges were brown, I should cut them off. So I trimmed the brown tips with scissors. Then those cut tips turned brown again and the browning spread further down.
The truth: Browning tips are usually caused by water quality or fluoride. Caladiums are sensitive to fluoride in tap water. When you trim a browned edge, you create a fresh wound. The plant will try to push salts to that cut edge, causing further die-back.
The correct method is to remove the entire leaf at the base if the browning is severe. Do not try to do plastic surgery on leaves. If only the tip is brown and it is less than 10% of the leaf, leave it alone. The plant will recycle that tissue naturally.
How Long Does Recovery Take?
After I did the big prune to remove the flower stalk and old leaves, the plant took about 5 days to show new growth. The University of Florida (IFAS Extension) notes that tuberous roots respond to "release" from growth points. When you remove an active leaf, you essentially tell the tuber it does not have to feed that leaf anymore. So it releases a new eye.
That is why you want to prune in the morning. The plant is turgid with water, and the wound heals faster because the sap flow is high. Do not prune at night. The plant will sit with a wet cut for a longer period until the next daylight, increasing the risk of fungal entry.
The Controversial "Hard Prune" for Winter Dormancy
People email me about this all the time. They say, "My Caladium isn't dying in the fall; it just looks ugly. Should I cut it all the way down?"
No. Stop. Do not touch it. In autumn, as days shorten and temps drop, the plant will gradually yellow and die back. This is natural. The leaf energy is moving back to the tuber.
If you cut early, the tuber store is not filled. You will get a smaller tuber for next spring. And a small tuber means fewer leaves when you replant.
Wait until the leaf pulls away with a gentle tug. If it does not come off, it is not ready. Patience. I lost a whole batch of tubers because I cleaned them up too aggressively one October. I store my tubers in a box with dry peat moss at 55°F. And I check them monthly for rot spots.
The Overwintering Data Point
RHS offers a great resource page on tender bulbs, and they advise storing them dry at approx 7-10°C (45-50°F). I set my garage at around that temp. If you do not have a cool space, a spare bedroom closet works if the ambient house temp is around 65°F. Just avoid heating vents.
When I pull them out in early spring, I do not prune the roots. I plant the tuber with the knobby side facing up. Cover with just 1.5 inches of soil. Water sparingly until the first sprout shows.
FAQ Section
1. Can I propagate by just cutting a leaf with a stem and rooting it in water? No. This will not work. Caladiums do not propagate from stem or leaf cuttings. They only propagate by dividing the tubers. You can cut a mature tuber into pieces—but each piece must have at least one "eye" or growth bud. Divide in spring when you wake them up from dormancy. Let the cut pieces callus over for 24 hours before planting to prevent rot.
2. Why are my leaves turning pale and translucent after pruning? That is a symptom of acute sunburn. When you remove protective overhead leaves, the newly exposed leaves might get hit with direct light they were not used to. This happened to me when I left a plant on a south-facing windowsill after pruning. The leaves lost their chlorophyll pigment quickly. Move the plant slightly further away from the window for a week after pruning to let the exposed leaves adapt.
3. Should I prune off the roots when I repot in spring? Trim off any dead roots that crumble easily. Brown, mushy roots should be removed entirely. Healthy roots are white or pinkish. Rinse the soil off completely. I dip my tubers in a 10% bleach solution for 10 minutes before planting to kill any lingering bacteria. Let them air dry for two hours. Then pot them up. Do not fertilize for the first month. New Caladium roots are extremely sensitive to chemical burn.
Closing Thoughts (Written Likely by Someone Who Burned a Leaf or Two)
I look at pruning as a conversation. You listen to the plant. If we're being honest, most pruning mistakes are made because we want to control the plant instead of trusting the cycle.
One thing that surprised me about the Miss Muffet variety specifically is how forgiving it is with the right kind of pruning. The dwarf genetics make it sprout faster from the tuber than the giant strap-leaf types. My big Caladium 'Carolyn Whorton' took almost two weeks to show new growth after a heavy chop. The Miss Muffet bounced back in 5 days.
I recommend keeping a diary. Seriously. Write down the date you pruned, which leaves you removed, and the weather. In two weeks, look at the plant and compare your notes. You will start to see patterns. This is better than any generic advice I can give you.
The last thing I will leave you with is this; if you are scared to cut, just remove the flower buds. That is the safest way to say "pruned" without hacking at leaves. Flowers only steal energy. Leaves are your engine. Spend your energy on caring for the leaves, and keep the engine running smooth.
Before you grab the scissors, ask yourself one simple question: Is this leaf feeding the plant or draining it? If it is draining it, cut it away. The plant will thank you with a flush of fresh spots and speckles.





