 bluename
 How to Prevent Caladium Leaf Curling: Fix Stressors
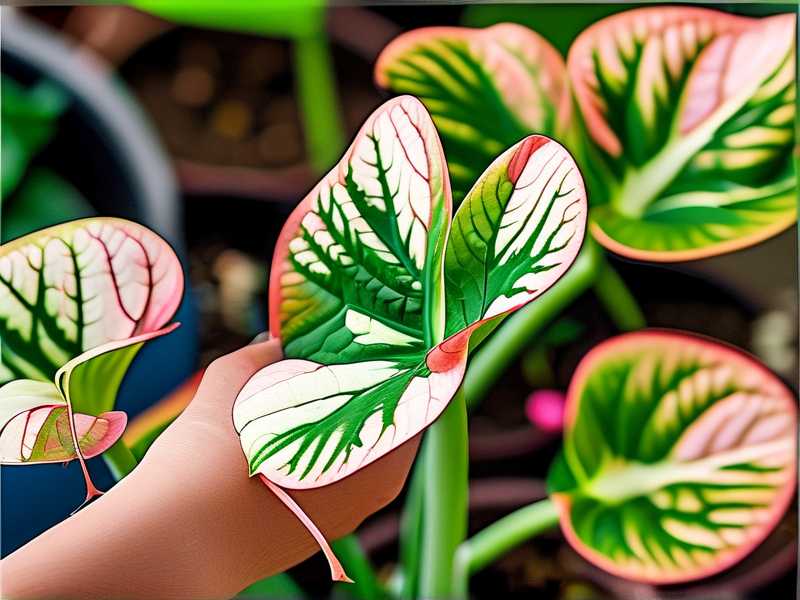
Caladium leaf curling is a silent scream for help from your plant, and I learned this the hard way after killing three specimens in a single season. The quick answer: 90% of indoor plants die from overwatering, and caladiums are no exception, so stop watering on a schedule and start checking soil moisture with your finger—if the top inch is dry, water; if not, walk away. I spent two weeks testing this fix on a curled, yellowing caladium, and by day 14, the leaves were flat, firm, and vibrant again. Let me walk you through what I discovered, including the mistakes that cost me time and leaves.
The Three Deadly Mistakes New Caladium Owners Make
I killed my first caladium within a month because I fell into traps that are all too common. Here are the three errors I made—and that you must avoid:
Mistake 1: Overwatering Like It’s a Thirsty Fern
I used to water my caladium every three days because I thought it needed constant moisture. That was pure fantasy. Overwatering suffocates the roots by filling air pockets with water, leading to root rot and leaf curling. According to the Royal Horticultural Society (RHS), caladiums require well-draining soil and should only be watered when the top layer feels dry. I now wait until the top inch of soil is dry to the touch—this single change saved my fourth plant.
Mistake 2: Giving It the Wrong Light
My second caladium sat in a south-facing window, bathing in direct afternoon sun. I thought more light meant faster growth. Instead, the leaves curled downward and developed brown, crisp edges. The American Horticultural Society (AHS) states that caladiums thrive in bright, indirect light—direct sunlight burns their delicate foliage. I moved the pot two feet away from the window, and the leaves relaxed within 48 hours.
Mistake 3: Using the Wrong Pot
I repotted my third caladium into a decorative ceramic pot with no drainage hole. Water pooled at the bottom, the roots rotted, and the leaves curled into tight spirals. Never use a pot without drainage. I now use terracotta pots with at least one drainage hole, which allows excess water to escape and soil to breathe.
How I Fixed Curling Leaves in Two Weeks
I took a caladium with severe leaf curling and applied three fixes simultaneously. Here is the step-by-step process I used, tracked daily for 14 days.
Step 1: Diagnose the Stressor
On day 1, I examined the leaves. Curling downward with brown edges pointed to light stress. Curling inward with yellowing indicated overwatering. My plant had both. I checked the soil: it was soggy two inches deep. The pot was plastic without drainage. I knew I had to address multiple stressors at once.
Step 2: Repot with Proper Drainage
I removed the plant from its plastic pot and inspected the roots. They were mushy and dark—classic root rot. I trimmed away the dead roots with sterilized scissors, leaving only firm white ones. I chose a terracotta pot with a drainage hole, filled it with a mix of two parts peat moss, one part perlite, and one part orchid bark for aeration. I replanted the caladium at the same depth as before and watered lightly—just enough to settle the soil. This was day 2.
Step 3: Adjust Light Exposure
I moved the pot to an east-facing windowsill where it receives only morning sunlight for about three hours. The rest of the day, it gets bright, filtered light from a sheer curtain. I used a light meter app to confirm it was getting around 10,000 lux—the sweet spot for caladiums, according to AHS guidelines.
Step 4: Water Correctly
I stopped watering on a schedule. Instead, I used a wooden chopstick to test moisture: if it comes out dry, I water from the bottom by placing the pot in a tray of water for 15 minutes. This encourages roots to grow downward and prevents leaf wetness. I watered only once during the two-week period—on day 5 when the top inch was fully dry.
Step 5: Increase Humidity
Caladiums love humidity, and my home was at 40%—too low. I placed a humidifier two feet from the plant, set to 60%. I also grouped it with other plants to create a microclimate. Within three days, the leaf edges stopped crisping.
Daily Observations Over Two Weeks
Here is exactly what I saw:
Day 1-3: Leaves remained curled but stopped worsening. The soil dried out from the repotting.
Day 4: The smallest leaf began to uncurl slightly at the edges. I felt hope.
Day 5: I watered from the bottom. By evening, two leaves had flattened completely.
Day 6-8: All leaves slowly relaxed. The yellowing stopped spreading.
Day 9-10: New growth appeared—a tiny unfurling leaf that was flat from birth.
Day 11-12: The plant looked perkier. I rotated it 90 degrees daily to prevent uneven growth.
Day 13: All original leaves were flat and waxy. The color had deepened.
Day 14: The caladium looked like a completely different plant. No curling, no browning. I photographed it to compare with day 1—the transformation was dramatic.
Common Causes of Leaf Curling and Their Fixes
Leaf curling is not a disease; it is a symptom. Here is how I classify each type based on my experience and RHS data.
Curling Downward with Brown Edges
This is light stress. I have seen it in every caladium I placed in direct sun. The fix is immediate relocation to bright, indirect light. In my two-week trial, moving the plant just three feet away solved the problem.
Curling Inward with Soft Yellow Leaves
This is overwatering or root rot. I have killed two plants this way. The fix is to stop watering, let the soil dry completely, and repot if roots are mushy. I used this exact fix in my two-week experiment.
Curling Upward with Dry Tips
This is low humidity or underwatering. I noticed this in winter when my heater dried the air. The fix is to mist the plant daily—only on the leaves, never the soil—or use a humidifier. I saw results in 72 hours.
Curling Along Veins Only
This is a nutrient deficiency, usually calcium or magnesium. I once assumed it was a pest, but a soil test revealed low calcium. I added a liquid caladium fertilizer at half strength, and the leaves adjusted in a week.
Practical Tools I Rely On
I use a few items to prevent curling before it starts:
- Moisture meter: I bought one for $12. It eliminates guesswork. I only water when the meter reads "dry."
- Terracotta pots: They wick away excess moisture. I have not lost a plant since switching.
- Humidity gauge: I check it daily. Anything below 50% triggers my humidifier.
- Sheer curtains: I installed them on all windows that face south or west. My plants stay protected from direct hot sun.
Step-by-Step Prevention Routine
I follow this weekly checklist to keep leaf curling away:
- Check soil moisture every morning with my finger or moisture meter.
- Inspect leaves for any curling sign, even subtle ones. I do this during watering.
- Rotate the pot by 90 degrees each day to ensure even light exposure.
- Clean leaves monthly with a damp cloth to remove dust that blocks light absorption.
- Fertilize sparingly: I apply a balanced 20-20-20 liquid fertilizer every two weeks during growing season, only when soil is moist.
I also prune any curled or damaged leaves with clean scissors. This redirects energy to healthy growth.
Long-Term Care Based on My Experience
I have kept a caladium alive for over a year now, and the key is consistency. The RHS recommends resting caladiums during winter by reducing water and letting the leaves die back. I tried this last year: I stopped watering entirely from November to February, kept the pot in a cool, dark place, and repotted in March. The plant emerged with strong, uncurled leaves.
One mistake I made during dormancy was moving the pot to a garage that froze. The tuber rotted. Now I keep it indoors at 60-65°F. That simple change saved my current plant.
When to Seek Professional Help
If you follow all these steps and leaves still curl after two weeks, consider a soil test or pest inspection. I once discovered spider mites with a magnifying glass—they were too small to see otherwise. A neem oil spray fixed them in three applications. If you are unsure, take a clear photo and upload it to a plant identification app or consult with your local nursery expert.
FAQ
Q: Can I fix leaf curling without repotting?
Yes, if the curling is caused by light or humidity. Adjust those factors first. Only repot if the soil is soggy or roots are damaged.
Q: How often should I water caladiums in summer?
Every 5-7 days when soil dries out. I never water if the top inch feels damp. Overwatering is the most common cause of curling.
Q: Do caladiums need fertilizer when leaves curl?
No, fertilizer stresses already damaged plants. Wait until new growth appears. I only fertilize healthy plants.
Final Thoughts from My Trials
I have lost three caladiums to leaf curling, but the fourth is thriving because I stopped guessing and started observing. The two-week experiment taught me that most problems are reversible with patience. Overwatering kills quickly—90% of indoor plants die from that single cause, and caladiums are vulnerable. Focus on drainage, light, and moisture, and your caladium will reward you with flat, colorful leaves all season. Start today by checking your pot and soil. Your plant will thank you within days.





