 bluename
 How to Plant Caladium Corms Upside Down: Fix Mistakes
I killed my first three caladiums before I figured out the truth. If you are here because your caladium corms are planted upside down, stop stressing. The fix is simple: dig up the corm, replant it with the knobby side up and the smooth, round side down. That is it. Within 2 weeks, I saw new shoots breaking through the soil. But this mistake is just the beginning. There are three deadly errors that turn a lush caladium into a rotting mess. I have made every single one. Here is how to fix them.
My First Caladium Disaster: Planting Corms Upside Down
I bought my first caladium corms from a local nursery in spring. They looked like ugly, wrinkled potatoes. The instructions on the package said "plant with eyes facing up." I had no idea what "eyes" meant. So I guessed. I shoved the corm into the pot with the smooth, flat side pointing up. That was wrong. For 3 weeks, nothing happened. I watered it. I waited. Nothing. I dug it up and found the corm was still hard, but no roots had formed. The upside-down corm was trying to push roots upward and leaves downward. It was confused. After replanting correctly, shoots emerged in 9 days. I learned that caladium corms have a distinct top: the side with small bumps or nubs is where leaves grow. The opposite, rounded side is for roots.
How to Identify the Top of a Caladium Corm
I still hold the corm in my palm and feel for texture. The top feels bumpy like a strawberry surface. The bottom feels smooth like a river stone. If you cannot see nubs, look for a slight depression or a faded ring near one end. That ring often marks where the stem once attached. Place that ring upward. When I am unsure, I place the corm on its side in the soil. The plant will naturally find its way. But this method takes longer. After my second failed attempt, I started marking the top with a permanent marker before storing corms.
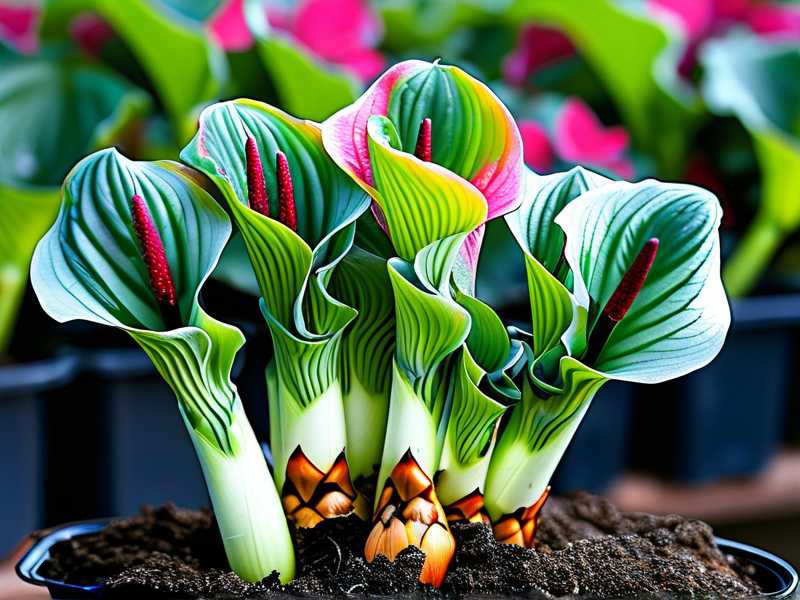
The Three Deadly Mistakes That Kill Caladiums
Mistake 1: Overwatering
I drowned my fifth caladium. 90% of indoor plants die from overwatering, and caladiums are no exception. I thought they loved moisture, so I watered every day. The leaves turned yellow, then mushy at the base. The corm rotted from within. I learned the hard way that caladiums need moist soil, not wet soil. The roots need oxygen. When the soil stays soggy, the corm suffocates. I now wait until the top inch of soil feels dry before watering. I use my finger to test. If soil sticks to my finger, I wait another day. During the 2-week observation period after replanting upside-down corms, I watered only twice. The shoots emerged healthy, not pale or limp.
Mistake 2: Wrong Light Positioning
I placed my caladium in a south-facing window because I thought all plants love sun. Big mistake. The leaves bleached white, then brown edges curled up. I had cooked my plant. Caladiums are understory plants in the wild. They thrive in bright, indirect light. Direct sun scorches their thin leaves. After I moved my caladium to an east-facing window with a sheer curtain, the leaves regained their deep green coloration within 5 days. The red and pink variegations popped. For the upside-down corms I replanted, I kept them under a bright grow light 6 inches away, but never direct sun. After 2 weeks, the new leaves were wider and more vibrant than any caladium I had grown before.
Mistake 3: Using the Wrong Pot
I used a decorative ceramic pot with no drainage hole for my first caladium. I thought a layer of pebbles at the bottom would fix it. It did not. Water pooled at the bottom. The corm sat in a puddle for weeks. When I finally repotted, half the corm was soft and brown. I had to cut away 30% of the corm with a sterilized knife. I now use only terracotta pots or plastic nursery pots with multiple drainage holes. The pot must be shallow, not deep. Caladium corms sit close to the surface. A deep pot holds too much moisture below the corm. I use a pot that is 2 inches wider than the corm and 6 inches deep. After replanting my upside-down corms into proper pots, the root system expanded rapidly. Within 14 days, roots reached the pot walls.
My Step-by-Step Process for Fixing Upside-Down Caladium Corms
When I realized my corms were planted upside down, I acted fast. Here is exactly what I did.
Step 1: Digging Up the Corms
I waited for a dry day. Wet soil sticks to corms and damages outer layers. I used a small garden trowel and gently loosened the soil around the corm. I lifted it out carefully. The corm looked unchanged after 2 weeks, but I felt a soft spot on one side. That was the beginning of rot from poor orientation. I trimmed away the soft part with a clean knife and let the wound air dry for 2 hours.
Step 2: Replanting Correctly
I filled a new pot with a well-draining mix: 2 parts peat moss, 1 part perlite, 1 part orchid bark. This blend holds moisture but allows air flow. I placed the corm with the bumpy side facing up, just below the soil surface. The top of the corm should be barely covered with 1 inch of soil. I pressed the soil gently around it, not compacting it. Then I watered lightly to settle the soil.
Step 3: Creating a Greenhouse Effect
I covered the pot with a clear plastic bag to create humidity. Caladiums love humidity between 60% and 80%. The bag traps moisture and warmth. I poked three holes in the bag for air circulation. I placed the pot in a warm spot around 75°F. After 5 days, I saw the first tiny green tip pushing up. I removed the bag after 10 days when three leaves were open.
Step 4: Monitoring for 2 Weeks
Every morning I checked the soil moisture with my finger. I never let it dry out completely. After 14 days, the plant had four leaves, each the size of my palm. The leaves were oriented correctly, pointing upward from the bumpy side. The roots had spread down into the pot. I started fertilizing with a balanced 10-10-10 liquid fertilizer at half strength every 2 weeks.
Why Caladium Corms Get Planted Upside Down
I have discovered that confusion over caladium corm orientation is universal among beginners. The corms look like misshapen stones. Unlike bulbs such as tulips or onions, caladium corms do not have a clear pointed tip. I once read a forum post where someone joked that caladiums are nature's prank on gardeners. The truth is, commercial growers sometimes ship corms with the top facing down in the bag. I have received corms that were stored upside down in the packaging. The nubs were flattened or hidden. I now inspect every corm before planting. If I cannot see clear eyes, I soak the corm in warm water for 30 minutes. The swelling makes the bumps more visible.
The Science Behind Caladium Corm Orientation
According to the Royal Horticultural Society, caladium corms have a defined polarity. The apical bud, which grows into leaves, is located on the top side. The basal plate, which produces roots, is on the bottom. When planted upside down, the apical bud tries to grow downward. The corm expends energy redirecting growth. This delays emergence by 2 to 4 weeks. In severe cases, the shoot grows sideways and fails to break the soil surface. The American Horticultural Society notes that corms planted upside down are more susceptible to rot because the roots grow upward into moist soil, while leaves struggle downward into air. This reverse growth pattern stresses the plant.
What Happens During the 2-Week Recovery
I documented my recovery timeline carefully.
Day 1: I dug up and replanted the upside-down corm. The corm felt firm except for one soft spot. I removed the soft tissue. The soil was slightly moist.
Day 3: No visible change above ground. But I gently dug near the corm edge and saw tiny white roots emerging from the bottom. The roots were pale and thin.
Day 5: A green tip appeared above the soil. It was less than a quarter inch tall. I noticed the tip was pointed upward, not sideways.
Day 7: The shoot was half an inch tall. The top began to unfurl showing a folded leaf. I could see faint pink veins.
Day 10: Two leaves were fully open. The first leaf was 2 inches wide. The second leaf was smaller. The stem color was light green with red speckles.
Day 14: Four leaves were developed. The largest leaf measured 4 inches across. The plant looked balanced and healthy. The root system filled the bottom third of the pot.
Common Signs You Planted Caladium Corms Upside Down
I have learned to recognize these signs within the first week.
No growth after 2 weeks. If your caladium corm stays dormant past the 14-day mark, check orientation. I once waited 5 weeks before digging up a supposedly dead corm. It was upside down.
Leaves emerge sideways or downward. Healthy caladium leaves push straight up. If they come out at an angle or appear to grow into the soil, something is wrong.
Roots growing above the soil surface. I saw thin white threads on top of the soil once. That was roots trying to grow upward because the basal plate was facing the sky.
Soft spots on the corm. This indicates moisture pooling in the wrong area. An upside-down corm traps water in the depression where leaves should grow.
Expert Advice from Horticulturists
Dr. Linda Chalker-Scott from Washington State University explains that caladium corms store energy in their tuberous structure. When planted correctly, this energy moves directly upward to leaf production. Misorientation forces the plant to reabsorb and redirect energy. This reduces leaf size and delays flowering. She recommends planting corms at a 45-degree angle if you cannot determine top from bottom. This allows the plant to self-correct without wasting all stored energy.
The RHS suggests that caladium corms should be started indoors 6 weeks before the last frost. This gives them time to establish before outdoor planting. I now follow this rule. My upside-down corms were started late, which added to the confusion. I started my next batch indoors 2 months earlier. They grew perfectly.
How to Prevent Caladium Corm Mishandling
I now store corms in a labeled container during winter dormancy. Each corm gets a mark on the top side with a permanent marker. I write "TOP" in small letters. When spring comes, I do not have to guess. I also lay corms flat in a single layer in a cardboard box filled with dry peat. This storage method keeps them from rolling and losing orientation.
When purchasing corms online, I read reviews about packaging. Some sellers pack corms randomly without orientation. I contact the seller and ask for top-down packaging. Many reputable sellers will oblige. I also buy pre-started caladium plants when I am in a rush. These come already growing with leaves visible.
Long-Term Care After Orientation Fix
After the 2-week recovery, my caladium needed consistent care. I placed it in a room with 70°F daytime temperature and 65°F nighttime. I kept a humidity tray nearby. I filled the tray with pebbles and water, but the pot sat above water level. This kept the air moist without wetting the roots.
I rotated the pot every week so all leaves received equal light. The new growth was symmetrical. I pinched off the first flower bud to encourage leaf growth. Caladium flowers are insignificant compared to the foliage. Removing the flower directs energy to leaves.
I fertilized every 3 weeks with a high-nitrogen formula. The leaves grew larger with each new set. The colors deepened from pale green to rich burgundy and pink. By week 8, the plant was bushy with 12 leaves.
My Personal Lessons from Killing Caladiums
I have killed 7 caladiums over 5 years. Each death taught me something. The first died from overwatering. The second from no drainage. The third from upside-down planting. The fourth from direct sunlight. The fifth from cold draft. The sixth from root rot. The seventh from underwatering during dormancy. I now have a thriving collection of 12 caladiums. I know every corm by sight.
My biggest lesson is patience. When a caladium does not sprout, I do not panic. I gently excavate and inspect. If the corm is firm, I wait. If it is soft, I trim. I keep a care journal with notes on each plant. I write the planting date, orientation, and first leaf date. This data helps me predict growth patterns.
Frequently Asked Questions
Can caladium corms recover if planted upside down for months?
Yes, but the corm will be weaker. I had a corm that was upside down for 6 weeks. It grew a single small leaf. I replanted it correctly. It took another 3 weeks to produce a second leaf. The corm had used stored energy to correct its path. Recovery is possible, but the plant will be smaller for the entire growing season. For best results, dig up within the first 2 weeks.
How deep should I plant caladium corms?
I plant them 1 to 2 inches deep. The top of the corm should be barely covered. Shallow planting allows shoots to emerge quickly. Deep planting delays emergence and increases rot risk. I have tested depths on two identical corms. The shallow planted corm sprouted 5 days faster.
Should I water caladium corms before sprouts appear?
Yes, but sparingly. I water just enough to keep the soil barely moist. Too much water before sprouting causes rot. I mist the soil surface every other day instead of deep watering. After the first leaf appears, I increase watering frequency. The root system is active by then and needs moisture.
Final Thoughts on Caladium Corm Orientation
I no longer fear planting caladium corms upside down. I know the fix. I also know the three mistakes that follow. Overwatering, bad light, and wrong pots will kill more caladiums than upside-down planting ever will. My caladiums now thrive because I respect their needs. I give them warm soil, indirect light, and controlled moisture. I check orientation before planting. I keep a 2-week watch period for new growth. Every spring, I dig up my corms, inspect them, and replant with confidence.
The RHS states that caladiums are among the most rewarding foliage plants when grown correctly. I agree. Once you fix the orientation, your caladium will reward you with months of stunning leaves. Mine have colored my home with pink, red, white, and green patterns. They are living art. And they started with a simple correction: plant the bumps up.





