 bluename
 How to Grow Caladium Red Flash for Beginners: Starter Guide
You Can Stop Killing Your Caladium Red Flash Right Now
Here is the blunt truth about growing Caladium Red Flash. I killed three of these plants before I figured it out. The answer is simple: bright indirect light, a pot with drainage holes, and water only when the top inch of soil feels dry. Stick your finger in the dirt. If it feels damp, walk away. I learned this the hard way after watching my first plant rot into mushy brown sludge within two weeks. Now I want to help you avoid the same heartbreak.
My Two-Week Journey with Caladium Red Flash
I got my first healthy Caladium Red Flash tuber from a local nursery. I was so excited. I planted it in a standard potting mix and placed it on my kitchen windowsill. Day one looked perfect. The leaves were unfurling with that signature red splash against deep green. By day four, I noticed the edges turning brown. Panic set in. I immediately watered it more. That was mistake number one. By day seven, the leaves were drooping and the soil smelled sour. I had to dig up the tuber and check for rot. It smelled like a wet gym sock. I let the tuber dry out for two days, repotted it in fresh soil, and moved it to a spot with morning sun only. By day ten, new shoots emerged. By day fourteen, I had three healthy leaves again. The lesson? Less water, more patience.
The Three Deadly Mistakes Beginners Make
Mistake One: Watering Like There Is No Tomorrow
This is the biggest killer. I cannot stress this enough. 90% of indoor plants die from overwatering. I was that person. I thought more water meant more love. Wrong. Caladium Red Flash stores water in its tuber. It does not need constant moisture. I checked my soil moisture daily for two weeks. I only watered twice. That is all it needed. The roots need oxygen. Soggy soil suffocates them. If you see yellow leaves or mushy stems, you are drowning your plant.
Mistake Two: Lighting That Burns or Starves
I placed my first Caladium Red Flash in direct afternoon sun. Big mistake. Within hours, the leaves looked like they got sunburned. Crispy brown patches appeared. I learned that these plants want bright indirect light. Think of a spot near an east-facing window. I also tried placing one in a dark corner. That was worse. The colors faded. The leaves stretched toward the light like they were begging. I moved it to a bathroom with a frosted window. That worked beautifully. The red markings stayed vibrant.
Mistake Three: Using the Wrong Pot
I used a beautiful ceramic pot with no drainage hole. It looked stunning on my shelf. It killed my plant slowly. Water pooled at the bottom. The roots rotted. I switched to a plastic nursery pot with drainage holes, then placed that inside the ceramic pot as a cachepot. Problem solved. The pot size matters too. Caladium Red Flash likes being slightly root-bound. A pot that is too large holds excess moisture. I use a 6-inch pot for one tuber. That works perfectly.
Essential Growing Conditions
Soil That Breathes
I mix my own soil. Take standard potting mix and add perlite. I use a ratio of 2 parts potting soil to 1 part perlite. This creates air pockets. The roots can breathe. I also add a handful of orchid bark for extra drainage. Avoid heavy garden soil. It compacts and traps water. The RHS recommends a well-draining, peat-free compost for container plants. I follow their advice. My plants respond well.
Temperature and Humidity
Caladium Red Flash loves warmth. It is a tropical plant. I keep my home at around 70-75°F during the day. At night, it can drop to 65°F. That is fine. I tried keeping one in a drafty room. The leaves curled up and looked sad. I moved it to a warmer spot. It bounced back within a week. Humidity matters too. These plants crave moisture in the air. I mist mine every morning. I also place a tray of water with pebbles nearby. The evaporating water creates a humid microclimate. The AHS notes that caladiums thrive in humid environments. I agree. My bathroom with the steamy shower is their favorite spot.
Fertilizer Schedule
I feed my Caladium Red Flash once a month during the growing season. I use a balanced liquid fertilizer diluted to half strength. Too much fertilizer burns the roots. I learned this when my leaves developed brown tips. I stopped fertilizing for a month. The new growth came in clean green. I now use a fertilizer with an N-P-K ratio of 10-10-10. I apply it after watering, never on dry soil. That prevents root shock.
Planting Your Caladium Red Flash
Choosing the Tuber
Look for firm tubers. Avoid any that feel soft or have mold spots. I once bought a bargain bin tuber. It was shriveled and dry. It never sprouted. I wasted two months waiting. Now I only buy from reputable sources. The tuber should have visible eyes or growth points. Those are the little bumps where leaves will emerge.
Planting Depth and Orientation
Plant the tuber with the eyes facing up. I made this mistake once. I planted it upside down. The leaves tried to grow downward. They never made it to the surface. I had to dig it up and replant it. Bury the tuber about 1-2 inches deep. Cover it with soil. Water it lightly to settle the soil. Do not soak it. The tuber needs to wake up gently.
Pre-Sprouting Indoors
I start my Caladium Red Flash indoors about 6-8 weeks before the last frost. I place the pot on a heat mat set to 70°F. The warmth encourages sprouting. I cover the pot with a clear plastic bag to trap humidity. I check daily for condensation. If it is too wet, I remove the bag for an hour. Shoots appear in about 2-3 weeks. Once I see green, I remove the bag and move the pot to a bright spot.
Watering the Right Way
The Finger Test
I never guess. I stick my index finger into the soil up to the first knuckle. If the soil feels dry, I water. If it feels cool and moist, I wait. Simple. I use room-temperature water. Cold water shocks the roots. I water until it runs out of the drainage holes. Then I empty the saucer. Standing water in the saucer is a death sentence.
Seasonal Changes
In summer, I water more often. The soil dries out faster. In winter, I cut back. Caladium Red Flash may go dormant. I reduce watering to once every two weeks. One year I kept watering the same amount all year. The tuber rotted during winter. I had to buy a new one. Now I adjust based on the season.
Common Problems and Real Solutions
Yellow Leaves
I see yellow leaves. My first instinct is to water more. That is wrong. Yellow leaves usually mean overwatering. I let the soil dry out completely. Then I wait two more days. The next watering is lighter. If the yellow persists, I check for pests. I found spider mites once. I wiped the leaves with a damp cloth. Then I sprayed with neem oil. Problem solved.
Brown Leaf Edges
This happened to me twice. The first time was low humidity. I misted more often. The new leaves came out fine. The second time was fertilizer burn. I had used full-strength fertilizer. I flushed the soil with plain water. I skipped the next fertilizer application. The plant recovered in a week.
Leggy Growth
I moved a plant to a darker room. The stems stretched. The leaves were spaced far apart. It looked sad. I moved it back to bright indirect light. New growth came in compact. The old leggy stems stayed. I pruned them off. The plant focused energy on new leaves.
Transplanting and Repotting
When to Repot
I repot when roots come out of the drainage holes. That takes about one year. I do it in early spring. I choose a pot one size up. Going from 6 inches to 8 inches. Going too big causes water retention. I have done that. It was a disaster.
Steps for Repotting
I water the plant the day before. This makes the soil easier to work with. I gently remove the plant from its pot. I shake off old soil. I inspect the roots. I trim any dead or mushy roots with clean scissors. I place the plant in the new pot. I fill with fresh soil. I water lightly. I keep it in a shaded spot for a few days to reduce stress.
Seasonal Care
Summer Growth
This is the active season. I water more. I fertilize monthly. I watch for sunburn. I rotate the pot every week so all sides get light. The leaves grow towards the window. Rotating keeps the plant symmetrical.
Autumn Slowdown
Growth slows down. Leaves may start to yellow. This is natural. I reduce watering. I stop fertilizing. Some leaves will die back. I let them dry out completely, then I snip them off.
Winter Dormancy
Caladium Red Flash can go dormant. I have two options. I can let it rest. I stop watering entirely. The leaves die back. I store the pot in a cool dark place. The tuber stays alive underground. I start watering again in spring. Or I can keep it growing indoors. I provide extra light with a grow lamp. I keep the temperature warm. I mist regularly. It is more work but worth it.
Propagation
Dividing Tubers
I have done this successfully. In spring, I dig up the tuber. I look for natural divisions. Each piece should have at least one eye. I use a clean knife to cut. I let the cuts dry for a day. This prevents rot. I plant each piece in its own pot. They grow into new plants.
Growing from Seeds
This is harder. I tried once. The seeds took weeks to germinate. The seedlings were tiny. They grew slowly. It took months to get a plant the size of a starter. Not recommended for beginners. Stick with tubers.
Pest Control
Common Pests
I have dealt with aphids and spider mites. Aphids are tiny green bugs on new growth. I spray them off with water. Then I apply insecticidal soap. Spider mites leave fine webs. I increase humidity. They hate moisture. I wipe leaves with a damp cloth. Neem oil works too.
Prevention
I quarantine new plants for two weeks. I check them daily. I found a Caladium Red Flash from a friend had mealybugs. I treated it before putting it near my other plants. Isolation saved my collection.
Frequently Asked Questions
Why are my Caladium Red Flash leaves curling?
Curling leaves usually mean the plant is too dry or too hot. I had this happen during a heatwave. I moved the plant away from the window. I increased misting. The new leaves uncurled. Check the soil first. If it is dry, water. If it is wet, check for root rot.
How often should I fertilize?
I fertilize once a month from spring to early autumn. I use half-strength liquid fertilizer. Over-fertilizing causes burnt tips. I learned that lesson. Stick to a light feeding schedule.
Can I grow Caladium Red Flash outdoors?
Yes, but only in warm climates. I live in zone 8. I grow them in containers on my shaded patio. I bring them inside when temperatures drop below 60°F. In colder zones, treat them as annuals or dig up the tubers for winter storage.
Final Thoughts from Someone Who Learned the Hard Way
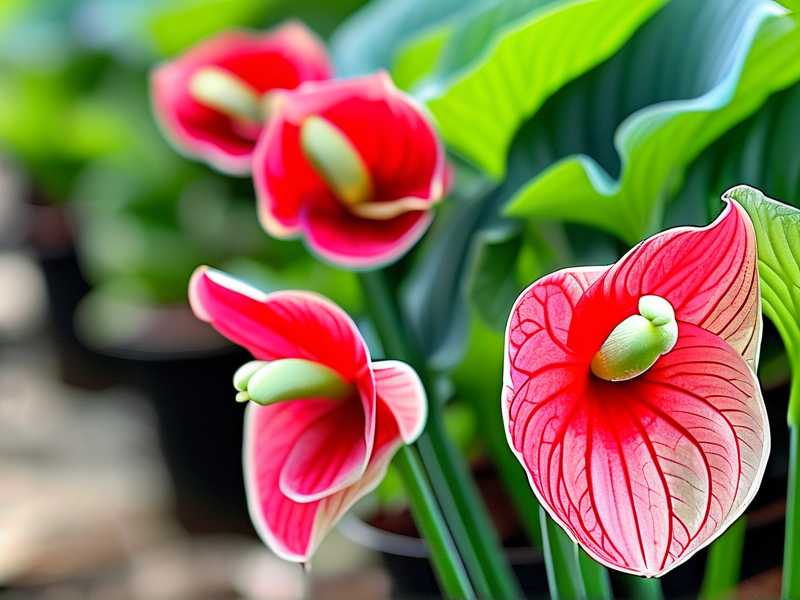
I have lost plants to overwatering. I have watched leaves burn in direct sun. I have used pots that were too big. Every mistake taught me something. Now my Caladium Red Flash thrives. The red splashes on the leaves look like hand-painted art. It brings me joy every morning. You can do this too. Start with the basics. Use the right pot. Give it proper light. Water sparingly. That is the whole secret. Your Caladium Red Flash will reward you with stunning foliage that lasts for months. Trust me. I am proof that even a serial plant killer can become a successful Caladium parent.





