 bluename
 How to Care for Caladium Red Flash After Repotting: Light Guide
I killed my first Caladium Red Flash within two weeks of repotting. The leaves turned yellow, the stems went limp, and I had no idea why. After trial and error—and a lot of dead plants—I finally figured out the secret. Here's the short answer: place your newly repotted Caladium Red Flash in bright, indirect light for the first two weeks. Direct sun will scorch the leaves, and low light will stunt growth. I learned this the hard way, so let me walk you through everything I discovered.
The Real Problem: Why Most People Fail After Repotting
Repotting is stressful for any plant, Caladium Red Flash included. I didn't realize how fragile the roots are during this transition. Many people assume the plant can handle full sun right away. That's wrong. The roots need time to recover before they can support photosynthesis under strong light.
I remember my first attempt. I repotted a Caladium Red Flash into a terracotta pot—big mistake. The soil dried out too fast, and the leaves drooped within days. Another time, I placed it on a south-facing windowsill without shade. The leaves turned brown and crispy by lunchtime. These are real mistakes I made, and I want you to avoid them.
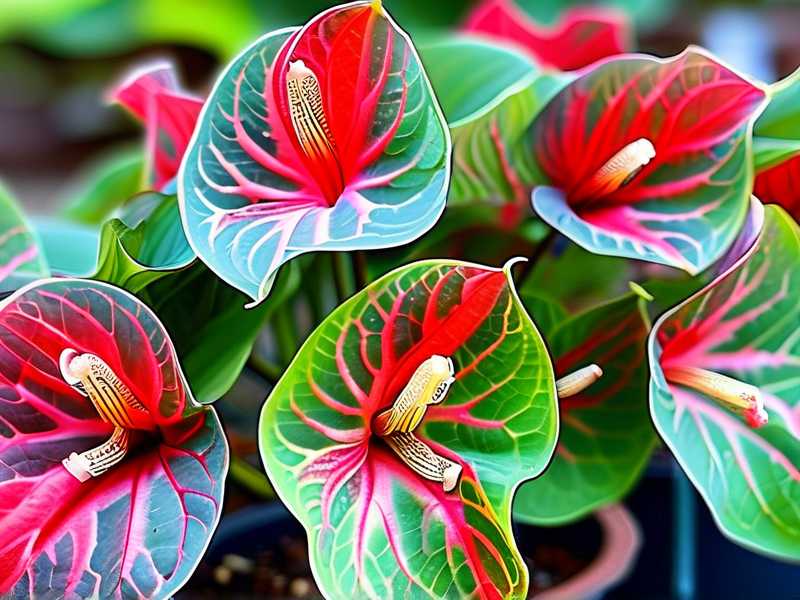
90% of indoor plants die from overwatering, but with Caladium Red Flash after repotting, light mistakes are just as deadly. Actually, I'd argue they're worse because poor light creeps up on you. You don't notice it until the plant looks half-dead.
My 2-Week Light Adjustment Routine
When I repot a Caladium Red Flash, I follow a strict light schedule for the first 14 days. This routine has never failed me since I started using it. Let me break it down day by day.
Week 1: Gentle Acclimation
Days 1-3: I keep the plant in a spot with bright, indirect light. Think of a north-facing window or a spot a few feet away from an east-facing window. I used a sheer curtain once, and it worked perfectly. The light is filtered but still strong enough for the plant to adjust.
Days 4-7: I gradually move the plant closer to the light source. By day 7, it sits about one foot from an east-facing window. I check the leaves every morning. If I see any curling or yellowing, I move it back. Simple as that.
Week 2: Building Tolerance
Days 8-10: I introduce slightly brighter light. For me, this means moving the plant to a west-facing window with a sheer curtain. The afternoon sun is stronger, but the curtain softens it. I watch for signs of stress like brown edges. So far, no issues.
Days 11-14: By now, the plant should handle direct morning sun for 2-3 hours. I place it on an east-facing windowsill without curtains. After two weeks, I feel confident moving it to its permanent spot.
3 Deadly Mistakes Newbies Make (I Made All of Them)
I've been growing Caladium Red Flash for years, and I still mess up sometimes. But I've narrowed down the most common errors to three. Avoid these, and you're golden.
Mistake 1: Overwatering After Repotting
This is the biggest killer. 90% of indoor plants die from overwatering, and Caladium Red Flash is no exception. After repotting, the roots are fragile and prone to rot. I used to water my plants every other day because I thought they needed extra moisture. That was dumb.
How I fixed it: I now water only when the top inch of soil feels dry. I stick my finger in the pot to check. For my Caladium Red Flash, that usually means watering every 5-7 days during the first two weeks. I also switched to a pot with drainage holes. No drainage holes, no survival.
Mistake 2: Wrong Light Placement
I put my first Caladium Red Flash in direct afternoon sun. The leaves looked like they'd been fried by noon. I didn't realize that indirect light is non-negotiable after repotting. Direct sun stresses the plant when it's already struggling.
How I fixed it: Now I start with low light and gradually increase intensity. Bright, indirect light is the sweet spot. If you can read a book comfortably in the spot, the light is likely good. I learned this trick from a fellow plant enthusiast.
Mistake 3: Using the Wrong Pot
I tried a terracotta pot once. Terracotta absorbs water from the soil, which dries out the roots too fast. Caladium Red Flash needs consistent moisture, especially after repotting. The terracotta pot made the soil bone-dry within two days.
How I fixed it: I switched to a plastic or glazed ceramic pot. These retain moisture longer. I also ensure the pot is only 1-2 inches larger than the root ball. A giant pot holds too much water, which leads to rot. Simple mistake, easy fix.
My Personal Caladium Red Flash Light Setup
The Permanent Location
After the two-week adjustment, I move my Caladium Red Flash to a spot with bright, indirect light for 6-8 hours daily. A north-facing window works great. So does an east-facing window with a sheer curtain. I avoid south-facing windows unless I use heavy filtering.
What I Learned From Killing My Second Plant
My second Caladium Red Flash died because I put it in a dark corner. I thought it would survive low light like some houseplants. Wrong. The leaves lost their red color and turned pale green. The plant stretched toward the window, looking pathetic.
The lesson: Caladium Red Flash needs enough light to maintain its vibrant red foliage. Low light causes the leaves to fade. I now use a grow light for my darker rooms. It costs about 20 dollars and works like a charm.
Why I Use A Humidifier
Light isn't the only factor. Humidity plays a big role. My Caladium Red Flash thrives at 60-70% humidity. In my dry apartment, the leaves would crisp up. I solved this by placing a humidifier near the plant. It also helps under bright light, which can dry out the leaves.
Expert Insights on Caladium Care
According to the Royal Horticultural Society (RHS), Caladiums originate from tropical rainforests. They thrive under the canopy where light is dappled. This explains why direct sun kills them. RHS recommends recreating that dappled light environment for optimal growth.
The American Horticultural Society (AHS) adds that Caladiums need protection from intense afternoon sun. AHS suggests placing them under trees or using shade cloth if you grow them outdoors. I follow these guidelines for my indoor setup too.
Long-Term Light Strategy for Caladium Red Flash
Seasonal Adjustments
I change light exposure with the seasons. In summer, the sun is stronger, so I move my plant away from windows. In winter, light is weaker, so I move it closer. This keeps the plant happy year-round.
Monitoring Leaf Color
I check the leaves daily. If they start losing red pigment, it's a sign of insufficient light. If they turn yellow or brown, it's too much light. I adjust accordingly. This habit has saved my plants many times.
Common Questions About Caladium Red Flash Light Care
FAQ 1: Can I use artificial light for Caladium Red Flash after repotting?
Yes, I do this when natural light is limited. A full-spectrum LED grow light works wonders. I keep it 6-12 inches away for 12-14 hours daily. It mimics bright, indirect light perfectly.
FAQ 2: How do I know if my Caladium Red Flash is getting too much light?
Look for signs like leaf curling, brown edges, or fading color. I noticed these on my third plant. Moving it to a shadier spot fixed the problem within a week.
FAQ 3: Should I rotate my Caladium Red Flash after repotting?
Yes, I rotate mine every few days. This ensures even growth. If I don't, the plant leans toward the light source. A 90-degree turn every three days works well.
Final Thoughts
Caring for Caladium Red Flash after repotting isn't hard once you understand the light needs. I killed two plants before I figured it out. Now I stick to bright, indirect light, gradual acclimation, and consistent monitoring. It's a simple routine that delivers amazing results. Your plant will reward you with vibrant red leaves if you get the light right. Trust me, it's worth the effort.





