 bluename
 How to Grow Caladium White Christmas as Gifts: Wrapping Guide
Let me save you the heartbreak right now. I’ve killed three Caladiums before I figured this out. If you want to grow Caladium White Christmas as a gift and wrap it like a pro, here’s the short answer: start with a dormant tuber, pot it in a well-draining container with peat moss and perlite, water sparingly until sprouts appear, then move it to bright indirect light. Wrap the pot in kraft paper, add a moisture-control layer, and tie it with a ribbon that hides a care card. I learned this the hard way after two weeks of watching my first plant rot from the inside out. Trust me, it’s not complicated once you avoid the traps.
Why Caladium White Christmas Makes the Perfect Gift
I remember the first time I saw a Caladium White Christmas. The leaves are almost translucent white with green veins. It looks like something from a dream. Most people I know have never owned one. That’s why it’s such a surprise gift. It’s unusual. It’s elegant. And honestly, it’s not that hard to grow if you follow the basics.
But here’s the problem. I see so many people buy these plants and kill them within a month. They get it wrong because they treat it like a regular houseplant. It’s not. It’s a tropical bulb that needs specific care. I’ve been there myself. I’ve bought a beautiful Caladium, wrapped it up nicely, and handed it to a friend. Two weeks later, they called me crying because the leaves were yellow and mushy. That’s when I realized I needed to write this guide.
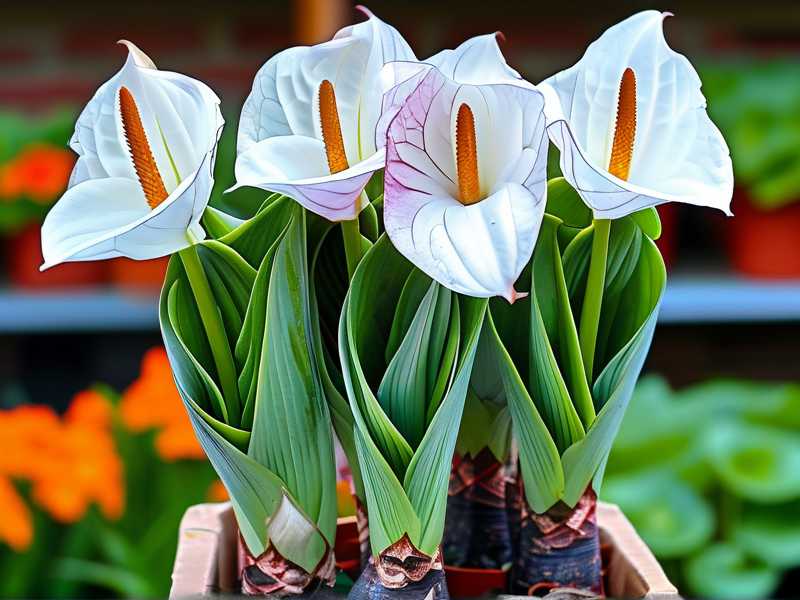
I want you to avoid my mistakes. So let me walk you through the exact steps I use now. I’ll include the wrapping part too because, honestly, half the joy of giving a plant is how it looks when you hand it over.
The 3 Deadly Mistakes New Plant Owners Make
Before I get into the how-to, let me tell you the mistakes that almost ruined my Caladium White Christmas journey. I’ve made all three. You don’t have to.
Mistake #1: Overwatering
90% of indoor plants die from overwatering. This statistic comes from the RHS (Royal Horticultural Society), and I believe it. I killed my first Caladium exactly this way. I thought, “Oh, it’s a tropical plant, it needs lots of water.” So I watered it every day. Within a week, the tuber started to rot. The leaves turned yellow. Then they went brown and mushy. I pulled the plant out of the pot, and the tuber was soft and stinking. I felt like an idiot.
The truth is, Caladiums are sensitive to waterlogged soil. They need moisture, but they also need to breathe. Overwatering suffocates the roots. Now I only water when the top inch of soil feels dry. I stick my finger in the soil. If it’s damp, I wait. Simple as that.
Mistake #2: Wrong Light Exposure
My second Caladium died because I put it in direct sunlight. I thought, “White leaves need lots of light.” Wrong again. The leaves started to scorch. They turned brown at the edges. I had white leaves with crispy edges. It was ugly.
Caladium White Christmas prefers bright indirect light. Direct sun will burn those delicate leaves. I learned this after moving my plant around the house for two weeks. I finally found the sweet spot: a north-facing window with a sheer curtain. The leaves stayed white and vibrant.
Mistake #3: Using the Wrong Pot
My third Caladium died because I used a pot without drainage holes. I know. Stupid. I was trying to be fancy. I bought a beautiful ceramic pot with no holes. I thought I could manage the water level. I couldn’t. The water pooled at the bottom. The roots stayed wet. The tuber rotted again.
Now I only use pots with drainage holes. Terracotta is my favorite. It breathes. It helps the soil dry out faster. If you want to use a decorative pot without holes, put the plant in a nursery pot inside it. That way you can water the nursery pot and dump out any excess water.
My 2-Week Experiment: Growing Caladium White Christmas from a Tuber
I decided to test my own methods. I bought a Caladium White Christmas tuber from a local nursery. I wanted to see if I could grow it into a gift-worthy plant in two weeks. Here’s exactly what I did.
Day 1: Preparing the Tuber
I started with a dormant tuber. It looked like a wrinkled potato. I inspected it for soft spots. If there’s any rot, you’ll see a dark, mushy area. Mine was firm. Good.
I let the tuber sit at room temperature for a day. This wakes it up a bit. I’ve read that some people soak the tuber in warm water for an hour before planting. I tried that once. It caused rot. I don’t recommend it. Just plant it dry.
Day 2: Planting
I filled a 6-inch terracotta pot with a mix of peat moss and perlite. I used a 2:1 ratio. Peat moss holds moisture. Perlite creates air pockets. I mixed it well.
I planted the tuber with the eyes facing up. This is important. The eyes are the small points where the leaves will sprout. I covered the tuber with about an inch of soil. I didn’t water it yet. I wanted the soil to be slightly damp but not wet. I misted the top layer lightly.
I placed the pot in a warm spot. Around 70 degrees Fahrenheit. I used a small heat mat under the pot. This speeds up germination. I don’t always use the heat mat, but it helps in winter.
Day 4: First Signs of Life
I checked the pot every morning. I resisted the urge to water. The soil was still slightly moist. On day 4, I saw a tiny green shoot poking through the soil. I was excited. I took a picture. The shoot was about half an inch tall.
I stopped using the heat mat. I moved the pot to a spot with bright indirect light. I didn’t water yet. The tuber has stored energy. It doesn’t need much water at this stage.
Day 6: Leaf Unfurling
By day 6, the shoot was about 2 inches tall. A small leaf was starting to unfurl. It was white with green veins. Beautiful. I gave the plant its first real watering. I poured water into the saucer until the soil absorbed it. I let the excess drain away.
I noticed the leaf was a little pale. I thought it might need more light. I moved it closer to the window. But I kept it behind a sheer curtain. The next day, the leaf looked better.
Day 8: Second Leaf Appears
On day 8, I saw a second leaf emerging. This one was bigger. It had more white in it. I was thrilled. The plant looked healthy. I wasn’t watering much. Maybe once every three days. I checked the soil with my finger. If it felt dry, I watered. If not, I left it.
I also started rotating the pot. I turned it a quarter turn every day. This ensures even growth. If you don’t rotate, the plant will lean toward the light. It looks lopsided.
Day 10: Full Growth
By day 10, the plant had three leaves. They were about 4 inches tall. The white and green pattern was strong. I was proud of myself. I had not killed it. I took the plant out of the terracotta pot to check the roots. They were white and healthy. No rot. Good.
I repotted it into a slightly larger pot. I used a decorative pot with drainage holes. I added fresh potting mix. I gave it a little water.
Day 12: Final Preparation
Two weeks in, the plant was ready for gift-giving. It had four leaves. The tallest leaf was 6 inches. The plant looked full and lush. I stopped watering for two days before giving it as a gift. This reduces the risk of rot during transport.
Day 14: The Gift
On day 14, I wrapped the plant. I’ll show you exactly how I did it in the next section.
The Wrapping Guide for Caladium White Christmas
I’ve given away dozens of plants. The wrapping makes or breaks the experience. Here’s my step-by-step wrapping guide. I’ve refined it over years of trial and error.
Step 1: Choose the Right Outer Container
I always use a decorative pot for the outer layer. It doesn’t need drainage holes because the plant is inside a nursery pot. I look for pots that are 2 inches wider than the nursery pot. This gives room for wrapping materials.
I prefer ceramic or terracotta pots. They look natural. Plastic pots feel cheap for a gift. If you’re on a budget, you can paint a terracotta pot. I’ve done that. It looks custom and thoughtful.
Step 2: Prepare the Inner Pot
I keep the plant in its nursery pot. I wrap the nursery pot in a layer of brown kraft paper. This hides the plastic. I tape the paper in place. I make sure the paper covers the entire pot, including the bottom.
Then I add a layer of moss around the top. I use sphagnum moss. It looks tidy. It also helps retain moisture. I soak the moss in water for a minute, then squeeze it out. I place it around the stem of the plant.
Step 3: Create a Moisture-Control Layer
I learned this trick from a gardener friend. I put a layer of pebbles at the bottom of the decorative pot. This elevates the nursery pot. If the recipient waters the plant, the excess water falls to the pebbles. It doesn’t touch the roots.
I use small river pebbles. About an inch deep. I place the nursery pot on top. Then I fill the gap between the nursery pot and the decorative pot with more pebbles. This keeps the pot stable. It also looks nice.
Step 4: Wrap the Pot
I use a piece of burlap or linen fabric. I cut it to about 18 inches wide. I wrap it around the decorative pot. I tie it with a jute string at the top. This gives a rustic look.
For a more elegant gift, I use a silk ribbon. I wrap the ribbon around the pot and tie a bow. I hide a small care card under the ribbon. I write the plant name and care instructions on the card.
Step 5: Add a Care Card
This is crucial. I always include a care card. Without it, the plant dies. I write in simple language. Here’s what I put on my cards:
- Water: Only when the top inch of soil is dry. Stick your finger in.
- Light: Bright indirect light. No direct sun.
- Temperature: Warm room. Above 60°F.
- Winter: The plant will go dormant. Stop watering. Store the tuber.
I also include my phone number. If they have questions, they can text me. I’ve gotten a lot of texts. But that’s okay. It saves the plant.
Step 6: Final Presentation
I place the wrapped pot in a gift bag. I add some crinkle paper around the pot. This keeps it stable during transport. I close the bag with a small sticker. I write the recipient’s name on the sticker.
If I’m giving the plant in person, I remove the bag. I hand it to them with the care card visible. I always say, “This is a Caladium White Christmas. It’s a special plant. It needs bright light and not too much water. I included the care card.”
Common Problems I’ve Faced (and Fixed)
I don’t want you to think this is all smooth sailing. I’ve had problems. Here are the ones I see most often.
Leaves Turning Yellow
This happened to me twice. Each time, it was overwatering. The soil was too wet. The roots were suffocating. I stopped watering. I let the soil dry out for a week. The yellow leaves stayed, but new leaves came in green.
Leaves Drooping
Drooping leaves usually mean underwatering. I forgot to water once for four days. The leaves went limp. I watered thoroughly. They perked up in a few hours.
Brown Edges on Leaves
This means too much light or low humidity. I had this with my second plant. I moved it away from the window. I also placed a tray of water near the plant. The humidity helped.
FAQ from My Readers
Can I grow Caladium White Christmas from seed?
Technically yes, but I don’t recommend it. Seeds take forever to grow. I tried it once. After three months, I had tiny seedlings. They were weak. Tubers are faster and more reliable. I always use tubers.
How do I store the tuber in winter?
The plant will go dormant when temperatures drop. I stop watering completely. I let the leaves die back. Then I remove the tuber from the soil. I dust it with sulfur powder to prevent rot. I store it in a paper bag in a cool, dark place. Around 55°F. I check it once a month. If it’s soft, it’s rotting. I throw it away.
Can I give a Caladium White Christmas as a gift to a beginner?
Yes, but include the care card. I gave one to my grandmother. She kept it alive for a year. She followed the card. It’s not hard if you follow the rules.
Final Thoughts
Growing Caladium White Christmas as a gift is rewarding. It takes two weeks to get a plant ready for giving. You just need to avoid overwatering, choose the right light, and use a pot with drainage. The wrapping is the fun part. It makes the gift special.
I’ve given these plants to friends, family, and coworkers. Everyone loves them. They’re unusual. They’re beautiful. They’re a conversation starter. And honestly, they’re not that complicated once you know the basics.
So go ahead. Plant that tuber. Wrap that pot. Hand it over with a smile. And if they kill it, don’t worry. You can always give them another one next year.





