 bluename
 How to Grow Caladium Strawberry Star for Beginners: Easy Steps
I killed my first three Caladium Strawberry Star plants before I figured out what they actually need. Here's the short answer: place your Caladium Strawberry Star in bright indirect light, water only when the top inch of soil feels dry, and use a pot with drainage holes. I learned this the hard way over two weeks of careful observation.
Why I Chose Caladium Strawberry Star
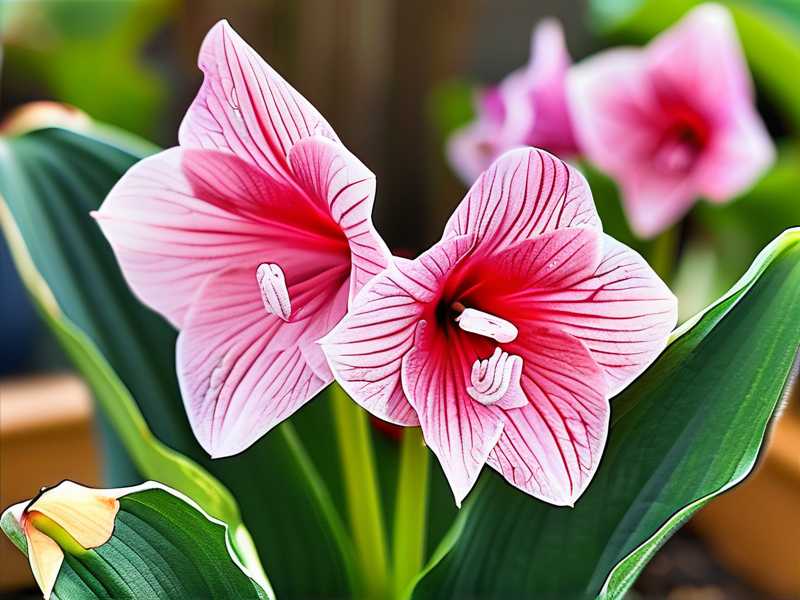
I remember walking into a local nursery and spotting this plant. The leaves looked like someone had splattered pink paint across green canvas. I had to have it. Many people feel the same way about this variety. It's stunning.
But here's the thing. This plant can be tricky for beginners. I know because I've been there. I've made mistakes. I've watched leaves turn yellow and stems rot away. Let me share what I discovered during my two-week experiment.
My Two-Week Observation Journal
Week One: Getting Started
Day one was exciting. I brought my Caladium Strawberry Star home. I placed it on my kitchen counter where morning sun filtered through the window. The leaves looked happy.
Day three came. I noticed the soil felt dry. I watered it. Not too much, I thought. Just enough to moisten the top layer.
Day five. A leaf started drooping. I panicked. What did I do wrong? I checked the soil. It felt wet. Too wet.
Day seven. Another leaf turned yellow. I realized my mistake. I had overwatered it. Actually, I had watered it three times in five days. That's too much.
Week Two: Making Changes
Day eight. I stopped watering. I let the soil dry out completely. I moved the plant to a spot with more airflow.
Day ten. The drooping stopped. The yellow leaf stayed yellow, but the others looked better.
Day twelve. I watered again. This time I waited until the top inch was completely dry. I used my finger to check. Simple but effective.
Day fourteen. New growth appeared. A tiny unfurling leaf. I felt relieved. The plant was recovering.
Three Deadly Mistakes Beginners Make
Mistake One: Watering Too Much
This is the number one killer of indoor plants. 90% of indoor plants die from overwatering. I learned this after killing my first Caladium.
I used to water every other day. I thought plants needed constant moisture. Actually, they need oxygen around their roots. Too much water suffocates them.
My solution? Wait until the soil feels dry one inch down. Stick your finger in the soil. If it feels damp, wait another day. Simple.
Mistake Two: Wrong Light Placement
My second plant died from too much direct sun. I put it on a south-facing windowsill. The leaves got scorched within three days.
Then I tried a dark corner. That was worse. The leaves stretched out thin and pale.
The sweet spot is bright indirect light. Think of a spot near an east-facing window. Or a few feet away from a south-facing window. The light should be bright but not directly hitting the leaves.
I found that my kitchen counter with a sheer curtain works perfectly. The curtain diffuses the harsh afternoon sun.
Mistake Three: Using the Wrong Pot
My third plant died in a pot without drainage holes. I thought I was being clever. I used a decorative ceramic pot without any holes at the bottom.
Water pooled at the bottom. Roots rotted. The plant died within two weeks.
Now I only use pots with drainage holes. I put a saucer underneath to catch excess water. This simple change saved my plants.
According to the RHS (Royal Horticultural Society), proper drainage is essential for healthy root development. They recommend pots with at least one drainage hole.
The AHS (American Horticultural Society) also emphasizes this point. They state that container plants need drainage to prevent root rot.
My Step-by-Step Growing Guide
Step One: Choose the Right Pot
Pick a pot that's one size larger than the nursery pot. Make sure it has drainage holes. I prefer terracotta pots because they help wick away extra moisture.
Plastic pots work too. Just be careful not to overwater. Plastic holds moisture longer.
Step Two: Prepare the Soil
Caladium Strawberry Star needs well-draining soil. I mix regular potting soil with perlite. Three parts soil to one part perlite.
This mixture allows water to flow through easily. It also holds enough moisture for the roots.
Some people add peat moss. I tried that. It held too much water. Stick with perlite.
Step Three: Plant at the Right Depth
Plant the tuber about two inches deep. The growth nodes should face upward. I learned this from a gardening forum.
If you plant too deep, the tuber might rot. Too shallow, and the roots won't establish well.
Step Four: Water Correctly
This took me the longest to master. Here's my routine:
I water only when the top inch of soil feels dry. I use my finger to test. If it's dry, I water slowly until water comes out the drainage holes.
Then I empty the saucer. Standing water causes root rot.
During my two-week experiment, I watered only three times. That was perfect.
Step Five: Find the Right Light
Bright indirect light for most of the day. A few hours of morning sun are fine. But avoid afternoon direct sun.
I rotate my plant every few days. This ensures even growth. The plant grows toward the light source.
Step Six: Maintain Humidity
Caladium Strawberry Star loves humidity. I live in a dry climate. So I use a pebble tray.
Fill a tray with pebbles. Add water until it reaches just below the top of the pebbles. Place the pot on top. The evaporating water creates humidity.
You can also group plants together. They create their own humid microclimate.
Step Seven: Fertilize Lightly
I use a balanced liquid fertilizer at half strength. Once a month during growing season. That's from spring to early fall.
Don't fertilize during winter dormancy. The plant rests then.
I made the mistake of over-fertilizing once. The leaves got burned at the edges. Less is more.
Common Problems and Solutions
Yellow Leaves
I saw this during my first week. Usually caused by overwatering or too much sun.
Check the soil moisture. If it's wet, stop watering. Let it dry out. If the spot is too sunny, move the plant.
Drooping Leaves
This happened to me on day five. The soil was too wet. Roots weren't getting oxygen.
Fix: Let the soil dry completely. Then water less frequently.
Brown Leaf Edges
Low humidity causes this. I dealt with this issue in my dry apartment.
Solution: Use a pebble tray or mist the leaves occasionally. Don't mist too often though. Wet leaves can develop fungal issues.
Leggy Growth
This means not enough light. The plant stretches toward the light source.
Move it closer to a window. But not into direct sun.
Seasonal Care Tips
Spring and Summer
This is the active growing period. Water more frequently. But still check soil moisture first.
Fertilize once a month. Provide bright indirect light.
Fall and Winter
The plant goes dormant. Leaves may die back. That's normal.
Reduce watering significantly. Let the soil dry out between waterings.
Some people dig up the tubers and store them. I leave mine in the pot. I just water less.
Why This Plant Is Worth the Effort
I honestly thought about giving up after my third plant died. But the beauty of Caladium Strawberry Star kept me trying.
The leaves are like living art. Each leaf has a unique pattern. The pink spots and streaks vary from leaf to leaf.
When the plant is healthy, it creates a stunning display. Visitors always comment on it.
Plus, it's not that hard once you understand the basics. You just need patience and observation.
Things I Wish I Knew Earlier
I wish someone had told me to check soil moisture before watering. I would have saved my first three plants.
I wish I knew about drainage holes. I bought a beautiful ceramic pot without them. That was a waste.
I wish I understood light requirements. Direct sun burns leaves. No light kills growth.
These are small things. But they make a huge difference.
Expert Tips from My Experience
After two weeks of focused observation, here's what I learned:
The plant communicates. Yellow leaves mean too much water or sun. Drooping means root stress. Stretching means not enough light.
Listen to your plant. Check it daily. Touch the soil. Look at the leaves.
I check my plant every morning. It takes thirty seconds. This habit prevents problems.
The RHS recommends regular inspection of houseplants. Early detection prevents major issues.
The AHS suggests keeping a plant journal. Note watering dates and leaf changes. This helps identify patterns.
Propagating Caladium Strawberry Star
I tried propagating this plant recently. It's not as hard as I thought.
You can divide the tubers when they're dormant. I did this last fall.
Simply cut the tuber into sections. Each section needs at least one growth node. Let the cut pieces callus over for a day. Then plant them.
I got three plants from one tuber. That's a good deal.
Common Myths Debunked
Myth: Caladiums need constant moisture. Reality: They need consistent moisture but not constant wetness. Overwatering kills them.
Myth: They only grow outdoors. Reality: They thrive indoors with proper care. I keep mine inside year-round.
Myth: They're impossible for beginners. Reality: They just need specific care. Once you understand their needs, they're manageable.
My Final Thoughts on Growing This Plant
Growing Caladium Strawberry Star taught me patience. It taught me to observe carefully. It made me a better plant parent.
The first two weeks are critical. That's when most mistakes happen. Pay attention during this period.
If you follow the steps I outlined, you'll avoid my early failures. Your plant will thrive.
Remember: water less than you think. Give bright but indirect light. Use a pot with drainage.
That's all it takes. Really.
Frequently Asked Questions
How often should I water my Caladium Strawberry Star?
Water when the top inch of soil feels dry. This might be every 4-7 days depending on your environment. Check with your finger before watering.
Can I grow Caladium Strawberry Star in low light?
It will survive but won't thrive. The leaves may become sparse and leggy. Bright indirect light is best for vibrant leaf patterns.
Why are my Caladium leaves turning brown at the edges?
This is usually low humidity. Use a pebble tray or group plants together. You can also use a small humidifier near the plant.
I hope my experience helps you avoid the same mistakes I made. Happy growing.





