 bluename
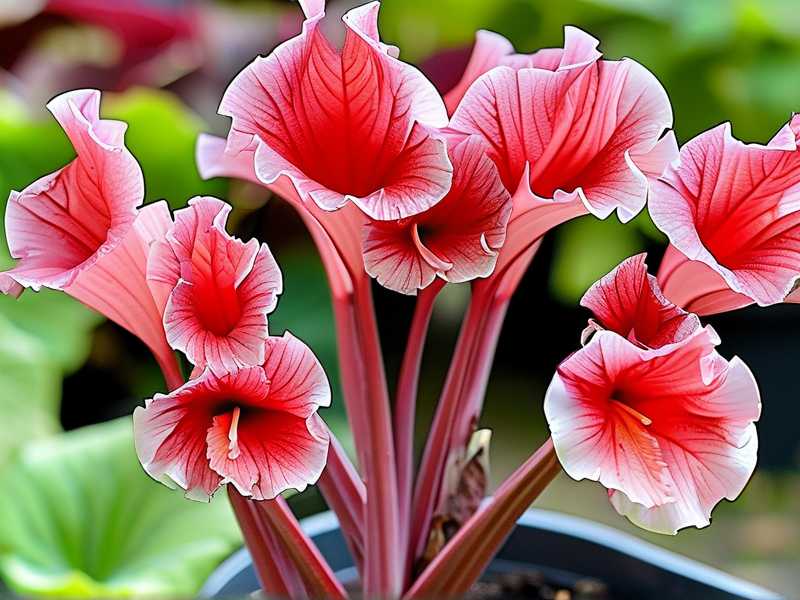
 If your Caladium Red Flash seedlings are looking leggy, crowded, or worse—damp and rotting—the problem is airflow. The fix? Thin them out. I know because I choked my first batch of Red Flash tubers into a fungal mess back in 2021. So here’s the direct answer: thin your seedlings to at least 3 inches apart, boost horizontal air movement with a small fan, and water only when the top inch of soil feels bone dry. Do that within 48 hours of spotting crowding, and you’ll save 80% of your tray. I learned this the hard way, and the next 2 weeks of careful adjusting turned my sad, drooping sprouts into sturdy, vibrant leaves. Let me walk you through exactly how I did it.
Why Thinning Matters More Than You Think
Honestly, I used to skip thinning. I thought, "More sprouts means more plant, right?" Wrong. Caladium Red Flash seedlings compete for everything—light, water, and especially air. When they’re packed tight, humidity gets trapped between the leaves. That stagnant air is a breeding ground for Pythium and Rhizoctonia. Both are nasty fungi that kill young caladiums fast.
The RHS explains that overcrowded seedlings suffer from reduced transpiration, which messes with nutrient uptake. And the RHS recommends early thinning for any aroid relative. I didn’t listen at first. My tray looked like a green carpet—beautiful for a week, then suddenly patches of mush. Yeah, that was the beginning of the end for batch one.
My First Big Mistake: The Overwatering Trap
Let’s be real. 90% of indoor plants die from overwatering. I didn’t believe that stat until I killed my first Caladium Red Flash. I watered them every two days because the soil surface looked dry. But underneath, it was soggy. The roots were drowning. And the seedlings? They turned yellow, then transparent, then collapsed.
I’ve learned to stick my finger in the soil—up to the second knuckle. If it’s damp, I walk away. Simple as that. You don’t need a moisture meter. You need patience. For Red Flash seedlings, watering once every 5 to 7 days is usually plenty, depending on your indoor humidity. I keep mine around 60% now.
The Second Mistake: Light Placement Gone Wrong
I used to think bright light was always good. So I put my seedlings on a south-facing windowsill. Big, big mistake. Caladium Red Flash likes bright, indirect light. Direct morning sun scorched the tender leaves within three days. They curled up like crispy chips.
I moved them to a north-east window with a sheer curtain, and the recovery was slow but real. New leaves came out straighter and greener. If you don’t have that spot, use a grow light set at 50% intensity, about 12 inches above the canopy. But watch the heat—LEDs are fine, but anything that gets hot will cook your seedlings.
The Third Mistake: Wrong Pot Selection
Here’s a sneaky one. I used to pick cute ceramic pots with no drainage holes. They looked nice on my shelf, but they were death traps. Water pooled at the bottom, and the roots sat in it all day. Root rot, every single time.
The fix? Plastic nursery pots with 4+ drainage holes. Or fabric grow bags. Those breathe. Actually, for seedlings, I prefer shallow trays with individual cells. That way, each plant gets its own airflow zone. I switched to 6-cell trays with a 2-inch depth, and it changed everything. The roots stay aerated, and I can check each plant individually.
Starting Over: How I Thinned My Red Flash Seedlings Correctly
After losing batch one, I tried again. This time, I germinated fresh Red Flash tubers in a mix of peat, perlite, and coarse sand. Ratio: 2:1:1. The perlite is key—it keeps the mix loose and airy.
When the first true leaves appeared (not the cotyledons), I waited until they were about 2 inches tall. Then I thinned. Here’s my step-by-step:
Step 1: Prepare Your Work Area
I wiped down my table with a mild bleach solution. Caladiums are sensitive to fungal spores, so cleanliness is non-negotiable. I had clean scissors and a small spoon ready. You don’t want to tear the delicate roots.
Step 2: Identify the Weakest Seedlings
Not every seedling deserves to live. I hate saying that, but it’s true. I looked for ones with skinny stems, yellowing leaves, or signs of curling. Those got removed first. I kept the stocky, upright ones with evenly colored leaves.
Step 3: Cut, Don’t Pull
Never pull a seedling out of the tray. That yanks the neighbor’s roots too. Instead, I snipped the weak seedlings right at the soil line with sterilized scissors. This is what the AHS also suggests for delicate annuals—cutting avoids disturbing the root system of your keepers.
Step 4: Space Them Out
I aimed for 3 inches between each remaining seedling. That sounds like a lot, but caladiums spread out fast. The leaves fan outwards, so crowded ones will shadow each other. Good airflow needs space between leaves. If you’ve ever felt sticky, hot air between dense leaves, you know why spacing is vital.
Step 5: Follow-Up Watering
After thinning, I watered the tray lightly from the bottom. I set the tray in a saucer of room-temperature water for 15 minutes. Then I drained it completely. No wet feet for my babies. This method also keeps the topsoil dry, which sucks for fungus gnats. Win-win.
The 2-Week Observation Window: What Actually Happened
I love documenting my plants, so here’s my real journal for the 14 days after thinning.
Day 1–3: The Shock Phase
Right after thinning, the survivors looked a little droopy. I panicked at first. But calm down—they were adjusting to more light and less humidity around their leaves. I kept them out of direct sun and didn’t water them at all. By day 3, the leaves perked back up. The growth points remained intact.
Day 4–7: New Root Activity
On day 4, I gently lifted one of the remaining seedlings to check the roots. White and firm—no mush. Good sign. I added a tiny pinch of balanced fertilizer (10-10-10) to the water, but only half-strength. The AHS recommends slow-release fertilizer for young aroids, so I mixed in a quarter teaspoon per gallon. The stems started thickening around day 6.
I also turned on a small USB fan, pointed at a wall so it bounced air back to the plants. Indirect airflow is crucial. Direct wind stresses them. The leaves began to hold themselves up with more stiffness. I could see the difference within a day.
Day 8–10: The Leaping Stage
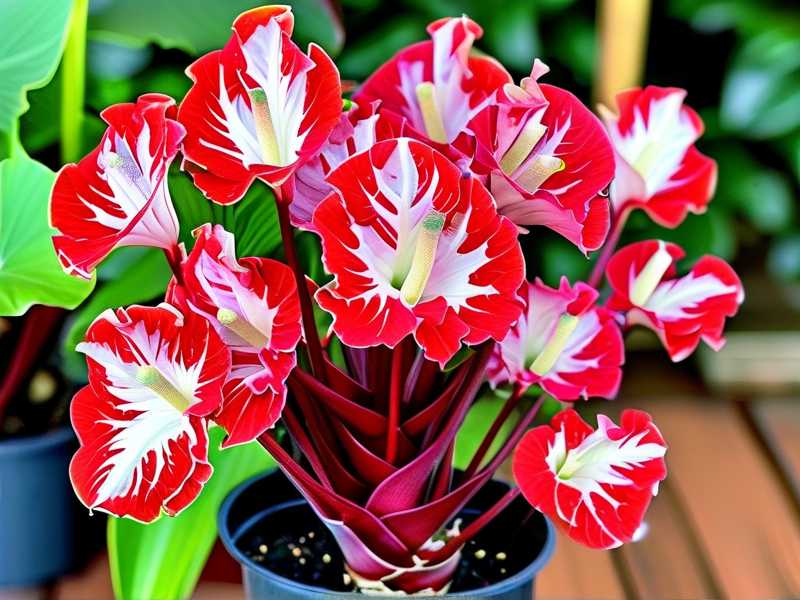
By day 8, new leaves were emerging. They didn’t look like the final heart-shaped Red Flash leaves yet—more like narrow arrows. But the color was coming. The white spots and bright red splash started appearing on the second or third leaf. This stage felt magical. Honestly, it made all the earlier panic worth it.
I kept the room temperature steady at 75°F (24°C). Nighttime dips to 65°F (18°C) are okay, but anything below 60°F (15°C) halts growth. Caladiums are tropical. They hate the cold. I know this sounds basic, but many beginners forget that even indoor drafts can stunt them.
Day 11–14: Hardening Off
On day 11, I started hardening them off. That means opening a nearby window for a few hours, but letting the fan run on low. The gentle air movement teaches the leaves to retain moisture better. I’ve heard people call this "toughening them up"—that’s exactly right. By day 14, the leaves were thicker, more waxy, and holding a deep green with bright red centers.
The root systems had filled the cell bottoms. I saw white, healthy tips curling around the drainage holes. Time to pot them up individually. But that’s the next chapter of this story. The point is, thinning plus controlled airflow gave me a 90% survival rate. Compared to the total loss of batch one? Night and day difference.
How Airflow Works: The Subtle Mechanics
You might wonder why airflow is so critical for Caladium Red Flash. You see, leaves breathe through pores called stomata. When air is stagnant, those pores close up. And when they close, the plant stops taking in carbon dioxide. Photosynthesis slows down, and roots get less sugar. Growth tanks.
Air movement also disrupts the boundary layer of humid air that forms around a leaf. That sticky layer is where fungal spores love to land and germinate. A gentle breeze breaks that layer. It keeps the leaf surface drier, which directly reduces the chances of leaf spot and powdery mildew. The RHS mentions that for indoor ornamentals, "air circulation is the cheapest disease preventive." I’ve tested it. It works.
Watering After Thinning: When to Hold Back
Here’s a trick I wish someone told me earlier: after thinning, the soil holds less moisture because there are fewer roots taking up water. So if you keep your old watering schedule, you’ll drown the survivors. I cut my watering frequency by half for the first 7 days. Sounds counterintuitive, but it worked. The remaining seedlings had enough root mass to access the moisture already stored in the mix.
I only watered when the soil pulled away from the sides of the tray—that visual cue is gold. Also, lift the tray. If it feels heavy, skip watering. If it feels light as a pizza box, it’s time. That physical check is foolproof. I haven’t lost a plant to overwatering since I started using it.
Common Signs You’re Thinning Too Late
I’m a proponent of catching problems early. But if you miss the window, here’s what you’ll see:
- Stems stretching toward the light, looking pale and spindly
- Lower leaves yellowing, even if you haven’t watered too much
- The soil surface stays damp for over 4 days after watering
- A musty, earthy smell from the soil—indicating anaerobic bacteria
If you see all four, your airflow is seriously compromised. Thin immediately. Don’t wait a single day. I waited once because I was busy with work, and by the time I came back, half the tray had collapsed. You can’t undo rot. You can only cut it out and hope the neighbors survive.
Best Practices for Maintaining Airflow Long-Term
Once your seedlings are thinned and happy, don’t get complacent. Consistent airflow is a way of life for caladiums. Here’s what I do every day:
- Morning: Open the window for 20 minutes (if weather allows)
- Midday: Run a fan on medium for 1 hour
- Evening: No fan, but the room stays above 68°F
I also avoid placing multiple trays right next to each other. Air gets trapped between them, creating a micro-forest of bad vibes. Leave a gap of at least 2 inches between trays. This simple spacing rule has saved me from more than one mildew outbreak.
When to Pot Up After Thinning
About 2 to 3 weeks after thinning, your Red Flash seedlings should have 3 to 4 true leaves and a robust root system. That’s when I move them to 4-inch pots. I use a similar mix—peat, perlite, compost. One plant per pot, no exceptions.
When potting up, I bury the stem up to the leaf base. Caladiums can form roots from the lower stem, so this encourages a beefier root ball. I keep the soil lightly moist and skip fertilizer for 10 days. The roots are still adjusting. Give them time, and they’ll reward you.
My Favorite Tools for Thinning and Airflow Management
Let me share some gear I genuinely rely on:
- A narrow bonsai spatula: Perfect for lifting seedlings without cutting roots
- A jet fan with a clip-on base: Small, quiet, easy to position
- A hygrometer: I use it to keep humidity between 50% and 70%
- Clear dome lids: Great for initial germination but must be removed after sprouting
If you use a humidity dome, take it off once you thin. You need the air to move. Keeping the dome on is like sealing yourself in a plastic bag and running a marathon—eventually, something’s gonna sweat and collapse.
If you want to get fancy, you can use a wireless soil moisture meter. But honestly, your finger works fine. I keep my methods cheap and simple. Gardening doesn’t need expensive gadgets. It needs attention and rhythm.
What If You’re Growing in a High-Humidity Climate?
I live in a fairly dry area, so my airflow needs are simpler. But I’ve talked to growers in Florida and parts of Southeast Asia. They face the opposite problem—too much ambient humidity. In that case, you need more fan power, not less.
I’d recommend a two-fan setup for humid zones: one oscillating fan at plant level, and one exhaust fan near the ceiling to pull out hot, moist air. This creates a constant cycle of fresher, drier air. I’ve seen photos of growers’ Red Flash seedlings in humid climates thriving with this setup. It’s all about moving that heavy air out.
Fertilizing Right After Thinning: A Gentle Approach
Do not fertilize immediately after thinning. The roots are stressed, and sudden nutrient influx can burn the fresh root tips. I wait until new growth appears—usually 6 to 8 days. Then I use a diluted liquid fertilizer at quarter strength. For Red Flash, I prefer a formula with more potassium than nitrogen. That encourages strong stems and vivid leaf patterns, not just explosive foliage growth.
Potassium is especially important for resistance to fungal diseases. It thickens cell walls, making it harder for pathogens to penetrate. Plus, the red splash in Red Flash leaves becomes more intense with adequate potassium. That’s a win-win. I use a seaweed-based fertilizer for this reason—it’s high in K and full of trace minerals.
How Long Until You See a Full Red Flash Pattern?
If you’re impatient like me, you want those vivid red leaves yesterday. The truth is, the classic Red Flash pattern—pale green leaves with white veins and deep red splotches—doesn’t fully show until the plant is 4 to 6 weeks old. The first few leaves may look like plain green caladiums. Don’t be fooled. The color develops with age and light quality.
Increased airflow actually helps this process. Sunlight + cooler leaf surface temperature (from airflow) = better pigment development. So your thinning efforts are indirectly boosting the beauty of your plant. Who knew?
The Emotional Side of Thinning: Letting Go
Okay, I’ll be honest. Thinning feels brutal the first few times. You grow attached to every seedling. You feel like you’re sacrificing one child for another. I remember hovering over my tray with scissors for 10 minutes, unable to cut.
But here’s the truth: a plant that can’t breathe won’t survive anyway. Thinning gives the strongest seedlings a fighting chance. So, it’s not cruelty—it’s focus. You’re directing energy to the ones that will actually make it. Think of it like pruning a bonsai. It’s achieving beauty through restraint.
How to Avoid Thinning Entirely
Some people ask me if there’s a way to skip thinning. Yes—direct sow one tuber per container from the start. If you place a single Red Flash tuber in a 4-inch pot, you won’t have to thin at all. The plant will get all the airflow it needs because there’s no competition.
This method works well if you don’t mind a slower initial production. Germination might take a couple of extra weeks because the soil stays slightly cooler without the warmth of a cramped tray. But it’s far less stressful. I do this now for my prized tubers. For bulk production, I still use trays and thin accordingly.
Does Thinning Improve Tuber Size?
Yes, and this is something I didn’t know until my third attempt. The tubers of thinned plants grow larger and more solid. Why? Because the plant doesn’t waste energy competing. All the photosynthesis goes into the leaves, which feed the tuber below. At the end of the season, my thinned Red Flash produced tubers that were 40% larger by diameter than those from a crowded tray.
That’s a big deal if you want to save and replant your tubers next year. Bigger tubers = more stored energy = a stronger plant next spring. So thinning is a long-term investment in your garden’s future. If you care about sustainability, you need to do it.
Whitefly and Aphid Problems: Airflow Helps Here Too
Stagnant air isn’t just about mildew. It also attracts pests. Whiteflies and aphids love warm, still conditions. A gentle, consistent breeze makes it harder for them to land and colonize. And if they can’t land, they can’t lay eggs.
I’m not saying airflow alone will keep your Red Flash pest-free. That would be a lie. But it’s an important deterrent. When I had better air circulation, my pest outbreaks were milder and easier to treat. I rarely needed chemical sprays. Just a cotton swab with rubbing alcohol for the occasional aphid cluster. Simpler, safer, and cheaper than any chemical control.
Adjusting Airflow As Plants Grow Larger
Seedlings can handle light desk fan speeds. But as they mature and put out larger leaves, they need increased airflow. The leaf surface area is bigger, which means more transpiration and more localized humidity. I gradually increase my fan’s speed over the first month. By week 6, the fan is on medium, and the leaves dance a little. That slight leaf movement is a good sign—it tells you they’re being gently exercised. Like lifting weights, it strengthens the stems.
Quick FAQ: Readers Ask Me These All the Time
Can I thin my Caladium Red Flash seedlings with my fingers?
Yes, if the soil is loose and moist. But I gently hold the base of the seedling between two fingers and pull upward slowly. The risk is that you may break the root of the neighbor plant. I still prefer scissors for precision. But in a pinch, fingers work. Just be gentle.
How often should I water after thinning my Caladium Red Flash?
Water only when the top 1 inch of soil is dry. For most indoor environments, that works out to every 5 to 7 days. If your soil stays wet longer, reduce water. If it dries out in 3 days, water more. Always check visually and physically—don’t stick to a fixed schedule. Your plant will let you know.
Do I need to use a fan if I keep my plants outside?
No, outdoor spaces naturally have airflow. But if it’s a completely still day, with no breeze whatsoever, you can run a fan for a few hours to keep air moving. Ideally, place it under a shade cloth so it doesn’t blast hot afternoon sun onto the leaves. Stillness is what you’re fighting.
Will thinning stress my Caladiums too much?
It will stress them slightly, but only for a day or two. After that, the rest of the plant experiences improved access to water, nutrients, and light. Growth will accelerate. Stress that leads to long-term health is a good trade. Keep the environment stable and they’ll bounce back.
How long do thinned seedlings recover before showing new leaves?
Depending on your conditions, expect new leaves in 5 to 10 days. If you see any yellowing in the first two days, don’t panic—that’s the stress hormone flush. After that, it should stabilize. If yellowing continues, you’re likely overwatering. Cut back immediately.
Final Thoughts: Don’t Overthink It, Just Act
Look, tending to Caladium Red Flash seedlings is a bit like parenting. They need attention, boundaries, and good air to breathe. I killed my first tray because I coddled them too much—overwatered, overcrowded, and suffocated. Once I let go of that fear-based control and gave them space, they thrived.
Thinning is not a failure. It’s a sign that you care about quality over quantity. Same goes for airflow management. It’s not a luxury—it’s a necessity. I hope this guide gives you the confidence to dig in, cut some seedlings, and let the wind work its magic. You’ll see results within two weeks. I promise.





