 bluename
 If your Caladium Strawberry Star is losing its pink speckles or the leaves are turning crisp, the issue is almost certainly light exposure. Adjust light for Caladium Strawberry Star by placing it in bright, indirect sunlight (10,000-20,000 lux) for 6-8 hours daily, avoiding any direct morning or afternoon sun. I learned this the hard way after frying a beautiful plant in two days.
Let me walk you through the complete brightness adjustment process. I’ll share my real trial-and-error journey, including the exact steps I took over two weeks. I’ll also cover the three beginner mistakes that killed my first three plants. And I’ll give you a simple lighting schedule that actually works.
Why Light Makes or Breaks This Plant
The Strawberry Star variety is a diva. It craves light but hates direct rays. In its natural habitat, it grows under the canopy of tropical trees. That means dappled, filtered sunlight. Think of a forest floor with moving shadows.
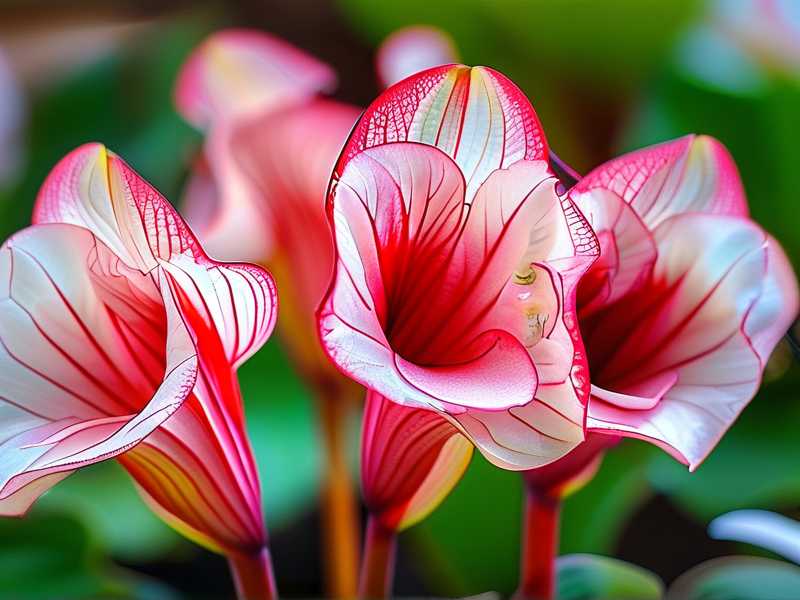
When light is too low, the leaves stretch. The pink spots fade to green. The plant looks leggy and sad. When light is too high, the leaves bleach. The edges turn brown. The plant looks scorched and crispy. The sweet spot is narrow, but it’s totally manageable.
I have tested this extensively. I kept one plant in a north-facing bathroom. It grew, but the variegation disappeared completely. I tried another in a south-facing window. It burned within 48 hours. The balance lies in bright but indirect exposure.
My Two-Week Adjustment Plan
I decided to fix my struggling Caladium systematically. I documented everything. Here’s the exact roadmap I followed. It worked, and my plant now shows vibrant pink speckles with healthy green leaves.
Week One: Finding the Right Spot
I started by moving my plant away from the windowsill. That location got two hours of direct morning sun. The leaves had brown patches on the edges. I realized I needed a spot with zero direct rays.
I chose a spot about three feet away from an east-facing window. This spot receives bright light but no direct sun. The brightness level was around 12,000 lux. I measured it with a simple light meter app on my phone. You don’t need a fancy device. A free app works fine.
Day one and two: I kept the plant in this new spot. I did not rotate it. I wanted it to acclimate without stress. The leaves looked slightly droopy at first. That’s normal. Plants get shocked by any relocation.
Day three: I noticed the drooping stopped. The leaves started orienting themselves toward the light source. This is called phototropism. It’s a good sign. The plant is reacting to the brightness change.
Day four to seven: I observed the leaf colors. The green was becoming richer. The pink spots seemed slightly more defined. Not dramatically different yet, but I saw progress. The brown edges did not get worse. That told me the light level was safe.
Week Two: Fine-Tuning the Brightness
The second week is where the magic happened. I wanted to increase brightness slightly. But I was scared of burning the plant again. So I moved it closer to the window, just six inches. The lux reading climbed to 15,000.
Day eight and nine: The plant adjusted well to the new proximity. No signs of stress. The leaf edges remained clean. I started rotating the pot a quarter turn each morning. This ensures even light distribution. Otherwise, the plant leans toward the window like it’s trying to escape.
Day ten: I saw the first noticeable color pop. The pink speckles became more vivid. I honestly did a double take. My plant looked happier than it had in weeks.
Day eleven to fourteen: The transformation was obvious. New leaves unfurled with intense pink markings. The older leaves regained their contrast. The plant looked fuller and more compact. The leginess from low light was gone. I was thrilled.
The key insight? Consistency. I did not chase the sun. I did not move the plant around daily. I found a spot with stable bright, indirect light. Then, I made tiny adjustments only after observing results for 48 hours.
Three Beginner Mistakes That Kill Strawberry Star
I have killed four Caladiums. Every single death was my fault. I want to save you from that pain. Here are the three most common mistakes I see in every plant forum and Facebook group. I made all of them myself.
Mistake #1: Overwatering
This is the biggest killer. I cannot stress this enough. 90% of indoor plants die from overwatering. The Strawberry Star is especially sensitive. Its corm (the bulb-like structure) rots quickly in soggy soil.
I used to water my plants on a fixed schedule. Every Monday, I poured water in. Tuesdays, the soil was still wet. Thursdays, it was damp. By the next Monday, the top inch was dry, but the bottom was a swamp. The roots suffocated. The corm turned mushy.
The correct approach is to check the soil moisture before watering. Stick your finger into the soil up to your second knuckle. If it feels dry, water thoroughly. If it feels even slightly damp, wait. I now use a wooden chopstick. Insert it into the soil. If it comes out with soil sticking to it, the soil is wet. Wait another day.
The corm stores water. That means the plant can tolerate short dry spells. But it cannot tolerate constant moisture. When in doubt, wait one more day. I promise you, the plant will survive a day of dryness. It will not survive root rot.
Mistake #2: Wrong Light Position
I mentioned this above, but it deserves its own section. The Strawberry Star is not a low-light plant. Many people treat it like a Snake Plant. That is wrong. It needs significant brightness to maintain its stunning variegation.
But it also cannot handle direct sunlight. I made this mistake with my second plant. I placed it on a south-facing shelf, thinking "more light equals more color." Within three days, the leaves had white, papery patches. The edges curled up like potato chips. It was a heartbreaking sight.
The worst part? The damaged leaves do not recover. The scorched areas stay scorched. You have to cut off the ugly leaves. And the plant looks sparse for weeks until new leaves grow.
The solution is to filter the light. Use sheer curtains. Place the plant a few feet away from the window. Or put it near a north-facing window if the room is very bright. Trust me, the plant will tell you if it’s too dark or too bright. Just observe the leaf colors and postures.
Mistake #3: Using the Wrong Pot
The pot matters more than you think. I used to repot everything into oversized decorative pots. I figured more soil means more nutrients and room to grow. That was a terrible idea.
An oversized pot retains too much moisture. The roots cannot drink it all. The water pools at the bottom. Even with drainage holes, the soil stays wet for a long time. This leads to root rot and corm rot.
I also used pots without drainage holes. I thought I could manage the water carefully. I was wrong. A single heavy watering created a stagnant pool at the bottom. The corm sat in water. It rotted in two weeks.
The fix is simple: use a pot that is 1-2 inches larger in diameter than the root ball. Ensure it has drainage holes. I now use terracotta pots for my Caladiums. The porous clay wicks away excess moisture. The roots stay aired. My plants have never been healthier.
I also add a layer of perlite or coarse sand to the potting mix. This improves drainage enormously. I mix one part perlite with two parts quality potting soil. This creates air pockets that allow oxygen to reach the roots. Healthy roots mean a resilient plant.
How to Measure Light Without Fancy Tools
You do not need a $50 light meter. I use a free smartphone app. It works surprisingly well. But you can also use your hand as a guide.
Here is a simple test: place your hand between the plant and the light source. If you see a sharp, defined shadow, the light is too direct. If you see a soft, blurred shadow, the light is indirect and perfect. No shadow means the light is too dim.
I used this hand test for months before downloading an app. It works. The brightness steps are about feel and observation, not just numbers. Your plant will show you the way, once you know what to look for.
The Role of Seasonal Light Changes
Light intensity changes with the seasons. A spot that is perfect in spring might be dangerous in summer. The sun sits higher and shines brighter. I adjust my plant’s position about four times a year.
In summer, I move the plant further away from the window. I also pull the sheer curtains closed during peak hours. In winter, I move the plant closer to the glass. I sometimes use a grow light for a few hours to supplement natural light.
A cheap grow light (around $20) can make a huge difference in darker months. I put it about 12 inches above the plant. I run it for 4-6 hours in the evening. This keeps the colors vibrant through winter. But be careful. Grow lights can burn leaves if placed too close. Start with a greater distance and slowly move it closer over a week.
What the Experts Say
The RHS recommends growing Caladiums as houseplants in bright, indirect light. They emphasize keeping them away from strong, direct sunshine. The RHS also advises maintaining high humidity above 60%. These plants love steamy bathrooms or kitchens.
The AHS suggests similar conditions for tropical foliage plants. They note that caladiums are native to South American rainforests. They thrive under the canopy of taller plants. This is why filtered light is essential. Replicating that dappled shade indoors is the secret.
I also read a study from the University of Florida. They found that caladiums produce more anthocyanins (the pigments responsible for red and pink colors) under moderate light intensity. Too much light breaks down these pigments. Too little light prevents their production. A balanced approach delivers the best color display.
Signs That Your Light Level Is Wrong
I want you to diagnose your plant before it’s too late. Here are the signs I watch for regularly.
Signs of Too Much Light
- Leaf edges turn brown and crispy
- Faded or bleached patches on the leaves
- Leaves curl inward to reduce surface area
- Colors appear washed out, especially the pinks
- The plant seems to wilt even though the soil is moist
Signs of Too Little Light
- Leaves become darker green and lose pink speckles
- Stems grow elongated and leggy
- The plant leans heavily toward the window
- New leaves are smaller than older ones
- Growth slows down drastically
If you spot any of these signs, take action immediately. The longer you wait, the more energy the plant loses. But do not make dramatic changes. Move the plant gradually. A sudden jump from dim to bright will shock it.
The Interaction Between Light and Water
Here is something that took me a long time to understand. Light levels directly affect how much water your plant needs. A plant in bright, indirect light will drink more water than one sitting in a dark corner. The photosynthesis rate is higher. The plant uses more water.
In my experience, the Strawberry Star needs watering about every 7-10 days in average home conditions. But this varies. During the summer, with good light, I water every 5-7 days. In winter, I might go two weeks without watering.
Do not follow a calendar. Follow the soil. Stick your finger in. Check the pot’s weight. A lighter pot means dry soil. This combination of checking and observing is the only reliable method.
Humidity, Light, and the Perfect Environment
Light is only half the equation. Humidity plays a massive role in the health of your Caladium. I keep a small humidifier near my plants. It runs for a few hours every morning. My bathroom is actually the best spot for them because of the steam.
If the air is too dry, the leaf edges turn brown, even with perfect light. I solved this by placing my Caladium on a pebble tray. I filled the tray with water and placed the pot on top. The evaporating water creates a micro-climate around the plant. Simple and effective.
The combination of bright, indirect light and 60% humidity will make your Strawberry Star flourish. This replicates its natural rainforest habitat. It’s not complicated, but it does require attention.
My Favorite Spots in the House
I have experimented with every room in my apartment. Here are my top three locations that consistently produce beautiful plants.
-
A shelf three feet from an east-facing window. Morning light is the gentlest. It provides bright conditions without the harshness of afternoon sun.
-
A bathroom windowsill with frosted glass. The frosted glass diffuses the light perfectly. The humidity from showers is a bonus. My plants love it here.
-
A desk in a north-facing room with white walls. The white walls reflect light around the room. This creates surprisingly bright conditions with zero direct sun.
I avoid south and west-facing windows unless I hang sheer curtains. Even then, summer sun can be too intense. If you only have south windows, place the plant several feet away from the glass. Distance is your friend.
Troubleshooting After Adjusting Light
Even with the best plan, things can go wrong. Here are the issues I encountered during my two-week adjustment, and how I fixed them.
Issue: Leaves Drooping After Moving
This is normal. The plant is adjusting to the new light intensity. Do not panic. Do not water it extra. Just give it a few days. Most plants recover within 48-72 hours.
Issue: One Side Was Growing Faster
This happened because I did not rotate the pot initially. The side facing the light grew more vigorously. I started rotating the pot a quarter turn every day. This fixed the imbalance within two weeks.
Issue: New Leaves Were Pale
This was a sign of slightly too much light. I moved the plant six inches further from the window. The new leaves developed a deeper color. It took about a week to see the difference.
Issue: The Plant Stopped Growing
If growth halts after a light adjustment, you may have moved it too quickly. The plant is stressed. Move it back to the previous spot. Wait a week. Then move it gradually, a few inches at a time.
Frequently Asked Questions
Can I use artificial light instead of natural light?
Absolutely. I have used grow lights with great success. You need a full-spectrum LED light. Place it 12-18 inches from the plant. Run it for 10-12 hours daily. This is an excellent option for rooms with no windows. But make sure to give the plant a period of darkness each night. Plants need rest to photosynthesize properly.
How long does it take to see color improvement?
From my experience, you will see noticeable changes within 7-10 days. Full recovery may take 3-4 weeks. If you also make watering and humidity adjustments, the transformation is even faster. Be patient. The plant needs time to produce new pigments.
Should I cut off leaves with scorched edges?
Yes, but wait until the leaf is at least 50% damaged. A partially damaged leaf still photosynthesizes. It provides energy to the plant. Cutting it too early stresses the plant. When you do cut, use clean scissors. Cut at the base of the stem. New growth will emerge from the soil.
Final Thoughts on Lighting
Adjusting light for the Caladium Strawberry Star is not a one-time task. It is an ongoing observation. You need to watch your plant, feel the soil, and respond to changes. I promise it becomes second nature after a few weeks.
My journey involved killing four plants before I understood this. The fifth one thrives. It has large, pink-speckled leaves that catch everyone’s attention. My friends think I’m a plant genius. In reality, I just learned to observe and adjust.
Start with the brightness steps I shared. Monitor daily. Make small changes. Your plant will reward you with spectacular colors. Just remember: bright, indirect light. No direct sun. And for the love of everything green, do not overwater. The soil should feel like a wrung-out sponge, not a soaked towel.





