 bluename
 If you are reading this, chances are you just dug up your Caladium 'Red Flash' and you are staring at a pile of knobby, muddy roots wondering what on earth to do next. The short answer? To store Caladium Red Flash corms, you must cure them in a warm, dry spot for a week, then pack them in bone-dry sphagnum moss or vermiculite inside a breathable mesh bag, and keep them in a dark closet where the temperature stays between 50°F and 60°F (10°C-15°C). Do not refrigerate them. Do not seal them in plastic. And for the love of all things green, do not peek at them every day—you will introduce moisture and rot them.
I have been growing these dramatic, pink-splashed beauties for about six years now. In that time, I have lost more corms than I care to admit. I have witnessed the mushy, foul-smelling aftermath of overwatering in winter storage. I have cried over a bag of what used to be twenty healthy corms that turned into a brown slurry because I got lazy. But I also learned the hard way, so you do not have to. This guide is the exact playbook I follow every autumn, and it works. Stick with me, and your Red Flash corms will wake up next spring ready to explode with color.
Why Bother Storing Them at All?
Let’s be real. Caladiums are tropical plants. They are not frost-hardy, and if you leave the corms in the ground over winter in USDA zones 8 and below, they will turn into mush. That is not a guess; that is biology. The corms are full of water, and when that water freezes, the cell walls burst. Game over.
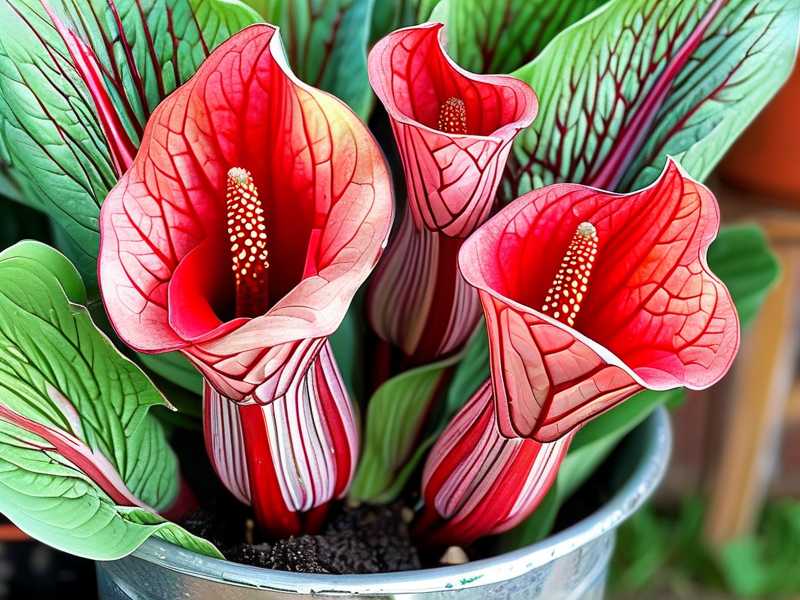
I used to treat them like annuals and rebuy them every spring. But let me tell you, buying a pot of 'Red Flash' at the garden center costs about $8 to $12. A single corm costs half that. If you have a whole border of them like I do, storing them correctly saves you a serious chunk of cash. Plus, your own corms are acclimated to your yard. They get bigger and better every year. That alone convinced me to master the storage game.
The RHS has some solid general guidance on overwintering tender bulbs. I read their notes years ago, and while they cover the basics, I think they miss a few critical real-world details—specifically, about humidity control and the 'curing' step. That is where this guide fills the gap.
The 3 Deadliest Mistakes Every Beginner Makes
Mistake #1: Watering Them Before Storage
I cannot scream this loud enough. 90% of indoor plants die from overwatering, and the same logic applies to storage—but with corms, it is worse because you cannot see them dying. You dig them up, they are wet from the soil, and you think, "I should rinse these off and let them dry." That is fine. But then you put them in a box, still showing any hint of moisture, and shut the lid.
I did this my very first year. I was so proud of my harvest. I put them in a paper bag, folded the top, and tucked them in the basement. Two weeks later, I opened the bag and was hit with a smell like rotting vegetables and damp socks. Every single corm had a soft, brown spot, and the center was oozing. It was a total loss. The moisture trapped in the bag created a sauna, and the corms basically cooked themselves.
The fix is simple. You have to dry them completely before storage. I will walk you through the exact timetable below.
Mistake #2: Getting the Light Wrong (Yeah, Light Matters)
Most people think storage is just "dark and cold." That is mostly true, but there is a nuance. If your storage spot is too bright—say, a garage with a window—the corms might try to break dormancy early. I had that happen one year when my furnace broke and I moved the boxes into a spare room with a big east-facing window. By January, those corms were pushing out pale, etiolated sprouts. They were weak and eventually rotted because they were burning energy they did not have.
The rule of thumb is simple: total darkness is best. A basement corner, a back closet, even under a bed—anywhere that sees zero daylight. I actually cover my mesh bags with an old black t-shirt for double protection. It might be overkill, but hey, it works.
Mistake #3: Choosing the Wrong Pot or Container
I am not talking about growing pots here. I am talking about storage containers. I tried the airtight plastic tub approach once. I drilled holes in the lid, but it was still too sealed. Condensation formed on the inside walls, dripped down, and soaked the moss. That led to rot faster than germination.
On the flip side, a cardboard box or a burlap sack works great because it breathes. But those have their own problem: they are vulnerable to pests. A weevil can chew right through cardboard. I had a small infestation of bulb mites one year, and they spread through my entire batch because everything was in one open box.
What I use now is a mesh produce bag—the kind onions come in from the grocery store. Each corm gets its own bag, and then I put all of those bags into a single cardboard box with a loose lid. That way, air flows, but critters have a harder time getting in.
The Step-by-Step Storage Process (My Exact Method)
Okay, this is the meat and potatoes. I am going to give you my timeline, based on my experience over the last few years. It takes about two weeks from digging to final storage, and I will break it down for you.
Step 1: Digging Them Up (Late Autumn)
I wait until the first frost has blackened the foliage. This is crucial. You want the leaves to die back naturally because that signals the plant to pull all its energy back into the corm. If you cut them green, you risk shrunken, weak corms.
I use a garden fork, not a shovel. A shovel can slice through a corm like a knife through butter. I dig about a foot away from the stem and gently lever the clump up. Shake off the big chunks of soil, but do not wash them yet. Just lay them on a tarp for a bit.
Step 2: The Initial Clean and Curing (Days 1–3)
This is where my method diverges from what you might read elsewhere. Many guides tell you to wash the corms immediately. I say don't. Instead, I let them sit in the garage, spread out on a wire rack, for three days with a fan blowing on them gently. This initial "rough drying" makes the dirt fall off almost by itself.
After those three days, the soil is dry and crumbly. Then I take them outside and use a stiff brush or my fingers to remove the remaining clods. I do not submerge them in water. I find that any water contact at this stage raises the risk of bacterial issues later.
If you must wash them because they are caked in clay, do it quickly and dry them with a towel immediately. Then put them right back on the rack with the fan.
Step 3: Trimming and Inspection (Day 4)
Once they are clean, I trim the dead foliage down to about 1 inch above the corm. I also snip off the wiry, dead roots. Nothing more. Do not take off the living, fleshy roots if you see any—those can be left.
Now, the inspection. This is the moment of truth. I squeeze each corm gently. It should feel firm. Hard, actually. If it feels spongy at all, I toss it. There is no saving a soft corm, and keeping it in your batch will only infect the others.
I look for dark spots, lesions, or any sign of weevil holes. If I see a tiny dark spot, I cut it out with a sterilized knife. I dip the knife in rubbing alcohol between cuts. Then I dust the wound with sulfur powder. That creates a dry scab over the cut. Sulfur powder is cheap and it is a game-changer for preventing rot.
Step 4: The Second Drying Phase (Days 5–7)
Here is where the "cool place" part of the title really kicks in. After inspection, I move the corms to my basement. But it's not cold enough yet to be the final home. I just keep them on a cardboard tray, not touching each other, for another week.
The temperature during this phase should be around 65°F to 70°F (18°C-21°C). This is not cold storage. This is just a dry, airy spot. If you shove wet-ish corms straight into a cold room, you trap moisture. Sitting at this intermediate temp lets them fully dry out all the way through the core.
I know they are ready when they feel lightweight. A fresh corm is heavy with water. A stored corm feels like a dried-out nugget. When you tap it, it sounds a bit hollow. That is what we are going for.
Step 5: Packing and Final Cold Storage (Week 2)
Now we get to the actual storage. I have tried a million packing materials over the years. Peat moss? Too acidic and can hold moisture. Perlite? Works, but it's dusty and can be hard to separate from the corms in spring. Shredded newspaper? Absorbs moisture but can become a soggy mess if there is any humidity surprise.
My current favorite is sphagnum moss. Not peat moss, but the long-fibered, dried sphagnum. It has a natural antifungal property. I buy it in a brick, soak it if I need it for potting, but for storage, I use it completely dry. I place a layer of dry moss in a cardboard shoe box. Then I place my corms on top, not touching each other. Then I cover them with more dry moss.
I put the lid on loosely. Not airtight. Then I move the box to my coolest basement closet. The temperature stays between 50°F and 55°F (10°C-13°C). If your basement is too warm—like 65°F (18°C)—the corms will start sprouting in February. That is too early. You want them dormant.
If you do not have a cool basement, maybe a garage is your best bet. But garages can get below freezing. I put a minimum-maximum thermometer in the box. Yes, in the box. I check it once a week. If it drops below 40°F (4°C), I know I need to bring them inside. If it goes above 65°F (18°C), they will dry out too much, and you'll get shriveled corms.
I have heard people store them in the crisper drawer of the fridge. I really don't recommend it. The fridge is too humid, and the cold is just at the fringe of damaging the tissue. I tried it once with a few corms as an experiment. They came out looking great, but three of the five rotted within a month of planting because the cold had damaged their cell walls. Stick to the cool closet.
Step 6: Monthly Check-Ups (Maintenance)
For the next 3 to 4 months, I do a quick check every month. I do not pull the corms out and squeeze them and poke them. Trust me, leave them alone. I just lift the lid, look at the moss, and feel for any condensation on the top layer.
If the moss feels damp at all, I panic a little, then I fix it. I take the whole box, leave the lid off, and let it air out in the basement for 24 hours. Then I flip the moss around and re-pack.
If I see a single corm that has developed a soft spot, I remove it immediately. I do not touch the other corms with the same hands—I wear gloves or use tongs. Fungal spores spread so easily. I have lost an entire batch because I was lazy about this.
Real-Life Case Study: My 'Red Flash' Recovery
I want you to know that I am not perfect. I have been doing this for years, but a few seasons ago, I almost gave up.
I had a gorgeous 'Red Flash' that was about three years old. It had given me twenty-two corms from one original. That is the beauty of this variety—it multiplies fast. I was so excited about the haul that I got sloppy. I washed them in a bucket of water to get them clean. I thought it would speed things up. I left them in a colander overnight thinking the water would drain off.
The next day, I packed them in a plastic bucket with some damp sawdust I had lying around. I told myself, "This is fine, it's humid air but it's dark." I was wrong.
Two weeks in, I smelled that dreaded stench. I opened the bucket and half of the corms had collapsed. They were stringy and brown. The scent was overwhelming—it smells like a dead animal mixed with yogurt. The sawdust had held moisture against the corms, creating a breeding ground for fusarium.
I salvaged the remaining ten corms. I washed them in a 10% bleach solution for 15 minutes—that's one part bleach to nine parts water. I then rinsed them, dried them with a hair dryer on the cool setting, and redid the whole curing process from scratch. It worked. I got nine out of the ten to survive. The key was sterilizing them and forcing them to dry out completely before re-packing.
That experience taught me that the "cool place" is not just about temperature. It is about the micro-environment around the corm. The air needs to be dry and moving. If the air is stagnant and humid, you will lose them.
Optimal Conditions: Getting Technical for a Second
The AHS emphasizes the need for good air circulation during storage. I learned that the hard way. But let's break down the numbers. I aim for 50-55°F (10-13°C). The relative humidity in the storage area should be between 50% and 60%. If you have a basement, just hang a cheap hygrometer on the wall. It costs five bucks.
If your air is too dry, the corms will shrivel. They will look like raisins. You can fix that by placing a damp paper towel in a plastic bag—not touching the corms—just crumpled in the corner of the box. Just do not let it touch them.
If your air is too damp, you will see mold on the moss. Usually, my basement hovers around 55% humidity in winter, so I rarely have issues. But I do know that if you live in a coastal area, humidity could be your main enemy.
I read a study from a commercial caladium grower in Florida who stated that chilling injury starts below 47°F (8°C). So even if the garage seems "cool," if it hovers at 45°F, you are in the danger zone. The corms will not show immediate signs, but they will fail to sprout in spring.
What About Pests?
Pests might not be the first thing you worry about, but they should be. Spider mites and aphids are the least of your problems during storage. The real nightmare is the caladium borer—a beetle larvae—that eats the inside of the corm. They look fine from the outside, but inside, they are hollow.
I prevent this by dusting every corm with a fine layer of horticultural sulfur before packing. It is a fungicide and a mild insect deterrent. It also hurts nothing. Wear a mask when you do this—the dust is fine and can irritate lungs. I do this every single time now. It costs me $10 a year and saves me from total failure.
One year, I also add a few dried bay leaves to the box. I have no scientific proof this works, but I swear the pest pressure went down. Maybe it was a placebo effect from the sulfur. But I will take any edge I can get.
How to Wake Them Up in Spring
You have stored them all winter. Now what? About 6 to 8 weeks before your last frost date, I pull the corms out of dormancy. I take them out of the moss and inspect them and discard any that went soft.
Here is what I do, and it works every time. I soak them in room-temperature water (about 70°F) for 24 to 48 hours. This rehydrates them. You will see the skin plump up. Then, I put them in a plastic tray with a thin layer of slightly moist sand. I set this tray on a heat mat set to 75°F (24°C). The heat mat is vital. Caladiums are tropical; they need soil temperatures of at least 65°F (18°C) to sprout. If you plant them straight in the garden when the soil is cold, they will rot.
Within three weeks, you will see little noses poking out. That is when you pot them up or plant them out. This method also lets you check the viability of your corms before planting. Do not skip the spring inspection. It will also help you catch the corms that did not store well, allowing you to buy replacements before the garden centers sell out.
The Bottom Line: It's All About Dryness
I know I have thrown a lot of information at you. But here is the takeaway, the single most important piece of advice I can give you. The secret to successful Caladium 'Red Flash' corm storage is not just the cool temperature. It is the dryness. If you get the dryness right, the temperature can be a little off, and you will still be okay. If you get the moisture wrong, you are doomed, no matter what the thermometer says.
I learned this from a fellow gardener at my local community garden who grew up on a farm. He used to store his bulbs in the hayloft, hanging in onion bags. I adopted that principle—good air flow, consistent coolness, and darkness. Almost all my corms survive now.
So here is my final, condensed routine that I want you to remember:
- Dig up corms after frost kills the leaves.
- Dry them rough for 3 days with a fan.
- Clean them, trim them, inspect them hard. Throw away any soft ones.
- Cure them for another 4 days in a warm, dry place.
- Dust with sulfur.
- Pack in dry sphagnum moss in a cardboard box.
- Keep at 50-55°F in total darkness.
- Check monthly for condensation or rot.
- Wake them up in spring on a heat mat.
Do that, and you will never buy a 'Red Flash' corm again. You will be giving them away to friends.
FAQ: Quick Answers to Questions You Still Have
1. Can I store Caladium corms in a plastic bag?
No. Do not even think about it. A plastic bag creates a sealed environment that traps ethylene gas and condensation. That will lead to rot almost immediately. I have seen people recommend using a plastic bag with holes punched in it, and it is still an awful idea. Use a mesh bag or a paper bag. The material needs to breathe. If you have no other option, a paper lunch bag is a thousand times better than a plastic Ziploc.
2. How do I know if a stored corm is still alive?
The easiest way is to feel it. A viable corm is dense and heavy. When you squeeze it, it does not yield. A dead corm feels soft, light, and dry. You might also see signs of mold on the surface. But the most accurate test is the spring soak. If you soak it in water for 24 hours and it plumps up and gets firm, it is alive. If it stays mushy, it is dead. Do not wait until the outdoor planting season to find this out. Test them indoors.
3. What if my storage spot is too warm (above 60°F/15°C)?
If your basement is too warm because you have a furnace down there, you have a few options. One, try the highest shelf in the room (heat rises). Two, find a spot near an exterior wall on the north side of the house. If that still does not cool down, consider a cooler or a mini-fridge that you can set to 54°F (12°C). I know a guy who uses a wine cooler that has no fan—it just keeps a constant temp. That is ideal. As long as the cooler is only set to 50°F, the corms will not freeze. Just ensure you put them in a paper bag inside the cooler so the humidity stays low.





