 bluename
 The Secret to Saving Your Caladium Pink Beauty for Next Year: My 2-Week Drying Routine
If you want to store Caladium Pink Beauty corms successfully, the drying process is non-negotiable. Skip it, and you’ll likely open a bag of mushy rot in March. I learned this after losing an entire batch to mold in my first year of gardening. The short answer: cure them in a warm, dry, dark spot with airflow for 14 days. That’s it. But the details matter, and I’m going to walk you through every step I use now, including the mistakes that nearly made me quit.
I remember the day I dug up my first Pink Beauty. The foliage was still stunning, but the soil felt damp. I was impatient. I brushed off the dirt, tossed the corms into a cardboard box, and shoved them under my bed. Three weeks later, they smelled like a swamp. That was my first hard lesson. Now, I treat drying like a sacred ritual, and my corms survive winter every single time.
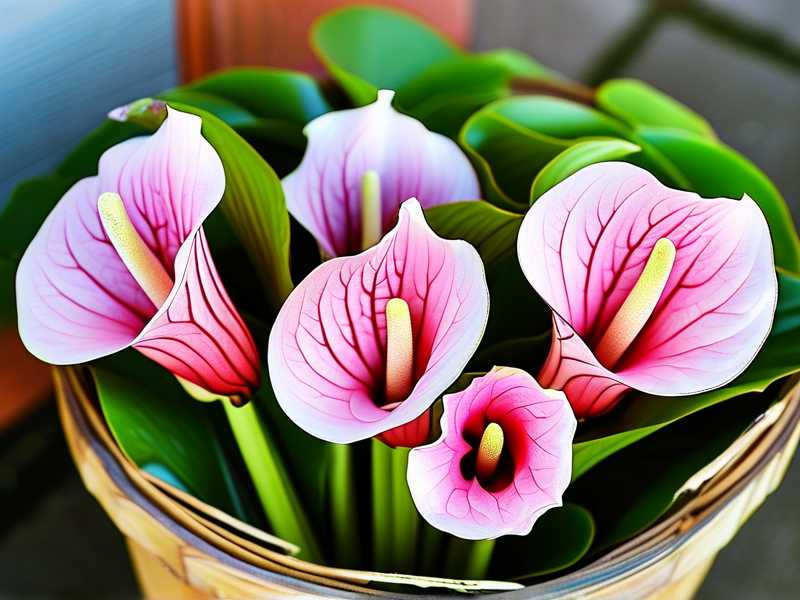
Why Drying Matters More Than You Think
Let’s be honest. Most people kill their Caladiums after digging them up, not before. The corms are essentially storage organs. They hold all the energy for next season. If you store them while they’re still carrying excess moisture, you’re inviting fungi and bacteria to a feast. The Royal Horticultural Society (RHS) specifically advises that bulb-like structures need a period of curing to form a protective layer. This isn't just a tip; it's physiological necessity. The outer skin needs to toughen up.
I’ve read countless forum threads where beginners ask if they can just store them in peat moss right away. And every experienced grower will tell you the same thing: no. You need that two-week window. Think of it like curing wood. You wouldn’t seal wet lumber. The same logic applies to your corms.
My Exact 2-Week Drying Timeline
Here is exactly what I do, day by day, to get my Caladium Pink Beauty corms ready for hibernation. Set a reminder. This is a daily commitment for two weeks.
Week One: The Initial Sweat
Day 1-2: Digging and Cleaning (Gentle Only)
I never wash my corms with water. That’s a rookie mistake. Water gets into the crevices and sticks around. Instead, I wait for the soil to be mostly dry in the pot. I dump the whole root ball out and gently crumble the dirt off with my fingers.
I use a soft brush, like a clean paintbrush, to dust off the remaining bits. You want to remove chunks of soil, but don’t scrub the skin. That skin is delicate right now. Leave any small roots attached. Cutting them too early creates an open wound. I let those dry and snap off naturally later.
Day 3-5: The Initial Lay-Out
I grab a wire cooling rack. If you don’t have one, a baking sheet with a towel works, but wire is better because it lets air circulate underneath. I lay the corms in a single layer. They cannot touch each other. I put this rack in my spare bathroom, which is dark and has a small dehumidifier running.
The temperature here stays around 70°F to 75°F. Humidity is the enemy. If your area is humid, run a fan on low nearby. Just a gentle breeze. I check them each morning. You’ll notice the surface feels less slimy and more firm by Day 3. The remaining roots are starting to dry out.
Day 6-7: The Flip
Here is where I messed up the first time. I left them sitting in the same spot for two weeks. The bottom stayed damp. Now, I flip them every single day. On Day 6, I gently turn each corm over. I also inspect them closely. If I see any soft spots or dark, watery patches, I quarantine those corms immediately. I have a separate tray for "suspicious" ones. If they smell sour, I toss them. It’s not worth risking the whole batch.
At the end of Week One, the skin should feel leathery but not hard yet. The roots should be brittle and snapping off easily.
Week Two: The Hardening Off
Day 8-10: The Paper Bag Method
Once the corms feel mostly dry on the surface, I move them to a paper bag. Not plastic. Plastic traps moisture. I fill a brown lunch bag with corms, but I only fill it halfway. I crumple the top of the bag loosely, leaving a gap for air. I shake the bag gently every other day. This helps them rub against each other, which is actually good. It knocks off the dried roots and helps the outer skin slip off.
This stage is called "hardening off." The RHS highlights that drying helps prevent basal rot during storage. The paper bag absorbs any residual moisture that squeezes out from the inside.
Day 11-13: The Squeeze Test
I start testing the corms on Day 11. You want them to feel hard, like a new potato. If you squeeze gently and it gives under pressure, it’s too wet. Put it back in the bag for another 48 hours.
I also check the eyes. The little pink buds should be tight and dry, not mushy. If the skin is completely papery and flaking off, that’s perfect. This means the corky layer has developed. This is your protection against winter rot.
Day 14: The Final Check
This is moving day. I take all the corms out. I snip off any last remaining roots with clean scissors. I dust them with a mix of sulfur powder and fungicide. This is a step I added after my second year when I lost a few to a white fuzz. It’s cheap insurance. Let that powder sit on them for a few hours at room temperature.
After that, they are ready for long-term storage. For me, that means packing them in dry vermiculite or perlite inside a cardboard box with ventilation holes. I never close a box completely airtight. They need to breathe a little.
The 3 Fatal Mistakes That Killed My Corms
I have a list of things I check before I even dig up the plant. These are the errors that cost me money and heartbreak.
1. Overwatering Before Digging
This is the number one killer. I used to water my caladiums one last time before digging, thinking it would make the soil softer. It did. But it also pumped the corms full of water. When you store them, that extra water has nowhere to go. It causes cell rupture and rot. The saying is true: 90% of indoor plants die from overwatering, and outdoor tubers are just as vulnerable.
Now, I stop watering my Pink Beauty two weeks before I plan to dig them up. I let the soil get completely dry. Bone dry. This triggers the plant to start going dormant on its own. The corms begin to dry from the inside out. That gives me a head start on the curing process. I know it feels wrong to neglect them, but trust me, the leaves will start to yellow anyway. That's your cue.
2. Getting the Light Wrong During Curing
I made the mistake of drying them near a sunny window once. I thought the warmth was good. The sun actually caused etiolation—the corms started to sprout in storage because they felt heat and light. They used up all their stored energy before I planted them in spring. The result? Weak, spindly plants that produced almost no leaves.
I also tried a dark, freezing garage one year. That was worse. The cold shocked them. The key is consistent warmth without light. A dark closet is perfect. Some people say light doesn’t hurt corms, but I have to disagree based on my own experience. Keep them in the dark. It tells them it’s still winter.
3. Using the Wrong Storage Container
I used to store them in a sealed Tupperware bin. I thought it was protecting them from pests. What it actually did was create a greenhouse effect. Condensation built up on the lid, and water dripped right back onto the corms. Within a month, I had a colony of mold.
The best container is cardboard. It breathes. It wicks moisture away. If you need to be more protective, you can use a paper bag inside a wooden crate. Avoid anything plastic unless you have drilled holes in it and lined it with newspaper. But honestly, cardboard is the winner. It’s simple and effective.
My First Disaster: The "Plastic Bag" Incident
Let me tell you about the specific time I lost everything. I had a beautiful pot of Pink Beauty. It was massive—at least ten corms in there. I dug them up, thought I was a pro, and threw them into a ziplock bag with some dry peat moss. I sealed it up completely.
I checked on them every week. For the first month, they looked fine. Then, on a random Tuesday, I opened the bag and got hit with a smell like rotting vegetables. Every single corm had a slimy film on it. The peat moss was damp. I had sealed in the moisture. They were goners.
I tried to salvage a few by cutting off the rot, but it was too deep. I lost all of them. That was the winter before I learned about the drying process. I remember thinking, "Why didn't anyone tell me about the curing step?" Most guides jump straight to storage. They miss the crucial prep work. So I'm telling you now, do not skip the two weeks.
Understanding the "Sweat" Period
Some call it curing, some call it sweating. It’s the process where the corm loses about 10-15% of its weight in water. This concentrates the nutrients and sugars inside.
This is backed by the American Horticultural Society (AHS), which explains that proper drying of tender bulbs is essential to prevent decay. When the skin wrinkles slightly, that’s a good sign. It means it’s losing moisture. If it feels heavy and smooth, it’s not ready.
I’ve started using a food scale. I weigh the corms on Day 1 and then again on Day 14. A weight loss of around 10% tells me they’re perfectly cured. It’s a geeky move, but I love data. It takes the guesswork out of it.
Signs Your Corms Are Cured and Ready
Let’s just do a quick checklist. When I pull my corms out of the paper bag on Day 14, I look for:
- Hardness: They feel solid, like a rock.
- Skin Texture: The outer skin is papery and slightly wrinkled.
- Weight: They feel light for their size.
- No Squish: There are absolutely no soft spots.
- Eyes: The growing points are firm and pale pink/white.
If any of these are off, I give them more time. There’s no rush. I’d rather wait an extra week than lose them all.
What Happens If You Skip the Drying Step?
I get it. Digging up bulbs is tiring work. You just want it done. But skipping the drying step is the fastest way to a worthless pile of mush. Storing wet corms is like putting a wet sock in a dark drawer. It will stink up everything.
The moisture will cause the outer layer to soften. Soft tissue invites bacteria like Erwinia (soft rot). Once that starts, there’s no stopping it. It spreads fast. I had to throw away a whole box once because one rotten corm contaminated the rest. It was in direct contact with them. Keep an eye on your batch every single week during winter. Isolate any that show signs of trouble.
My Final Storage Setup
After the 14-day drying period, I store them for the winter. I use a blending of methods. I put the dusted corms in a paper bag with vermiculite. I put that bag inside a larger cardboard box. I poke a few holes in the cardboard for airflow.
I place the box in the back of my basement, which stays at a steady 55°F. It’s dark, dry, and not too cold. That temperature range is crucial. Too warm, and they’ll sprout. Too cold, and they’ll freeze. 50-60°F is the sweet spot.
I check them once a month. I just peek inside, feel for condensation, and move them around. If the vermiculite feels damp, I replace it. That has never happened since I started the 14-day drying discipline.
A Quick Note on Humidity
If you live in a humid climate like Florida or Louisiana, the drying process is harder. The air is thick with moisture. Your corms will take longer to dry. I suggest using a dehumidifier in the room, or placing the corms on a wire rack in front of a fan.
The goal is to get them dry, not to cook them. Don’t use a heater directly on them. That can cause cracking. Just move air. Air movement is your best friend. If you see mold starting on the roots, you’re on the right track but too wet. Remove the worst offenders and increase airflow.
Expert Advice on Storing Tender Bulbs
The RHS has a great guide on storing tender bulbs, and they emphasize the need for a frost-free environment. That is non-negotiable. A frost will turn your corms to jelly. Even a light frost on the garage wall can kill them. Always bring them indoors.
The AHS echoes this, suggesting that you shouldn't divide the bulbs until they are fully dry. I made this mistake once. I tried to split a large corm while it was still moist. The cut took forever to heal and got infected. Wait until spring, right before planting, to divide them.
My Routine Makes Yours Easy
I am a lazy gardener at heart. I want the highest results for the least effort. That’s why this 14-day drying method is my absolute favorite. It requires zero skill. You just need patience. You literally set them down and walk away.
The process is forgiving. The only time it fails is when I get impatient and rush it. As long as you give them enough time, they will forgive you for everything else. I keep a sticky note on the paper bag with the date. I count two weeks out. I don’t touch them until that date passes.
How to Handle Shriveled Corms
Sometimes, after drying, a corm looks a bit shriveled. The skin is wrinkled like a raisin. This scares people. But it’s fine. The corm is still alive. It’s just compacted energy.
When you plant it in spring, it will plump up with water again. I’ve planted corms that looked like dried prunes, and they grew into massive plants. As long as they are hard and not mushy, they’re fine.
Color Changes During Drying
You might be alarmed by color changes. When I first dry them, the corms are light brown. After two weeks, they look a shade darker or sometimes have a greenish tint under the skin. This is a natural oxidation process. Don’t worry about it. It’s not mold if it doesn’t rub off on your fingers as dust.
The "Offset" Problem
My Pink Beauty often produces small offset corms around the main one. These are tiny bulbs. They are fragile and dry out fast. If you leave them out too long, they might die.
I actually separate the tiny ones and store them in a separate container with sphagnum moss. They need a bit more humidity to survive. They don’t dry as well as the big ones. Just a tip if you want to multiply your collection.
Seasonal Timing
I dig my corms in mid-October. That gives me the whole month to dry them before winter really hits. If you wait until the first frost warning, you might be too late. The cold will have already damaged the corm in the ground.
Dig them up as soon as the leaves start to fall over and yellow significantly. Don’t wait for them to die completely. That’s a sign of stress. The plant is telling you it’s time to sleep. Listen to it.
Frequently Asked Questions
1. Can I dry Caladium corms indoors in an air-conditioned room?
Yes, you can. Air conditioning actually dehumidifies the air, which is perfect for drying. I do this when the weather is rainy outside. Just make sure the room isn’t too cold. AC often keeps rooms at 68°F, which is fine for curing. Avoid placing them right on the AC vent. The constant blast of dry air can cause the outer skin to crack.
2. What is the ideal humidity level for drying? Do I need a humidifier or dehumidifier?
Keep it low. Aim for under 50% humidity. I actually prefer around 30-40%. If you don’t have a dehumidifier for the first week, I get it. I didn’t buy one until my second year. Here is what I did before: I used the oven. No, not for baking. I heated the oven to the lowest setting (like 170°F), turned it OFF, and left the door open. I placed the wire rack near the open oven door. The residual heat and air flow helped dry them out. Don’t close the door. That will cook them. It’s a temporary hack that saved me once.
3. Should I cut the leaves off before or after drying?
After. I always trim the leaves back to about 2 inches above the corm. I leave the stubs on during the first week. This allows the plant to pull back any last remaining nutrients from the stems into the corm. If you cut it completely flush, you risk opening a wound at the crown that can rot. Let the stub dry and shrivel up. It will pop off easily later.
4. Do I need to wash the corms with bleach or fungicide?
I don't wash with bleach. It's too harsh and can damage the skin. I use a commercial dusting fungicide powder. It’s a purple powder specifically for bulbs. You just dip the corm in it. It’s cheap and effective. I find that it creates a pH barrier that fungus hates. Just make sure the corm is completely dry before you dip it. If it's damp, the powder will cake into a paste and have the opposite effect.
5. What happens if my corms sprout in storage?
This happens when you store them too warm. If they sprout in the middle of January, don’t panic. It means they are alive. You have two choices. First, reduce the temperature immediately to slow the sprout down. Second, if it’s a spring-like sprout, just plant it in a pot indoors. You’ll have an early-season Pink Beauty. I’ve done this. It grows beautifully under grow lights. Just be careful not to break the sprout when handling it.
The Takeaway
Storing Caladium Pink Beauty corms is a simple process. It’s just about patience. Do the 14-day drying routine. Don’t rush it. I check my calendar and mark the date. It’s part of my annual ritual.
I remember feeling overwhelmed when I first started. There is so much conflicting advice online. But the drying part is not complex. It’s literally just leaving them alone in the right environment. The hardest part is fighting the urge to tuck them away in soil immediately.
Trust the process. Give them air. Give them time. And they will give you a spectacular show next season. I’m currently staring at my bag of corms from last fall. They are hard, clean, and ready to wake up. I can’t wait to pot them up next month.
Just remember. Dry them. Store them dry. Check them monthly. That’s the whole secret to a beautiful, healthy Caladium Pink Beauty for years to come. You’ve got this.





