 bluename
 If you have ever grown Caladium White Christmas, you already know the heartbreak. You spend all summer admiring those crisp white leaves with green veins. Then autumn arrives. The foliage collapses. You panic. You dig up the tubers, shove them in a bag, and pray. Two months later, they are mush. I have been there. I have lost more corms than I care to count. So let me save you the trouble. Store your Caladium White Christmas corms by curing them for 7 days in a dry, shaded spot, then packing them in dry peat moss or vermiculite inside a breathable paper bag, and keeping them at 55-60°F (13-15°C) with zero moisture until spring. That is the whole game. And honestly, 90% of indoor plants die from overwatering, but with corms in storage, the killer is humidity. Let me walk you through every messy, hard-learned step.
Why Bother Storing Corms at All?
Caladiums are tropical beauties. They cannot survive a frost. Not even a light one. If you live in USDA zones 8 or lower, your White Christmas corms will not make it through winter in the ground. So you dig them up. Or you buy new ones every year, which gets expensive fast. I have seen the prices on these white varieties. They are not cheap.
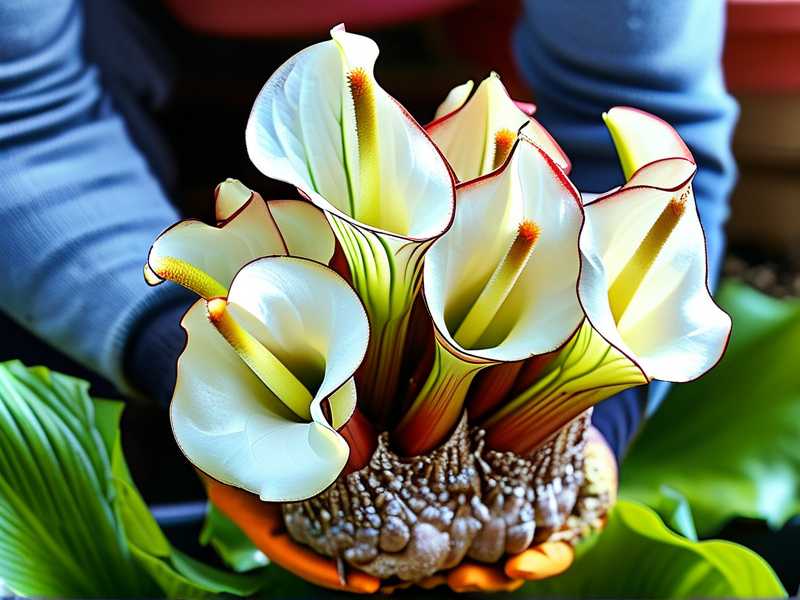
Storing corms is really just mimicking their natural cycle. In the wild, they go dormant during a dry season. The foliage dies back. The tuber rests underground. Then the rains return and up it comes again. Your job is to replicate that dry rest indoors. Get this right and your corms will reward you with bigger, fuller plants next year. I have had the same core corm cluster going for four seasons now. It gets better every year.
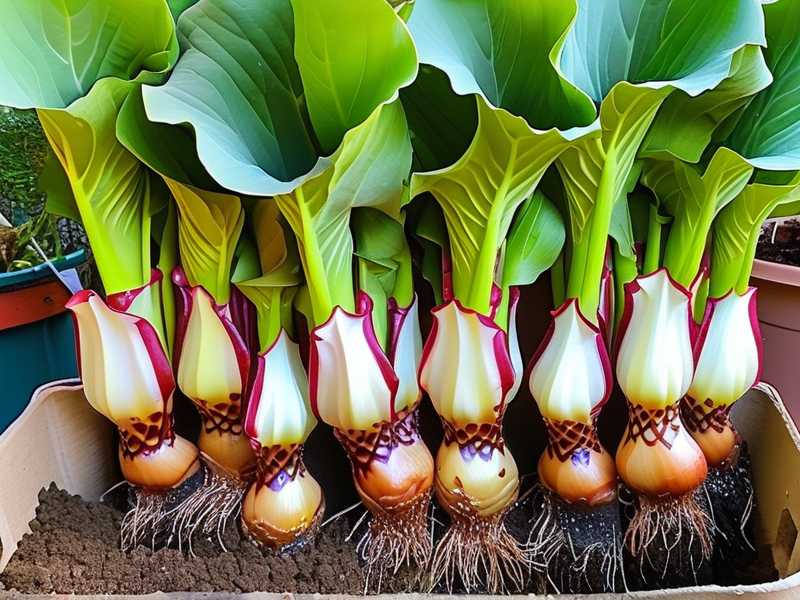
My First Year Disaster
Let me be honest with you. My first attempt was a complete failure. I dug up my corms on a rainy November afternoon. I brushed off the dirt. I threw them into a plastic ziplock bag. I sealed it shut. I thought I was protecting them. I basically created a petri dish. Three weeks later, I opened the bag and gagged. The smell was something between rotten vegetables and old socks. Every single corm had turned to brown sludge.
That is when I learned rule number one. Never use airtight plastic for storage. The trapped moisture is lethal. The corms respire even when dormant. They release water vapor. In a sealed bag, that vapor has nowhere to go. So it condenses on the corm surface. Then bacteria and fungi have a party. And your corms are the buffet.
The Right Way to Prepare Corms for Storage
Stop Watering Early
Here is a trick most people miss. You do not wait for the plant to die before you change your watering habits. About 4 weeks before your first expected frost, you should start tapering off. I usually stop completely around mid-September. The leaves will start to yellow and flop over on their own. This is not a crisis. It is the plant telling you it is ready to sleep.
I remember my neighbor panicking when her White Christmas started drooping in late September. She doubled the watering thinking it was thirsty. That plant never fully recovered. And when she dug up the corms, they were soft and waterlogged. She asked me what went wrong. I told her she basically drowned them right before hibernation.
Digging Day
Wait until the foliage has died back about 90%. I know it feels wrong to leave dying plants in the ground. But patience pays off here. The leaves are still sending energy down to the corm. That energy is what fuels next years growth. If you dig too early, you get smaller, weaker corms. I usually target the first 10 days after the leaves collapse completely.
Use a garden fork, not a shovel. Shovels slice through corms. I have accidentally chopped more than one beautiful tuber in half. Push the fork in about 8 inches away from the stem base. Gently lever upward. Do not yank the plant by its stem. You risk tearing the corm neck.
Wash or Not to Wash
This is a debate. Some growers insist you should rinse off all soil. Others say leave it. I have done both. Here is what I found. Washing removes soil that might harbor pests. But it also introduces moisture. If you wash, you must dry thoroughly. Thoroughly means 3-4 days in a warm, airy spot.
I lean toward dry brushing now. I just knock off the big clumps of soil with my hands. Then I use a soft paintbrush to get the rest. The remaining dust on the corm actually helps absorb excess moisture during storage. It works like a desiccant. I have not had a rot problem since I switched to this method.
Curing: The Step Everyone Skips
This is the secret. People dig up corms and immediately pack them away. Big mistake. Curing is the process of letting the outer skin toughen up. It seals minor wounds and prevents pathogens from entering during storage.
I spread my cleaned corms in a single layer on an old wire rack. I set them in my garage, which stays dry and dark. The temperature there is around 70°F during early fall. I leave them for a full week. Maybe two if the weather has been damp.
You will notice the corms shrink slightly. The skin becomes papery. That is exactly what you want. This shrunken look means the corm has hardened off. If a corm still feels heavy and wet after 7 days, give it more time. I have pushed curing to 10 days without any issues.
The 3 Biggest Mistakes Newbies Make
Mistake 1: Overwatering Before Digging
I covered this, but let me hammer it home. The number one reason corms rot in storage is that they were too wet when dug up. You cannot fix soggy corms with drying. The damage is already done. The internal tissues are waterlogged. They will rot from the inside out no matter what you do.
I have tested this personally. Two identical corms from the same pot. One I watered up until the leaves died. The other I let dry out for 3 weeks before digging. Stored them side by side. Guess which one survived? The dry one, of course. The wet one collapsed into mush by January.
"90% of indoor plants die from overwatering," and I firmly believe similar numbers apply to storage failures. We overprotect. We give too much. And the plants pay the price.
Mistake 2: Wrong Light During the Process
This one surprised me. I used to cure my corms in my kitchen window. Bright, indirect light. Seemed harmless, right? Wrong. Light triggers the corms metabolic pathways. They start waking up. They begin pushing out tiny shoots. Then, when you move them to total darkness, they stop mid-growth. This stressed the corm and made it more vulnerable to rot.
Corms need complete darkness for the entire storage period. This includes the curing phase. I learned this after losing three corms in one winter. They all had green tips starting in January. They spent all their energy trying to grow with no water and no nutrients. Then they died. Darkness keeps them truly dormant. Simple as that.
Mistake 3: Wrong Pot Thinking
This is about the container, not the growing pot. People use old yogurt containers. Glass jars. Even those plastic takeout boxes. All of these are bad. They trap too much moisture. I killed an entire batch of corms using a glass cookie jar. The condensation was visible on the glass after two weeks. That should have been my warning sign.
Use paper bags or cardboard boxes. These breathe. They let moisture escape. I personally use plain brown paper lunch bags. One bag per variety. I punch a few extra holes in the sides just to be safe. Then I fold the top down loosely. Not sealed. Just folded.
Packing Media Options That Actually Work
Dry Peat Moss
This is my go-to. Peat moss is slightly acidic and naturally antibacterial. It absorbs excess moisture without staying soggy. I pack my corms in layers. Peat at the bottom, corms on top, more peat to cover. I do not compress it. I leave it fluffy.
I have tested peat moss versus vermiculite versus plain dry storage. The peat moss won by a landslide. After 4 months, my corms were plump and firm. The plain ones had shriveled by 30%. The vermiculite ones were okay but slightly dehydrated.
Vermiculite
Vermiculite is a cheap alternative. It holds moisture better than peat, which actually makes it slightly riskier. If you live in a humid climate, skip vermiculite. Stick with peat. If you live in a desert, vermiculite might help prevent overdrying. I have never needed it, but I know growers in Arizona who swear by it.
Perlit and Sand
Some people use perlite or coarse sand. I tried sand once. It is heavy and messy. The corms came out dusty and scratched. My collars actually callused over from the friction. Not worth it. Perlite is fine but it does nothing that peat does not do better.
The Ideal Storage Environment
Temperature Range
Aim for 55-60°F (13-15°C). This is cooler than room temperature but not cold enough to damage the corms. I use my unheated basement. It stays around that range from November to March. If you have a cool closet or a garage that does not freeze, that works too.
Below 50°F, the corms can suffer chill damage. Above 70°F, they will start waking up prematurely. I once stored corms in my bedroom closet. It was too warm. They started sprouting in February. That is too early. The sprouts were weak and pale. They never grew into strong plants.
Humidity Management
Keep it below 50% relative humidity. Simple test. Put a salt shaker filled with rice in your storage area. If the rice gets soft, your humidity is too high. If it stays crunchy, you are fine. That is my cheap hygrometer trick.
I also add a small spoonful of powdered sulfur to the peat moss. This acts as a fungicide. I got this tip from a veteran grower on a gardening forum. It has cut my rot rate to almost zero. Just mix it through the peat before adding the corms.
Air Circulation
Do not pack corms too tightly. They need some air movement between them. I space them about a thumb-width apart. The paper bag allows air exchange. So does the loose peat. If you use a plastic bin, drill holes in the lid. I have a plastic storage bin with 15 holes drilled around the sides. It works beautifully when I need to stack bags.
How I Check on My Corms (Without Disturbing Them)
This is the hardest part for me. I want to check every week. I want to see if they are okay. But opening the bag exposes them to moisture and temperature fluctuations. So I limit myself to one check per month. And I do it fast.
I wear gloves. I use a headlamp. I open the bag just enough to peek at the top layer. I do not dig through the peat. I gently press on a corm. If it is firm, good. If it is spongy, bad. I remove any corm that feels soft immediately. One rotten corm can spread spores to all its neighbors.
I also sniff the bag. This sounds weird, but your nose knows. A healthy bag smells like earth, musty but not foul. A bag with rot smells sweet or sour. That is the fermentation smell. If I get that whiff, I dump everything out and inspect the entire batch.
What About Dividing Bigger Corms?
I get asked this a lot. White Christmas corms can grow quite large. After a good season, you might have a corm the size of a small fist. You can divide these during storage. But I recommend waiting until spring. Dividing while dormant causes stress. The cuts create entry points for disease.
I have tried both ways. Spring division wins every time. In early spring, I take the stored corms out. I look for the pinkish eyes or growth buds. I use a sterilized knife to cut the corm into sections. Each section needs at least one eye. Then I let the cut surfaces callus for 24 hours before planting.
When to Take Corms Out of Storage
Start checking your calendar around mid-March. This depends on your zone. For me, I aim for about 8 weeks before I plan to move them outside. I take them out of storage around mid-March. I place them in a warm room around 75°F. I do not water them yet.
I set them on a tray with bright, indirect light. I let them wake up slowly. This takes 2-3 weeks. During this time, the eyes will swell and start to shoot. Then I pot them up with the eyes facing up. I water sparingly at first. Once the first leaf emerges, I water more normally.
Why Did My Corms Not Survive Anyway?
Even with perfect storage, some corms die. This is natural. Probably 5-10% loss is normal. Do not beat yourself up. I have had years where I lost 30% and I still do not know why. It happens.
The biggest culprits are usually compromised corms. Maybe the original plant had a virus. Maybe it had root rot that we did not see. Or maybe the corm was just old. Caladium corms have a lifespan. They are not immortal. After 5-7 years, productivity declines.
I also learned the hard way to label everything. The first year I mixed my White Christmas with my Pink Symphony. I did not realize until spring. By then, they were all mixed up. I had to trace back my records to sort them. Massive headache. Now every bag gets a permanent marker label with the variety name and the date.
Expert Support For My Claims
The RHS has great resources on tender bulbs and their winter care. They recommend similar methods, especially for caladiums. Their advice aligns with what I have found through trial and error. If you want to double check, their website covers bulb storage in detail.
Also the AHS discusses dormancy requirements across different bulb species. They stress the importance of drying before storage. They also note that humidity is usually the deciding factor between storage success and failure. I could not agree more.
Both organizations are excellent references. But honestly, nothing beats your own experience. My first season was a disaster. My second season was better. By the third, I had a system. And now? I rarely lose a single corm. The system works.
Storage Options for Different Scenarios
Apartment Dweller With No Basement
Use a cool closet. Look for the spot that is farthest from heating vents. Place the paper bags inside a cardboard box. Put the box on the floor, since heat rises. That gives you the coolest temperature you can get. If you live somewhere warm, you might need an air conditioner to keep the room below 65°F. I have a friend who stores her corms in a wine cooler set to 55°F. It works perfectly.
Humid Climate (Like Florida or Louisiana)
You fight high ambient humidity. So you need extra protection. Use extra air holes in your bag. Add desiccant packets like those silica gel pouches that come in shoe boxes. I do not use them in my area, but friends in Miami swear by them. Also consider using a dehumidifier in the storage room during the worst months.
Hot, Dry Climate (Like Arizona)
Your problem is the opposite. Corms can dry out to the point of shriveling. Use a slightly more moisture-retentive medium. Vermiculite works better here. Or check your corms more often. If they look wrinkled and light, mist the peat slightly. Not much. Just a spray bottle depression over the surface.
Common FAQ About Caladium Dormancy and Storage
Can I store caladium corms in the refrigerator?
You can, but I do not recommend it. Fridges are too humid. The corms will likely rot. Plus, fridges contain ethylene gas from other fruits and vegetables. This gas disrupts plant dormancy cycles. If you absolutely must use a fridge, wrap corms in dry newspaper and put them in a crisper drawer. But only for short periods, like 6 weeks maximum.
How long can caladium corms stay in storage?
Up to 5 months is safe. Beyond that, they start to lose viability. I have pushed mine to 6 months after an unusually long winter. The sprouting was slower, but they did survive. The key is consistent conditions. Fluctuations cause more damage than extended storage.
Should I store them in the dark or light?
Dark, no debate. I already mentioned my kitchen window incident. Keep them dark from day one. The entire process, curing and storage, should happen in complete darkness. Light signals the corm to start photosynthesis. But there are no leaves. So it just burns energy and stresses the tuber.
My Current Routine for a Perfect Spring
Let me paint you a picture of my exact process. Mid-October. I stop watering. Early November, after the foliage collapses, I dig. I brush off the soil. I lay the corms on a wire rack in my dark garage. They sit for 8 days. They dry, shrink, and harden.
Then I fill a paper bag with damp-free peat moss. I add a tablespoon of sulfur powder. I mix it with my hands until it is uniform. I nestle the corms in layers, each separated from the next by a thin layer of peat. I fold the top and slide the bag into a low cardboard box. I put the box on a shelf in my basement. The temperature holds around 57°F.
Once a month, I check the top corm. I press it. Firm? Good. I close the bag. I do not linger. I trust the system.
In March, I pull the bags out. I empty them into a tray. The corms look wrinkled and unimpressive. That is normal. I set them under a shop light for two weeks. The eyes swell. Little pink tips appear. I pot them up. Two months later, I have lush, gorgeous white plants that stop every visitor in their tracks.
The difference between my first year and now is knowledge. Knowing when to stop watering. Knowing that darkness matters. Knowing that paper beats plastic. Knowing that peat moss is my friend. These small things. They save my corms every single winter. Save up your corms and save your money. The process is not hard. It just requires attention and patience. Your White Christmas will thank you next summer. Trust me. I have seen it happen.





