 bluename
 If you've ever stared at a shriveled, brown caladium corm and wondered if you're doing it all wrong, you're not alone. Honestly, 90% of indoor plants die from overwatering, and caladiums are no exception. Let me give you the short answer upfront: plant your Caladium Red Flash corms 2 inches deep, with the "eyes" or bumps facing upward, in well-draining soil, and water them only when the top inch feels dry. I learned this the hard way after turning my first batch of expensive corms into mush. Stick with me, because I'm going to walk you through every single step, including the mistakes that nearly made me quit.
Why Caladium Red Flash Deserves a Spot in Your Home
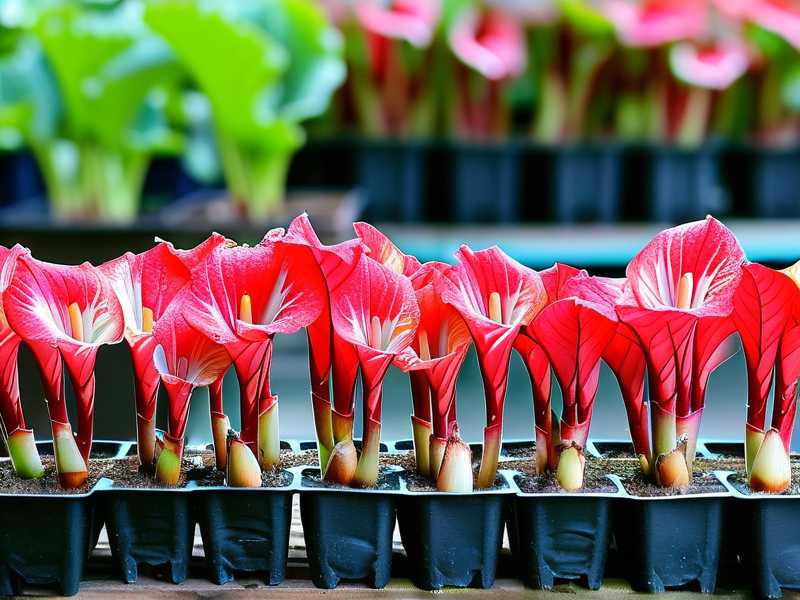
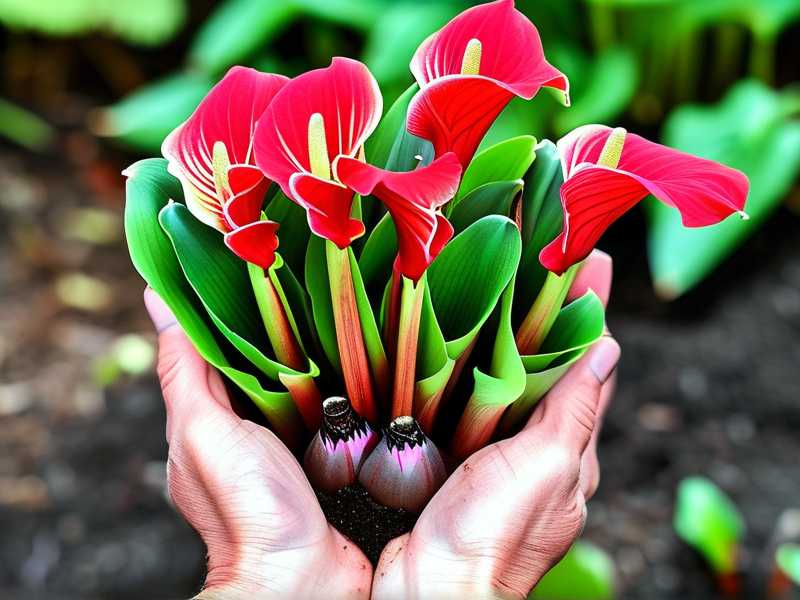
Caladium Red Flash is a showstopper. The leaves are massive, heart-shaped, and painted with deep crimson centers, green margins, and splashes of white. It's like someone let a painter go wild on a canvas. Indoors, it brings a tropical vibe that few houseplants can match.
But here's the thing: these plants start as unassuming corms (which are basically swollen underground stems). If you get the planting depth wrong, or fuss with them too much, they'll rot before you ever see a leaf. I've been there. I've dug up mushy, sad corms after two weeks of "loving" them too much with my watering can.
The Royal Horticultural Society (RHS) notes that caladiums need consistent warmth and moisture but never soggy conditions. That's the golden rule. The American Horticultural Society (AHS) echoes this, emphasizing well-draining soil as non-negotiable.
Newbie's 3 Fatal Mistakes (I Made All of Them)
Before we get into the good stuff, let's talk about the three ways beginners kill their Caladium Red Flash corms. I know these because I've done every single one of them.
① Mistake #1: Watering Too Much
This is the big one. The moment you plant a corm, there's this urge to water it like a thirsty dog. I get it. But the truth is, corms store energy and water. They don't need a flood.
I remember planting my first batch of Red Flash corms and giving them a generous soak every two days. Within a week, I noticed a funky smell. By day ten, the corms had turned into squishy, brown lumps. The soil was constantly wet, which essentially suffocated the corms. They need oxygen, not a swimming pool.
The RHS advises letting the soil dry slightly between waterings. Wait until the top inch of the potting mix is fully dry. Trust me, your corms will thank you.
② Mistake #2: Wrong Light Placement
Caladiums are funny. They love bright light, but not harsh, direct sun that scorches their leaves. I once placed my pot on a south-facing windowsill, thinking "more light equals more growth." Yeah, no. The leaves turned crispy and papery within days. The plant survived, but it looked terrible.
These plants naturally grow under the canopy of tropical trees. They get dappled, filtered sunlight. So, bright, indirect light is your sweet spot. A north or east-facing window works brilliantly. If you only have a south window, pull the plant back a few feet or use a sheer curtain.
③ Mistake #3: Using the Wrong Pot
I can't stress this enough. Container choice matters more than you think. I had a beautiful ceramic pot with no drainage holes. It looked amazing in my living room. But water pooled at the bottom, and the corms sat in moisture constantly. You can guess what happened.
Always use a pot with drainage holes. Terracotta is fantastic because it wicks away excess moisture. Plastic pots work too, but they hold water longer, so you need to be more careful with your watering schedule. A pot that's 6 to 8 inches in diameter is perfect for a single corm.
Getting Started: What You Need
Alright, let's gear up. Here's your shopping list and prep steps.
Choosing Healthy Corms
When you buy corms, look for ones that are firm to the touch. They should feel like a well-cooked potato, not a stale marshmallow. Avoid any with soft spots, mold, or shriveled skin. Size matters too. Bigger corms generally produce more leaves in the first season. I usually go for corms that are at least 1.5 inches in diameter. They have more stored energy.
Pre-Planting Preparation
Some people soak corms in warm water overnight to kickstart growth. Honestly, I've tried this, and it works. But only if you don't overdo it. Warm water (around 70°F) helps rehydrate the corm's outer skin. Keep the water shallow, just enough to cover the sides, not the top where the eyes are. Soaking for 8 to 12 hours is plenty, but if you forget and leave them for 24 hours, they'll be okay. Just don't make this a habit.
If you're in a cooler climate, consider warming the corms indoors for a few weeks before planting. I place mine on top of a warm (but not hot) appliance, like a refrigerator. Gentle bottom heat speeds up sprouts significantly.
Step-by-Step Planting Guide
Here is my exact process for planting Caladium Red Flash corms, the one that finally worked after I stopped overwatering and started paying attention.
Step 1: Pick the Right Season
Caladiums are warm-weather plants. They hate the cold, and they hate drafts. The soil temperature should ideally be above 70°F. I start mine indoors in late spring if I want an early start. But if you plant them outside, wait until the night temperatures stay above 60°F. In cooler zones, you'll treat them as houseplants or dig them up in the fall.
Step 2: Prep the Pot and Soil
Grab a pot with drainage holes. I prefer terracotta for its breathability. Fill it with a well-draining potting mix. I mix two parts standard potting soil with one part perlite and one part peat moss. This is my go-to chunky blend. It retains moisture without suffocating the roots.
The American Horticultural Society (AHS) suggests using a rich, organic mix that's slightly acidic (pH 5.5 to 6.2). Peat moss helps achieve this. If you don't have peat, coco coir is a sustainable alternative.
Step 3: Find the Eyes (The Top)
Now, look at your corm. It's not a perfect ball. One side is usually more rounded, the other slightly flat or even dimpled. The "eyes" are the little pinkish or brownish bumps on the surface. These bumps are where the shoots will emerge. They're usually, but not always, on the top.
To be safe, place the corm on the soil and see what feels natural. If you plant it upside down, the shoots will still find their way up, but it wastes energy and delays growth. Once I planted a corm sideways because I was confused. It worked, but the leaf took an extra week to break the surface. Not a disaster, but avoidable.
Step 4: Plant at the Right Depth
This is the part you came for. Place the corm with the eyes facing upward. Cover it with soil so it sits exactly 2 inches deep. This depth is the sweet spot. Too shallow, and the corm dries out. Too deep, and it may rot because the soil stays too wet around it.
Measure it. Don't eyeball it. I've made that mistake too. Use a ruler or know the length of your index finger's first two knuckles. That's roughly 2 inches for most adults.
Gently firm the soil down, but don't pack it. You want air pockets. Then, water it lightly. The soil should be moist, like a wrung-out sponge, not dripping.
Step 5: Provide Bottom Heat (Optional but Helpful)
I mentioned this earlier, but it's worth its own step. Caladiums sprout the fastest when the soil is warm. I place my pots on a seedling heat mat set to 75°F. If you don't have one, a warm spot on top of the fridge works. I once started two pots side by side, one with bottom heat and one without. The heated one sprouted in 10 days. The other took 18 days.
My 2-Week Observation Journal
Here's what I noticed when I finally did everything right. I kept a detailed log for two weeks to see how the corms behaved.
Day 1-3: The Waiting Game
After planting, I watered once. Then I stopped. I know, the temptation to check and water is strong. But I reminded myself of my past failures. I placed the pot on a heat mat near a bright window (but not in direct sun). No leaf movement yet. The soil felt slightly damp at the top but not wet. I didn't poke at the corm. I let it be.
Day 4-6: The First Signs
On day four, I gently brushed away the top layer of soil with my finger (carefully!) to check. I spotted a tiny, pale pink tip pushing upward. I felt such relief. It was like seeing a plant take its first breath. I watered lightly that morning. That was it. The tip grew about half an inch by day six.
Day 7-9: The First Leaf Unfolds
By day eight, the sprout had broken through the soil surface completely. It looked like a small, folded pinkish-green spear. I didn't water on day eight because the soil was still slightly moist an inch down. I know this because I used a wooden chopstick inserted into the soil. If it comes out clean, the soil is dry. If it comes out with damp soil stuck to it, wait. That's my trick. On day nine, the first leaf began to unfurl. It was terrifying and beautiful at the same time.
Day 10-12: Leaves Expand
The first leaf started to flatten out. I could already see the red and green pigmentation starting to show. The colors were lighter at first, then deepened over each day. I watered slightly on day ten. The heat mat is still on. The plant is leaning slightly toward the window, so I rotate the pot just a touch every morning to keep it growing straight.
Day 13-14: Establishing Momentum
By day fourteen, the first leaf was fully open, and a second stem was emerging from the soil. It's a bit smaller than the first, which is normal. The corms have limited energy in the beginning. I'm feeding nothing yet. No fertilizer for at least a month. The corm itself has all the nutrients stored. Adding fertilizer now can actually burn the young roots.
How to Avoid My Expansion Mistakes (The "Second Phase" Trap)
Here's a mistake I made after I successfully grew my first leaf. I got overconfident. I thought, "It's growing! I should move it to a bigger pot and fertilize!" I was wrong.
I transplanted one of my two healthy pots too early. The roots hadn't fully developed, and the plant went into shock. The leaf yellowed and died back. It eventually recovered, but I lost two weeks of growth. So, my advice: don't mess with success. If the plant is growing well in its current pot, leave it. Repot only when you see roots coming out of the drainage holes.
As for feeding, the AHS recommends starting a diluted liquid fertilizer (half-strength) about six weeks after sprouting. I use a balanced 20-20-20 formula. But honestly, I feed every second watering to avoid salt buildup in the soil.
Common Problems and Quick Fixes (From Personal Disaster)
Let me share a few more things I've screwed up, so you don't have to.
Yellowing Leaves
If leaves turn yellow, it could be too much water or too little light. Check your soil. If it's soggy, back off. If the soil is dry and the light is low, move the pot to a brighter spot. I had a leaf yellow once because the room was too dark and I was watering on a schedule. I learned to stop scheduling waterings. The plant tells you when it's thirsty.
Leggy Growth
If the stems are growing tall and thin, with leaves spaced far apart, it's not enough light. Caladiums like bright, indirect light. Stretch is a sign they're reaching for the sun. Move the pot closer to a window but not in direct sun.
Brown, Crispy Leaf Edges
This almost always means the air is too dry, or you're over-fertilizing. Caladiums love humidity. I run a small humidifier near my plants in the winter. Misting helps too, but it's temporary. If the edges are crispy and you haven't fed the plant, it's probably a humidity issue.
Winter Care: What Happens When It Goes Dormant?
Here is the one thing I wish someone had told me earlier. Caladium Red Flash will eventually go dormant, often in late autumn. The leaves will yellow and die back. This is not a death sentence. The corm is saving energy.
When the leaves have completely wilted, stop watering entirely. After the soil is dry for a week, dig up the corm. Clean off the soil and let it dry in the air for a few days. Then store it in a paper bag filled with dry peat moss. Keep it in a cool, dry place around 55°F to 60°F. I used to keep them in my garage until I realized it got too cold. Now they live in a closet inside my home.
In spring, I take them out, check for rot, and start the process again. Some people say you can leave them in the pot and keep the soil dry over winter. That works too, but I prefer checking on them. It gives me peace of mind.
My Personal Final Checklist
I'm repeating this for emphasis because I wish I had this list when I started:
- Plant 2 inches deep. Serious, measure it.
- Eyes up. They look like little bumps.
- Water once at planting. Then wait.
- Let the top inch of soil dry out before watering again.
- Use well-draining soil. Add perlite or coarse sand.
- Bright, indirect light. No scorching sun.
- Warmth is key. Keep them above 65°F.
3 Common FAQs
1. Can I Grow Caladium Red Flash Entirely Indoors?
Yes, absolutely. I grow mine indoors exclusively because I live in an apartment. These plants thrive as houseplants as long as you provide warmth, humidity, and bright filtered light. They don't need to be outdoors. Just keep them away from air conditioning vents and cold drafts.
2. My Corm Sprouted, But the Leaf Looks White. What Did I Do Wrong?
This is almost always a light issue. Caladiums need adequate light for chlorophyll production. If the leaf emerges pale or translucent, move the pot to a brighter location. It should green up and deepen in color within a few days. Don't add more fertilizer; that's not the problem.
3. Should I Fertilize Right After Sprouting?
No. Hold off for about four to six weeks. The corm has all the stored energy your plant needs initially. Adding fertilizer too early can burn the roots. Once the plant has several leaves, you can start with a half-strength balanced fertilizer every couple of weeks during the growing season.
Stick to these basics, and you'll get lush, gorgeous leaves in no time. It took me a few mushy corms to figure it out, but once I got the depth and watering right, my Caladium Red Flash became the star of my living room. Start slow. Pay attention. Your corms know what to do. You just have to get out of their way.





