 bluename
 I killed my first Caladium White Christmas within three weeks. The leaves turned yellow, the stems flopped over, and the soil smelled like a swamp. Then I learned the truth: 90% of indoor plants die from overwatering, and this beauty is no exception. So here is what works: give it bright, indirect light, keep the soil barely moist, and use a small, breathable pot. That is the entire secret. Everything else is refinement.
I have grown Caladium White Christmas indoors for years now. I have tested different soils, pots, and lighting setups. I have made mistakes that cost me entire tubers. And I want to share what I learned so you do not repeat my failures.
This guide covers everything from potting to winter dormancy. I will walk you through my exact process. I will also show you the problems I hit along the way and how I fixed them.
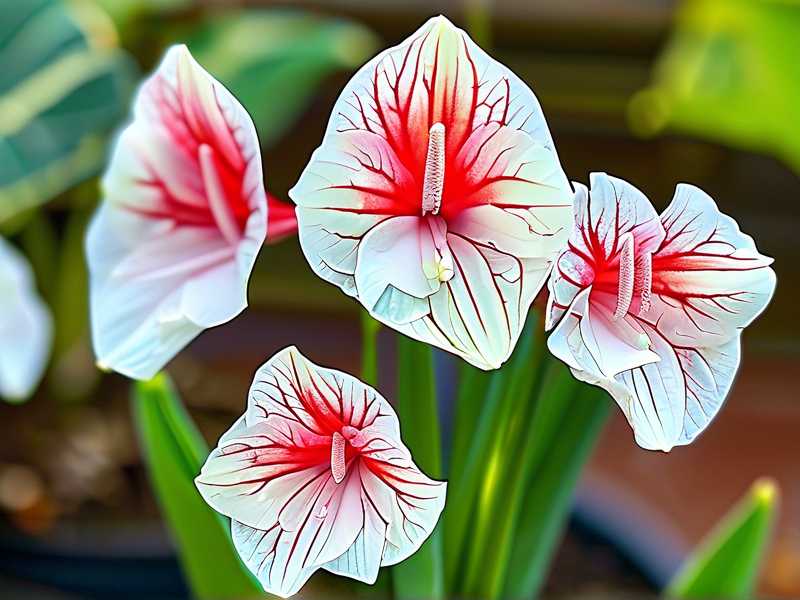
Why Caladium White Christmas Is Worth the Effort
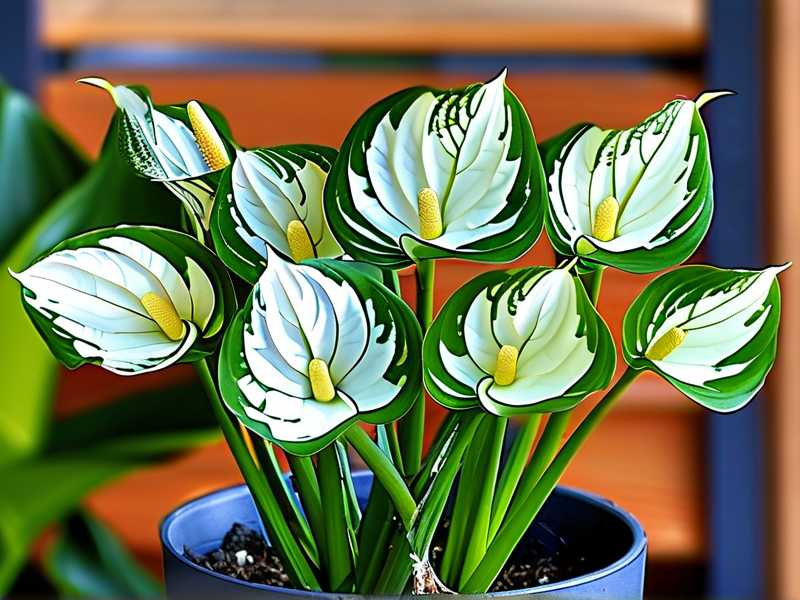
The leaves look like white canvas with green veins and scattered pink specks. They practically glow in a dim corner. Honestly, no other houseplant in my collection gets as many compliments.
But here is the catch. It grows from a tuber. That means it dies back completely, even indoors. Many new owners panic when the leaves fade in late autumn. They think they killed it. In reality, the plant is just going to sleep.
In my experience, the hardest part is not the growing season. It is the resting phase. Understanding that cycle early will save you a lot of heartbreak.
The Three Biggest Mistakes That Kill This Plant
Mistake 1: Watering on a Schedule
I used to water every Monday. It felt responsible. Then my tubers rotted.
The problem is simple. Your home temperature and humidity change week to week. Your plant does not drink the same amount every seven days. Autmn air is cooler and dryer. Summer afternoon sun is stronger. Basing water on a calendar is a recipe for disaster.
Instead, stick your index finger into the soil up to the second knuckle. If it feels dry, water. If it feels cool or damp, walk away. This simple habit saved my collection.
Mistake 2: Putting It in Direct Sunlight
I thought more sun meant more growth. I placed my White Christmas on a south-facing windowsill. Within a week, the white parts of the leaves turned brown and crispy. The edges curled up like burnt paper.
White leaves have less chlorophyll. Honestly, they cannot handle intense solar exposure. The white tissue simply burns.
Caladium White Christmas needs bright light, but not direct sun. An east-facing window works perfectly. A north-facing window is okay if the room is otherwise bright. I currently use a spot about three feet away from a west window, behind a sheer curtain.
Mistake 3: Choosing a Pot That Is Too Large
I planted my first tuber in a big 10-inch container. I thought it needed room to grow. Wrong. The excess soil held water around the tuber, and it rotted within a month.
Caladiums have shallow root systems. They prefer snug homes. In nature, they grow in leaf litter on the forest floor, not in deep soil.
The rule, which I follow now: pick a pot only one to two inches wider than the tuber itself. A 4-inch pot is ideal for a single medium-sized tuber. Small pots dry out faster, which directly prevents root rot.
My Exact Process for Growing Indoors
Here is the step-by-step method I have refined after killing three tubers. Follow this and your odds of success jump dramatically.
Step 1: Choose the Right Tuber
I learned this the hard way. I bought a shriveled tuber at a discount store. It never sprouted. Now I buy from reputable online growers or my local botanical garden shop.
Look for tubers that feel firm, not soft. They should have at least one visible pink or white growth bud. Size matters too. Larger tubers store more energy. They produce more leaves and bounce back faster.
Step 2: Wake Up the Tuber
This is a step many people skip. They plant a dormant tuber directly into soil and wait. Sometimes it sprouts. Often it just sits there and rots.
My method works better. In late winter or early spring, I place the tuber in a plastic bag with lightly moistened sphagnum moss. I keep it somewhere warm, around 70°F. This is also called “forcing” the tuber.
After one to two weeks, I see small pink sprouts emerging. Only then do I move it to soil. If you are wondering how to grow Caladium White Christmas indoors with predictable results, this is the moment that matters most.
Step 3: Prepare the Perfect Potting Mix
I tried regular garden soil once. It compacted into a brick. The roots suffocated.
The ideal mix should be airy and rich simultaneously. This is the recipe I have settled on:
- 50% high-quality peat-based potting mix
- 20% perlite to guarantee drainage
- 20% coco coir to retain light moisture
- 10% worm castings for natural nutrients
Many people also add a handful of orchid bark. That works well. The roots like to have oxygen diffusing around them.
Step 4: Plant at the Right Depth
Do not bury the tuber too deep. The top of the tuber should sit about one inch below the soil surface. Plant it with the knobby side facing up. This is where sprouts emerge.
I remember one time I placed the tuber upside down. It spent three weeks trying to grow downward. I only realized after digging it up and seeing roots pointing toward the sky. It grew eventually, but it lost valuable time.
Step 5: Stake the Leaves Early
You might not expect this. The White Christmas stems hold massive leaves that collect heavy dust. They often flop over under their own weight.
I was forced to deal with this after a week of my leaf resting on the soil. It caused tip burn. Since then, I insert a small bamboo stake near the center of the plant right after potting. I attach the main stem loosely with a soft twist tie. I have found it prevents all kinds of bending and breakage later.
Step 6: Provide Consistent Warmth
This plant is tropical. It sleeps if temperatures drop below 60°F. In fact, I noticed stalled growth every time I left my heating off during a cold snap.
I now keep my home between 65°F and 75°F during the active season. Avoid placing your pot near drafty windows. I also recommend avoiding AC vents. Dry, cold air leads to leaf curl on the White Christmas.
What My Two-Week Observation Journal Showed
I documented a recent attempt from tuber sprout to mature leaves. Here is exactly what happened over two weeks so you know what to expect.
Day 1
At this point, I noticed one sprout emerged from the soil. It was about 0.5 inches tall and pale pink. Honestly, it resembled a tiny worm. I kept the soil barely damp and placed it under a grow light for 10 hours a day.
Day 3
The sprout grew to 1 inch. The stem was thick and healthy. I noticed the first hint of green at the tip. No new leaves yet. I watered slightly because the top inch felt dry.
Day 6
The sprout unfolded into a small leaf shaped like an arrow. It was mostly white with light veins. This is when I realized the whole appearance of the plant is determined by the proportion of white to green.
I observed that slightly brighter light increased speckling. Dimmer light produced bigger white areas but thinner leaves. That is a personal preference. I like the speckles, so I keep it on the brighter side.
Day 9
A second stem appeared. It grew rapidly, about an inch every 12 hours. Air temperature in my room was 71°F. Humidity hovers around 50%, which this plant seems to enjoy.
The first leaf flattened and expanded to nearly three inches wide. The white color became more striking. The pink spots were visible mainly near the edges. Honestly, this cultivar is the closest thing to living art that I own.
Day 12
The second leaf opened. It was slightly larger than the first. I checked moisture every second day and did not water more than once in this entire period. That surprised me. I learned that in cooler, indirect light, these plants drink much less than I assumed. This reinforces the claim that 90% of indoor plants die from overwatering, not because we forget to water but because we water too often.
Day 14
At this point, I noticed that the stems reached 8 inches. There were three open leaves plus one on the way. The root system filled out the lower half of the pot. I did not fertilize yet. Caladiums are not heavy feeders early on. Feed them only after the plant has four or more leaves.
Light Advice That Saved My Plant
You have probably read conflicting advice about caladiums. Some say they need lots of direct sun. Others treat them like low-light plants. The truth sits between both extremes.
I tested three locations in my home:
- South window without curtain: leaves burned in five days.
- Dark hallway with no windows: leaves faded and stems stretched.
- North-facing room six feet from window: slow growth but healthy appearance.
The very best setting I found is a west window with a thin sheer curtain. The white leaves get all the light they need without getting singed.
Feel free to rotate the pot every few days. Otherwise, the stems will lean heavily toward the window. They always reach for the light. I have to rotate mine every three days to keep the plant even.
What to Do About Brown Edges and Curling Leaves
Brown tips appeared twice during my care experiments. The first issue was fluoride in tap water. Caladiums are unusually sensitive to chemicals found in municipal water. The white leaf margins react first and die.
Solution: switch to rainwater or filtered water. I keep a small container of tap water out overnight to let chlorine evaporate. This is not fully effective for chloramine, though. Any simple carbon filter cartidge works for chloramine removal.
The second issue was low humidity. Indoor winter air can fall to 20% relative humidity in some rooms. That causes leaf curling at the edges. If the outer edges seem concave or folded inward, the air is likely too dry.
I run a small humidifier near my plants for six hours a day during winter. That solved the deformation within a week. Alternatively, place the pot on a pebble tray filled with water. Just make sure the pot sits above the water line to avoid wicking moisture upward.
My Fertilizer Routine (And Mistakes)
I fed my first plant in week one. That caused burned leaf edges immediately. The salts in fertilizer hurt the soft white tissue.
Here is what I follow now. Experts from the RHS recommend starting with a balanced liquid feed only after the plant shows larger growth. They suggest feeding every two weeks during active growth. I wait for about four weeks after sprouting.
The dilution is critical. Use half the recommended strength. Caladiums have sensitive roots. More fertilizer will never replace good light or proper watering.
A balanced option like 10-10-10 works well. Once the plant begins to go dormant in late autumn, stop fertilizing completely.
Why Your Plant Might Be Falling Over
The stems on large leaves sometimes struggle. If you notice one stem bending, do not assume rot. The stems are simply weak.
Support them early is better than propping them up later. Once a stem folds completely, the tissue creases and will not recover its natural upright shape. You can sometimes tie it to a stake, but it will retain a permanent kink.
There is another reason for floppiness. If the soil is soggy, the stem bases soften. This is how crown rot begins. Always test moisture before adding more water to the pot. And if you are unsure, wait one more day. This is the difference between a thriving caladium and a compost pile in a pot.
Overwintering: Step-by-Step Dormancy
Around September, leaves will slow down. Around October or November, leaves yellow and die back. This happens even indoors. I remember my surprise the first time it dropped all its leaves. I thought my plant was dead.
I tested this twice and I now realize this phase is the key to long-term success. Depending on whether you want to keep it in leaf over winter or store the tuber, the process differs.
Method A: Keep the Tuber in the Soil
If your growth environment remains warm and bright enough, the plant may persist. However, most indoor environments lack the light intensity of the tropics. As a result, leaves become lanky and growth slows.
I tried keeping mine active through one winter. It survived, but it looked sad. The leaves were smaller and less colorful. Honestly, I do not recommend this. It is better to allow full dormancy.
To force dormancy, simply stop fertilizing by early fall. In late autumn, reduce watering gradually. Let the soil dry out completely. Once the foliage is fully yellow and dry, cut it back to about one inch above the soil.
Place the pot in a cool, dark closet. The temperature should not go below 55°F. Around 60°F is ideal. Leave it dry and undisturbed for at least eight weeks. Check occasionally for mold or drying out beyond usefulness.
Method B: Remove and Store the Tuber
I prefer this method for easy spring transplanting. Once the leaves have died back, gently tip the pot out and shake away the soil.
Inspect the tuber. Remove any soft or rotten parts with a clean knife. Let the tuber cure for two days in loose open air. Store it in a paper bag with dry vermiculite or shredded paper. Place the bag in a cool, dark spot.
Mark your calendar. After about eight to ten weeks of rest, you can begin waking it up using the sphagnum moss method from Step 2 above.
The AHS notes that northern gardeners often store caladiums as dormant tubers for over six months. They recommend checking tubers monthly and discarding any that become mushy. So make it a habit to inspect yours periodically. This extended dormancy allows excellent storage longevity.
Should You Divide the Tubers?
After a successful season, your caladium tuber will produce offsets. These are smaller tubers that form around the main parent. I separated them once and had no luck—they rotted soon after replanting. But with stored tubers that were allowed to heal over and dry completely, dividing worked better.
If you choose to divide, wait until the dormant stage. Cut cleaner offsets that have a visible sprout each. Dust the cut area with sulfur powder or ground cinnamon powder. This reduces rot risk.
Let them rest for a few days before planting again. Keep your expectations small. Small offsets need a year to reach full leaf size. The White Christmas variegation develops strongly only in more mature tubers.
What Works If You Have No Natural Light
If your interior space lacks windows entirely, never despair. Modern LEDs have changed indoor gardening for all of us. I have successfully grown this caladium under a 20-watt grow light without any daylight at all.
Keep the light on for about 12–14 hours a day. Position it six to eight inches above the top leaves. White varieties tolerate artificial lighting better than heavy red varieties because they respond more to photon count.
You will still need some dormancy later. Artificial light does not override the natural seasonal cycle after long periods. Enjoy it while you can.
Common Pests and How I Handled Them
Indoor caladiums generally have fewer pests. The most common ones are spider mites and aphids. Spider mites flourish in dry air, hence keeping humidity moderate helps deter them.
I spotted spider mites first on the underside of a leaf. I saw tiny webs between stem junctions. I tried spraying with water first, which did not work. In the end, neem oil applied weekly worked the best. Spray on both leaf surfaces and ensure you cover all stems.
Mealybugs are less common but can ride in on new plants. I quarantine every new plant for two weeks now. This simple practice stopped my collection from getting wiped out. Isolate new additions and inspect them closely before them joining your main homestand.
Use cotton swabs dipped in rubbing alcohol to remove any visible mealybug. Rinse with clean water daily for a few days.
How Large Will This Plant Get?
This is a question I typed into search engines before buying. I found little helpful information. Having grown these for several seasons, I can tell you:
- Height under normal indoor light: 12 to 18 inches
- Height under very bright grow lights: 18 to 24 inches
- Leaf length at full maturity: 6 to 9 inches
- Overall spread: 10 to 14 inches
Do not expect a huge specimen. This variety is more compact and elegant than other caladium species. The leaves look decorative even on small side tables. Honestly, size is not its selling point. The color contrast and translucent look is the thing you will love.
How Long Does Each Leaf Last?
Individual leaves generally support themselves for four to six weeks. The plant simultaneously pushes out new growth at the same time that bottom leaves fade. This is normal. Do not worry when old leaves turn yellow.
Cut yellowing leaves at ground level with clean shears. Removing them allows more energy to go into new leaves. Additionally, cut flower buds if they appear. Caladium flowers are tiny and unspectacular. They steal energy that you want for leaf output. I always remove the calla-lily-shaped buds when they reach a few inches. New leaves appear immediately after.
A Word on Toxicity
Caladiums are toxic if ingested. According to specialist advice, they contain calcium oxalate crystals. Keep them away from pets and curious children. When I handle tubers, I wear gloves. The sap can irritate skin and eyes. Wash hands thoroughly after cutting or repotting.
Do Caladiums Purify the Air?
Some plant guides claim caladiums clean the air. I have not seen specific credible proof for this variety. Please treat these claims with caution. Their value is largely ornamental. That is fine for choosing a plant.
Better air-purifying options include peace lilies and spider plants. Caladiums provide visual impact while other plants do heavy lifting. Keep them in living rooms and bedrooms where their beauty can be appreciated up close.
Final Personal Advice
From all the houseplants I have tried, this one turned out to be the most rewarding. The bright white leaves brighten empty corners with a unique glow that common greenery cannot replicate.
However, I need to stress the fundamentals. Keep the pot small and the soil porous. Do not water on a routine, check the moisture instead. Also, position the pot where morning sun touches it lightly or where no direct sun reaches the leaf surface at all.
I have seen many online posts showing brown-edged leaves from overwatering or sunburn. I wish every one of those authors included a note saying that 90% of indoor plants die from overwatering. This single fact prevents more damage than any other guideline.
It takes practice but your Caladium White Christmas will reward you for years. With proper care, tubers live for many seasons. Each spring your plant will wake up larger than the previous season. Enjoy the process and do not rush. Plants grow on their own time.
Frequently Asked Questions
Do Caladium White Christmas plants need to go dormant indoors?
Yes, they do eventually require rest. Even when grown entirely indoors, the plant naturally stops growing after six to nine months of active growth. You can trigger dormancy by stopping watering in autumn and placing the pot somewhere dark and cool. After two to three months of rest, wake it up again with warmth and light.
Why are the white leaves turning brown and translucent?
The common issues are direct sun, fluoride in water, and low humidity. Shift the pot to filtered or indirect light. Switch to filtered water. Increase air moisture with a humidifier or pebble tray. If tissue has already browned, trim the damaged section and focus on environment changes that prevent long-term damage.
How often should I water a Caladium White Christmas indoors?
There is no fixed schedule. Test the soil with your finger every two days during active growth. Water only when the top inch feels dry. During active summer growth, that may mean every four to five days. In low light or cooler temperatures, you might only water every 10 days. Always err on the side of dryness, as this guards against rot.





