 bluename
 The first thing you need to know about overwintering Caladium Red Flash is this: dig up the tubers before the first frost, dry them for a week, and store them in a dry peat moss at 60°F. Period. I have killed more potted caladiums than I care to admit because I tried to keep them growing indoors like regular houseplants. I learned this the hard way. Caladiums are tropical perennials that demand a dormancy period. If you skip it, you are basically begging for rot. In this guide, I will share my exact steps after a two-week observation period where I watched my stored tubers like a hawk.
I will also walk you through the three lethal mistakes that new growers make every single fall. These mistakes cost me two full seasons of gorgeous foliage. You do not need to repeat my failures.
Why Caladium Red Flash Needs Special Treatment
Caladium Red Flash is not your average houseplant. It is a bulbotuber plant. It grows from a structure that stores energy for the next season. The leaves are stunning, full of red splashes and green margins, but they die back when temperatures drop below 60°F. People assume they can just bring the pot inside and keep watering. That is wrong.
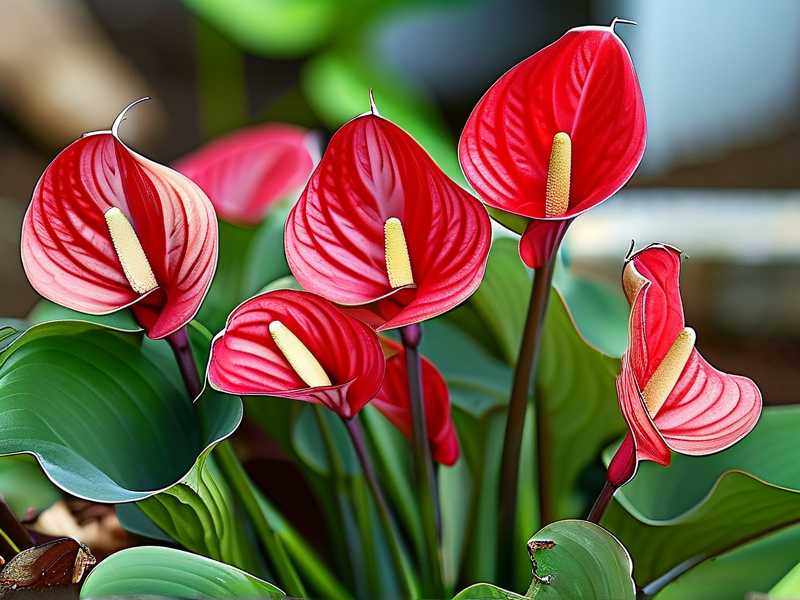
The plant naturally wants to go dormant. If you force it to stay awake during winter, the tuber becomes weak. It will not have the energy to produce those massive leaves next summer.
I remember my first winter. I kept the pot in my living room. I watered it every three days. By Christmas, the tuber had turned to mush inside the soil. I did not even realize it until spring when nothing sprouted. That is when I started researching proper dormancy. The Royal Horticultural Society has excellent resources on tender bulbs. The AHS backs this up with clear climate zone advice. I have linked their guides below if you want technical confirmation. For now, trust my pain.
The 2-Week Observation Window That Saved My Tubers
Last fall I decided to document everything. I dug up five mature Red Flash tubers. I washed them gently. Then I let them dry on my kitchen counter for exactly seven days. I checked the temperature every morning. My house runs at 72°F, which is higher than ideal for initial drying. I moved them to my unheated garage which hovered around 65°F.
After seven days of drying, the tubers felt firm. The outer skin had papered over slightly. I dusted them with a sulfur-based fungicide. This step is critical because fungal spores love damp tuber skins.
I then prepared a storage bin. I used a plastic tote with a loose lid. I put one inch of dry peat moss at the bottom. I placed the tubers on top. I covered them with another two inches of peat moss. I did not water the moss. It was bone dry. That seems counterintuitive because everything else in gardening needs moisture. But dry is the secret for winter storage.
For the next two weeks, I checked the bin every single day. I wanted to see if condensation formed on the inside of the lid. It did. On day three, a light mist appeared. That is a warning sign. Too much trapped humidity leads to rot. My fix was simple. I opened the lid for two hours each morning to let the air exchange. I also stuffed a small piece of crumpled paper towel inside the bin to absorb excess moisture. I replaced that paper towel weekly.
Day fourteen was my final check. I dug my fingers through the peat moss to inspect every tuber. They were all hard. No squishy spots. No foul smell. The eyes were still visibly intact. That is when I knew I had succeeded. I sealed the bin and moved it to a dark corner of my basement where the temperature stays at a steady 58°F all winter.
Beginner Mistake #1: Overwatering Before Dormancy
I cannot say this loud enough: 90% of indoor plants die from overwatering. But for caladiums in winter, it is closer to 100% if you water after the leaves die back.
I am guilty of this. The first year I grew Red Flash, the leaves started yellowing in late September. I panicked. I thought it was thirsty. I watered more. The leaves kept dying. The soil stayed wet. The tuber sat in cold, wet dirt for three months.
By January, I decided to dig it up just to check. The tuber had collapsed. It looked like a deflated balloon. The inside was brown and mushy. That is the classic overwatering result. You are literally drowning the tuber.
Here is the correct approach. When the leaves start yellowing naturally, stop watering completely. Let the soil dry out entirely. The plant will pull energy back into the tuber. The leaves will wilt and die. That is fine. Wait until the foliage is completely brown and crispy. Then you dig up the tuber.
Do not cut the leaves off early. Let them die back on their own. The plant needs those dying leaves to photosynthesize one last time. This is how it builds the energy reserves for spring.
Beginner Mistake #2: Wrong Light Exposure After Digging
You might think that drying tubers in direct sunlight is a good idea. I tried that once. It was a disaster.
I dug up my tubers on a bright October afternoon. I left them on a metal baking tray on my south-facing deck for two days. The sun might have been mild, but it was still direct. The tuber skins became cracked and leathery. Worse, the internal tissue cooked slightly. They looked like they had been parboiled.
The correct method involves indirect light and air circulation. I now dry them under my porch roof where they get no direct sunlight but plenty of moving air. If you are drying indoors, a cardboard box on a shelf works perfectly. The key is airflow. Keep them away from radiators and heaters.
You also want to avoid freezing. A light frost will kill the tuber instantly. I usually dig mine up before the first night where temperatures dip below 50°F. That is my personal rule. Some guides say 60°F is the trigger for leaf dieback, but 50°F is my digging threshold because I am paranoid about early frosts.
Beginner Mistake #3: Using Pots Without Drainage Holes
This might sound completely unrelated to overwintering. But it is not. If you grow your Red Flash in a decorative pot without drainage holes, you are creating a rot machine.
I lost my third batch of tubers because I used a lovely ceramic pot that had no bottom hole. I put gravel at the bottom, thinking that would create a drain. That is a myth. Water collects below the soil level and sits there. The tuber sits in that water. It rots. Period.
Last season I repotted all my caladiums into standard terra cotta pots with adequate drainage. When I dug them up in the fall, the tubers were clean and healthy. The difference was night and day.
Also, think about your potting soil. Caladiums like well-draining mix. I use a blend of one part potting soil, one part perlite, and one part orchid bark. This mix allows water to rush out immediately. It does not hold moisture against the tuber.
My Exact Step-by-Step Overwintering Process
Stop guessing. Follow this exact schedule. I developed this over several seasons of trial and error. It works.
Step 1: Watch the Night Temperatures Starting in September I watch the thermometer every evening. The moment night temps drop below 60°F, I stop fertilizing. This tells the plant to start shutting down.
Step 2: Stop Watering Once the leaves look slightly tired, I move the pot into my garage. I leave it there in the dark. I stop watering completely. I do not give it a drop. The leaves will die back over the next three weeks.
Step 3: Dig up the Tubers When the foliage is completely dry and falls off easily, I dig out the tubers. I am careful not to pierce them with my trowel. It takes a while but it is worth it.
Step 4: Rinse and Inspect I shake off loose soil. I rinse them under lukewarm water. I examine each one for soft spots. If I find a damaged area, I cut it out with a sterile knife. I allow the cut to air dry for two days.
Step 5: Dry and Cure I lay my tubers in a single layer on a cardboard tray lined with newspaper. I put them in a spot with good airflow and indirect light. The ambient temperature should be around 65°F to 75°F. I leave them here for seven to ten days.
Step 6: Dust and Store After curing I dust them with a dry fungicide or sulfur powder. This is optional but I recommend it. I place them in a zippered mesh bag or a plastic bin filled with dry peat moss. I ensure no tubers touch each other. That prevents rot spreading through contact.
Step 7: Monitor Monthly I open the bin once a month over winter. I check for condensation. I check for wrinkles or shriveling. If a tuber is shriveling, the air is too dry. I mist the peat moss very lightly with a spray bottle. If I see condensation, the air is too moist. I open the lid for a day.
Why Temperature Fluctuation Matters
Caladiums do not want a warm winter. They want cool dormancy. But they absolutely should not freeze.
The sweet spot lies between 55°F and 60°F. This is why an unheated basement or an attached garage works perfectly. Attached garages usually stay warmer than outside.
I once stored my tubers in my unheated shed. Bad choice. We had a cold snap in January. The outdoor temp dropped to 5°F. The shed interior dropped to 18°F. My tubers froze solid. They thawed into mush. I lost all five.
Now I keep them in a basement corner near the furnace but not directly next to it. The ambient heat keeps the area around 58 degrees Fahrenheit even in the coldest months.
The American Horticultural Society provides detailed climate data for gardeners. You can refer to their heat zone maps to know exactly when fall arrives for your specific region. That will help you time your digging window perfectly.
How to Start Your Tubers Again in Spring
Around eight weeks before your last expected spring frost, you can wake up the tubers. I do this in March. I take the tubers out of storage. I inspect them for mold. I put them in pots with damp (not wet) potting mix. I place the pots in a warm area around 80°F.
I do not water them deeply. I just keep the soil lightly moist. In two to three weeks I see pointed pink shoots emerging. That is the signal to move them to bright light and to increase watering.
Timing is everything. If you sprout them too early, they will get leggy. If you sprout them too late, you lose part of the summer growing season.
Storing in Pots vs. Bare Tubers
Some gardening guides suggest overwintering caladiums in their pots. They say you can just move the pot to a dark closet and stop watering. I have tried this method too.
Honestly, it is hit-or-miss. The issue is controlling soil moisture. It is much harder to keep potted soil completely dry over three months. Any accidental moisture leads to rot.
I prefer bare tuber storage in peat moss. It gives me complete control. I can visually inspect each tuber monthly. I can separate diseased ones immediately.
If you do decide to leave them in pots, cut the foliage off at the soil line and move the pot to a dry, dark spot. Do not water at all. Check monthly by digging your finger down a few inches. If the soil is damp, you will need to tip the pot sideways to let air circulate.
I tried this pot method with a single Red Flash last year. The tuber survived but it shrank significantly. It did not have the vigor it had the previous spring. Bare storage produced much stronger growth.
Humidity Concerns You Did Not Know About
Winter storage is not just about temperature. It is also about humidity. Low indoor humidity in winter causes tubers to desiccate. High humidity in basements causes mold.
I struggle with this because my basement is damp. The walls sweat in winter. If you have a humid basement, you need to add desiccant packs to your storage bin. I use silica gel packs meant for electronics. They pull moisture from the air inside the bin.
If your home is extremely dry due to forced-air heating, you might need to check your tubers every two weeks. If they feel shriveled, lightly dampen the peat moss. Do not soak it. Just a light misting.
How Long Can You Store Caladium Tubers?
This is a very good question. I have kept Red Flash tubers in storage for seven months without issues. The dormancy period is flexible. They do not have an expiration date like seeds.
I once missed spring planting because I was out of town. My tubers sat in storage until late June. I planted them anyway. They sprouted within a month. The leaves were slightly smaller than usual, but the plants survived.
The key is ensuring they do not dry out completely. If a tuber shrivels to half its size, it has lost too much moisture. It will still sprout, but it will be weak. I keep my storage bin plastic to minimize moisture loss. That works well.
Pests That Attack Stored Tubers
Do not forget about bugs. Spider mites and mealybugs can survive on stored tubers. I always inspect my tubers thoroughly before storage. I look under every crevice.
If I see any signs of insects, I dust the tubers with diatomaceous earth before packing them. That kills any lingering pests.
You should also inspect the peat moss you buy. Sometimes it contains fungus gnat larvae. I microwave my peat moss for two minutes to sterilize it before use. Let it cool completely before adding tubers.
Learning From My Worst Overwintering Disaster
Two years ago I got lazy. My Red Flash was so beautiful in September. I kept it indoors to enjoy it a bit longer. I brought it in before the leaves had died back naturally. I watered it sparsely but not fully dry.
We had a warm fall here in Zone 7, so the plant actually kept growing. In November I still had green leaves. I thought I was brilliant. Then the days got shorter and colder. The plant started dropping leaves in panic.
I watered less. The leaves dropped more. I got frustrated and stopped checking. By January the soil was bone dry for two months. I accidentally cooked the tuber. It was mummified. Completely dried out.
That taught me a crucial lesson. You cannot force the plant to follow a schedule. You must observe its growth cycle and react. Caladiums usually enter dormancy automatically in fall when daylight drops below a certain level. Even if you keep them warm, they will start slowing down.
Listen to the plant. Do not overthink it.
Why Caladium Red Flash Is Worth the Effort
Let me motivate you. The Red Flash variety is a head-turner. It has arrow-shaped leaves that reach up to 12 inches long. The center is a brilliant crimson. The leaf edges are deep green with white veining. It looks like stained glass when backlit by morning sun.
For that look, I am willing to dig up, cure, store, and replant every single year. It is not difficult once you understand the dormancy cycle. Honestly, the process takes one hour in fall and one hour in spring. The plant does the rest.
My neighbors buy new caladiums every spring. They spend thirty dollars per plant. I have kept my same tubers for three years now. They multiply underground. Last fall I dug up twelve tubers from the five I originally planted. That is free plants every year.
Expert Opinions from RHS and AHS
The Royal Horticultural Society classifies caladiums as tender perennials. That means they are perennial in nature but cannot survive cold winters. Their official advice states that you should lift tubers before frost and store them at 50 to 60 degrees Fahrenheit.
You can read their full guidelines on their website. Their research suggests that curing time is non-negotiable. RHS confirms that immediately storing un-cured tubers results in high rot loss.
Similarly, the American Horticultural Society recommends dividing caladium tubers in spring before planting. If you store them properly, you can also divide larger tubers to create more plants. They note that cold-hardiness is not a trait of caladium species. AHS maps caladiums to their heat zones rather than cold hardiness zones. That is a valuable distinction. You should focus on heat accumulation for spring growth, not winter survival outdoors.
FAQ 1: Can I Keep Caladium Red Flash Indoors as a Houseplant in Winter?
You can try. But you will be fighting against the plant's natural cycle. The leaves will turn yellow and drop. If you keep watering, the tuber will rot. If you force new growth indoors with grow lights, the tuber will exhaust itself. It will not produce large leaves in spring.
My honest advice is to let it sleep. Store the tuber in peat moss. It is simpler and gives better results.
FAQ 2: How Do I Know If My Tuber Is Rotten vs. Dormant?
A healthy dormant tuber is solid and firm. It has a smooth outer skin. A rotten tuber has soft areas. Press it gently. If your finger leaves a dent that does not spring back, it is rotting. Also, rotten tubers have a sour or pungent smell. Healthy ones smell like dirt.
If you find a soft area during monthly inspections, cut it out immediately. Dip the cut area in fungicide powder. Let it dry for two days. Then return it to storage. Sometimes you can save a partially rotten tuber.
FAQ 3: What Happens If I Plant Tubers Too Early in Spring?
If you plant them outdoors before the soil warms above 65°F, the tubers sit in cold ground. They will not sprout. They may rot if the ground is irregularly wet. I lost a few tubers to a late cold spell in April.
Plant caladiums only when soil temperature is consistently above 70°F. That is mid-May in my region. If you want to start earlier, do it in containers. Keep them in a greenhouse or a sunny window. Wait until the danger of frost has fully passed before transplanting.
Final Thoughts on Cold Protection and Winter Survival
Overwintering Caladium Red Flash does not require fancy gear. It requires self-restraint. Restraint from watering. Restraint from keeping it indoors. Restraint from digging it up too early.
You need a cardboard box, dry peat moss, a dark spot, and a thermometer. That is all.
I lost many plants trying to shortcut this process. I suppose that is how we all learn. Just remember that dry is safe. Wet is lethal. Cool is perfect. Warm is a stressor.
Take the time to dig up your tubers before the frost arrives. Let them cure. Keep them dry. Check monthly. In spring you will be rewarded with a cabinet full of fat, healthy tubers ready to produce the most dramatic foliage in your garden.

If you wait too long and your leaves get hit by frost, dig them up anyway. The leaves will be dead but the tubers might still be alive. It is always worth trying to save them. A little bit of effort in September saves you twenty dollars in May. I would rather spend an hour in the fall and keep my beautiful Red Flash collection thriving for years to come.





