 bluename
 How to Fix Caladium Wilting After Watering: A Root-Centric Rescue Guide
There’s nothing more disheartening than giving your stunning caladium a drink, only to watch its vibrant, heart-shaped leaves droop, curl, or wilt within hours. If you’ve found yourself frantically searching “why is my caladium wilting after I water it?”, you’re not alone. I’ve been there, staring at a once-proud ‘White Queen’ with its leaves practically touching the soil, feeling like I’d failed. For years, I assumed wilting meant thirst. So, I watered more. And the problem got worse. It was through this frustrating cycle that I learned a critical lesson: when a caladium wilts post-watering, the issue is almost never in the leaves—it’s almost always in the roots. This guide is the product of my own hands-on rescue missions, specifically a detailed, two-week intervention that saved a beautiful ‘Red Flash’ from the brink. I’ll walk you through the exact root check steps I used, the mistakes I made along the way, and how to truly revive your plant.
Why Your Watering Might Be the Problem, Not the Solution
We instinctively equate wilting with a need for water. But with caladiums, which are tropical tubers, wilting after watering is a classic distress signal. It’s the plant’s way of saying the system that should absorb that water is compromised. The primary culprits are root rot from overwatering and a condition often called “wet feet.” When soil remains soggy for too long, oxygen is driven out, and harmful anaerobic fungi and bacteria thrive. These pathogens attack the roots, turning them from firm and white or tan to mushy, brown, or black. Once a significant portion of the root system is damaged, it can no longer take up water, leading to dehydration and wilting—even though the soil is wet. It’s a cruel irony. The Royal Horticultural Society (RHS) notes that overwatering is the most common cause of houseplant demise, as it creates an environment where roots suffocate and decay.
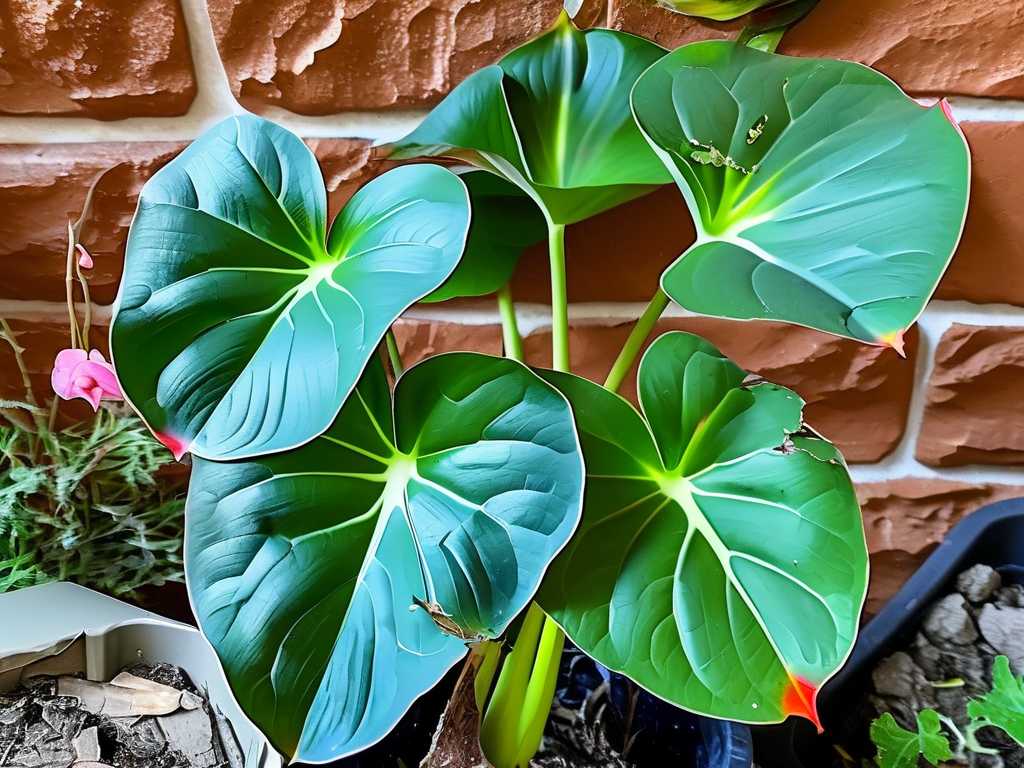
The Essential Pre-Check: Assessing Your Plant’s Environment
Before we disturb the roots, we need to gather clues. This step prevents unnecessary stress on the plant.
First, check the soil moisture deeply. Don’t just skim the surface. Stick your finger 2-3 inches into the soil. Is it cold, clumpy, and wet? That’s your first red flag. I use a simple wooden chopstick; if it comes out stained dark and with soil sticking to it, the medium is too wet.
Second, evaluate your pot and drainage. Is there a drainage hole? I learned this the hard way with a decorative cache pot. Water pooled at the bottom, creating a hidden swamp. Also, feel the weight of the pot. A pot that feels surprisingly heavy for its size, especially after the top soil has dried a bit, indicates waterlogged soil at the bottom.
Third, consider environmental factors. Is the plant in a cool, drafty spot? Cool temperatures slow water evaporation and transpiration, making overwatering effects worse. Low humidity can also cause leaf curl, but usually alongside crisp edges, not the soft, limp wilting we see with root issues.
The Step-by-Step Root Health Investigation
If the environment points to overwatering, it’s time for a root inspection. This is the most definitive diagnosis. I gathered my tools: a clean workspace, newspaper, sterilized scissors or pruners (I wipe mine with isopropyl alcohol), fresh well-draining potting mix, and a clean pot.
Step 1: Gently Remove the Plant from Its Pot Tip the pot on its side and coax the plant out. Don’t pull by the stems. If it’s stuck, gently squeeze flexible pots or run a knife around the inside edge. My ‘Red Flash’ was stubborn, and I had to tap the bottom firmly but patiently.
Step 2: Examine and Gently Loosen the Root Ball Now, observe. A healthy root ball should hold some soil but not be a solid, soggy mass. My plant’s root ball felt dense and cold. I began gently massaging it to loosen the soil and expose the roots. Here’s where I saw the truth: while there were some firm roots, many outer roots fell away easily, and a distinct, unpleasant, musty odor was present—a telltale sign of rot.
Step 3: Identify Healthy vs. Rotten Roots This is the crucial part. Healthy caladium roots are firm to the touch and can be white, tan, or even slightly orange. Rotten roots are mushy, slimy, and often dark brown or black. They may disintegrate when touched. The tuber itself should be firm. If it’s soft or squishy, the rot is advanced.
Step 4: Prune the Damage With my sterilized scissors, I meticulously trimmed away every soft, rotten root and any dead or yellowing foliage. This feels drastic, but it’s necessary. You must remove all the compromised tissue to prevent the rot from spreading. I cut back to healthy, firm material. After pruning, I briefly rinsed the remaining root system in lukewarm water to help wash away any lingering decomposed matter.
Step 5: Repot in Fresh, Airy Medium I chose a pot only 1-2 inches larger than the remaining root system. A too-big pot holds excess moisture. I used a premium, well-draining potting mix amended with extra perlite and orchid bark for aeration—a mix I now swear by for all my aroids. The American Horticultural Society (AHS) emphasizes the importance of a porous growing medium for preventing waterlogged soil. I placed the plant at the same depth it was before, filled in around it, and gave it one modest drink to settle the soil, being careful not to soak it.
The Critical Two-Week Recovery Protocol: What I Observed
The real work began after repotting. Recovery is not instant.
Days 1-3: The plant looked worse. The remaining leaves were still very droopy. This is normal transplant shock. I placed it in a location with bright, indirect light (no direct sun, which would add stress) and increased ambient humidity by grouping it with other plants. I did not water. The goal was to let the roots breathe and callus over any cuts.
Days 4-7: I saw the first sign of hope: one wilted leaf began to firm up slightly at the stem. No new drooping occurred. I continued to withhold water, checking the top inch of soil daily. It was drying slowly, as expected with a reduced root system.
Day 8: The soil was dry about 1.5 inches down. I gave it a thorough but careful watering, allowing water to flow freely from the drainage hole and immediately discarding the runoff. This was the test: would it wilt again?
Days 9-14: This was the turning point. The plant did not wilt after that first post-repot watering. Over the next few days, the leaves gradually, almost imperceptibly, lifted. They regained their turgor pressure. While I lost two older leaves that yellowed and were shed (the plant’s way of conserving energy), the core leaves recovered fully. By the end of the second week, the caladium was stable, with no signs of progressive wilting.
Common Pitfalls and How I Avoided Them
My first attempts at fixing caladium root rot failed because I made key errors.
- Pitfall 1: Under-pruning. I was too timid, leaving slightly soft roots “just in case.” The rot continued. The second time, I was ruthless, and it worked.
- Pitfall 2: Overwatering during recovery. I mistakenly kept the soil slightly moist to “help” it. This suffocated the new root growth. Letting the soil dry appropriately between waterings is non-negotiable.
- Pitfall 3: Using the old soil. Reusing the infected soil is a recipe for reinfection. Always start with a fresh, sterile mix.
- Pitfall 4: Expecting overnight miracles. Patience is essential. The plant needs energy to regrow roots before it can support perfect foliage.
Building a Healthy Future: Watering and Care Adjustments
Post-recovery, I changed my entire approach. I now water only when the top 1-2 inches of soil are dry. I lift the pot to feel its weight. I ensure high humidity through pebble trays, which caladiums adore. I keep them warm, away from drafts. Most importantly, I listen to the plant and the soil, not a rigid calendar schedule.
What if the tuber itself is rotten? If the main tuber is soft and mushy, the prognosis is poor. However, you can try a last-resort surgery. Cut away all the rotten parts until you reach clean, firm tissue. Dust the cut with sulfur or cinnamon as a fungicide. Let it air-dry for a day or two, then place it on barely moist sphagnum moss in a warm, bright place. It may resprout, but this is a longer, uncertain process.
How can I prevent this from happening again? Prevention is about mastering your watering technique and environment. Use pots with drainage holes, a chunky soil mix, and always empty saucers after watering. Consider the “soak and dry” method thoroughly, then let the soil approach dryness. Adjust watering frequency with the seasons—less in winter.
My caladium wilted after repotting, but the roots were fine. Why? This is likely transplant shock, which is different from root rot wilting. Ensure the plant wasn’t overwatered immediately after repotting, and give it consistent, warm, humid conditions without direct sun. It should perk up in a few days to a week as the roots settle into their new environment.
Seeing your caladium wilt after you’ve cared for it is frustrating, but it’s often a fixable problem. The journey with my ‘Red Flash’ taught me that successful plant care is less about a green thumb and more about informed detective work. By having the courage to check the roots, meticulously remove the rot, and provide a patient, tailored recovery period, you can rescue your plant. The key is to shift your mindset from “the plant needs water” to “the roots need to function.” By focusing on creating a healthy root environment—airy soil, careful watering, and good drainage—you’ll be rewarded with a resilient caladium that thrives, with its spectacular leaves standing proud and perky, exactly as they should.





