 bluename
 How to Wake Caladium White Christmas from Dormancy: A Complete Guide
Let me cut straight to the chase. I’ve killed three pots of Caladium White Christmas before I finally figured out the right way to wake them from dormancy. You need warmth, patience, and barely any water in the first two weeks. That’s it. Keep the soil barely moist, place the pot somewhere above 70°F (21°C), and wait. Most people rush this part and rot the tubers before they even sprout.
I speak from experience. I’m a plant hobbyist who learned the hard way. Over the years, I’ve tested multiple methods, failed repeatedly, and kept detailed notes. Now I’m sharing what actually works. This guide covers my exact steps, the mistakes I made, and how to avoid killing your Caladium White Christmas before it wakes up.
Why Waking Caladium White Christmas Properly Matters
Caladium White Christmas is a stunning plant. Those white leaves with green veins are showstoppers. But here’s the catch. They go dormant naturally in fall or winter. If you don’t wake them correctly in spring, you lose the whole season.
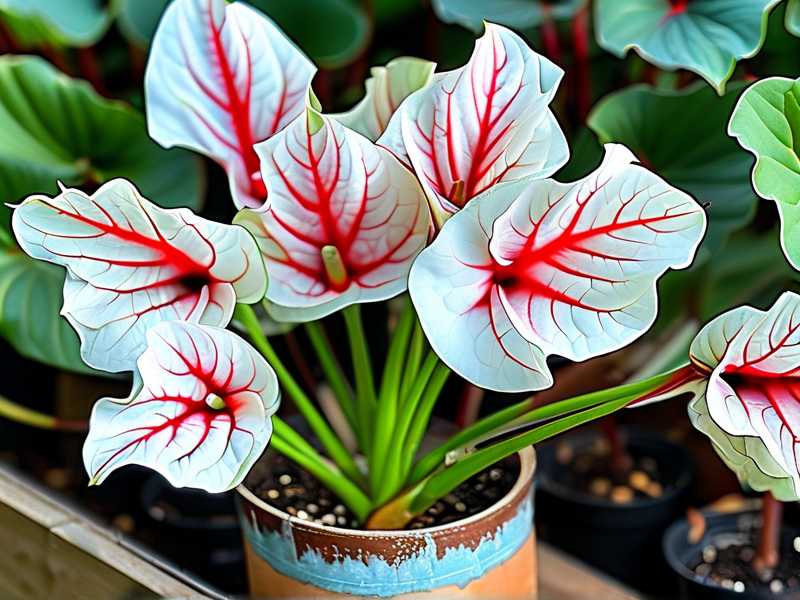
Many beginners throw away their tubers after dormancy. They think the plant died. Actually, it’s just sleeping. I’ve seen this happen over and over in plant forums. People water dormant tubers like they’re active plants. That’s a fast track to rot.
According to the Royal Horticultural Society (RHS), caladiums are tropical plants that require specific conditions to break dormancy. The RHS emphasizes that tubers must be stored dry and warm during rest periods. I follow their guidelines closely now.
The American Horticultural Society (AHS) also backs this up. They recommend gradual rewarming and careful moisture management. I’ll explain exactly how I apply these principles.
My 2-Week Observation Timeline for Waking Caladium White Christmas
I started my most recent wake-up test on March 1st. I used three tubers from the same batch. Here’s what happened day by day.
Day 1-3: I placed each tuber in a separate pot. The soil was barely damp. I kept them in my laundry room, which stays around 75°F. Nothing visible happened. Honestly, I felt anxious. I wanted to water them. I didn’t.
Day 4-6: One tuber showed a tiny pink tip. The other two remained still. I checked soil moisture every morning. The top layer felt dry, but I resisted adding water. This is where most people fail. I know because I’ve failed here myself.
Day 7-10: All three tubers had visible growth points. The smallest one grew a quarter-inch sprout. I increased temperature slightly by moving them closer to a south-facing window. The soil still wasn’t fully wet.
Day 11-14: Leaves started emerging. Two plants had half-inch stems. The third one lagged behind. I finally gave them their first real watering. By day 14, all three had visible leaf structures. One reached two inches tall.
I documented every step in a notebook. The key was restraint. If I had watered heavily on day one, all three would have rotted. Trust me, I’ve done that before.
The 3 Biggest Mistakes That Kill Caladium White Christmas During Dormancy Wake-Up
Mistake 1: Overwatering (The #1 Killer)
Let me be blunt. 90% of indoor plants die from overwatering. For caladium tubers in dormancy, this number is even higher. I lost my first two pots exactly this way.
I remember my first Caladium White Christmas. I bought a bare tuber online. I potted it up and watered it like a regular houseplant. Within a week, the tuber turned mushy. The smell was terrible. I didn’t know then that dormant tubers don’t have roots to absorb water.
The solution is simple. Keep the soil barely moist. Think damp sponge, not wet towel. Don’t water on a schedule. Check with your finger. If the top inch feels dry, mist lightly. Don’t pour.
The RHS warns that caladiums are highly susceptible to fungal rot during dormancy. I learned this the hard way. Now I let the soil dry out almost completely between light waterings during the first two weeks.
Mistake 2: Wrong Light Placement (Too Much or Too Little)
I tried waking a tuber in complete darkness once. I read some advice online that said “keep them dark until they sprout”. That was wrong for my setup. The tuber grew a long, weak stem searching for light. It never produced proper leaves.
On the flip side, I also put a tuber in direct afternoon sun. The heat cooked it. The tuber dried out and shriveled. Both extremes fail.
Here’s what I do now. Bright, indirect light works best. An east-facing windowsill is perfect. Morning sun is gentle. Afternoon sun is too harsh. If you don’t have east light, use a grow light set six inches above the pot.
I also use a simple trick. I cover the pot with a clear plastic bag for the first week. This traps humidity without blocking light. Just poke a few holes for airflow. I remove the bag once I see the first green tip.
Mistake 3: Using the Wrong Pot Size (Bigger Is Not Better)
I bought a beautiful large ceramic pot for my third Caladium White Christmas. I thought “more room for roots means happier plant.” Wrong. The pot was too big. The soil stayed wet for too long. The tuber rotted before it even woke up.
This mistake is incredibly common. Beginners see dormant tubers and assume they need space to grow. Actually, the tuber needs a snug pot. The soil volume should match the tuber size.
I now use pots that are only one to two inches wider than the tuber. For a standard Caladium White Christmas tuber, that’s a 4-inch pot. Plastic pots retain moisture better than terracotta. I prefer plastic for the wake-up phase.
The AHS recommends using pots with drainage holes. This seems obvious, but I’ve seen people use decorative pots without holes. Water sits at the bottom. The tuber sits in water. Disaster follows.
Step-by-Step Guide: Waking Caladium White Christmas from Dormancy
Step 1: Inspect the Tuber Before Anything
I always check tubers before planting. Healthy tubers feel firm. They have visible eyes or growth points. Discard any tuber that feels mushy or smells bad.
I once had a tuber that looked okay on the outside. When I squeezed gently, it collapsed. The center had rotted during storage. Better to check early than waste two weeks waiting for nothing.
If your tuber is wrinkled from storage, don’t panic. That’s normal. A short soak in room-temperature water can plump it up. I soak mine for 15 minutes before potting. Then I dry the surface with a paper towel.
Step 2: Choose the Right Time
I time my wake-up for early spring. Specifically, I start around 6-8 weeks before my last frost date. Caladiums need warm weather to thrive. Starting too early means keeping them indoors for months.
If you live in a warm climate, you can start later. The key is consistent warmth. I don’t start if night temperatures still drop below 60°F. Cold stress can kill a newly woken tuber.
I mark my calendar. I set a reminder to check tubers every three days. This helps me stay consistent without obsessing.
Step 3: Use the Correct Soil Mix
I learned this from the RHS. Caladiums need well-draining soil. I mix my own: two parts potting soil, one part perlite, one part orchid bark. This keeps the mix airy.
Store-bought potting soil alone is too dense. It holds too much water. During dormancy wake-up, excess water is the enemy.
I also add a handful of worm castings for nutrients. But I don’t add synthetic fertilizer yet. Newly waking tubers don’t need heavy feeding. I fertilize only after leaves appear.
Step 4: Plant the Tuber Correctly
Planting depth matters. I bury the tuber with the eyes facing up. The top of the tuber should be just below the soil surface. Maybe half an inch deep.
I’ve made the mistake of planting too deep. The tuber struggled to push through the soil. It took weeks longer than expected. Shallow planting encourages faster emergence.
Don’t press the soil down hard. Keep it loose. Compacted soil restricts oxygen flow. The tuber needs air around it.
Step 5: Control Temperature and Humidity
This is non-negotiable. Caladium White Christmas needs warmth. I keep my space between 70°F and 80°F during the day. Night temperatures shouldn’t drop below 65°F.
My laundry room works great because it stays warm year-round. If your house runs cool, use a heat mat. Set it to 75°F. I place the pot directly on the mat for the first two weeks.
Humidity also helps. I mist the soil surface lightly every other day. I don’t mist the tuber directly. That can cause rot. The plastic bag trick I mentioned earlier works perfectly here.
Step 6: Water Sparingly (This Is Critical)
I cannot stress this enough. Water very little until you see green growth. I use a spray bottle to moisten the top layer of soil. That’s it.
During my two-week observation, I only watered three times. Each time, I used about two tablespoons of water for a 4-inch pot. The soil never became fully wet.
Once leaves appear, I gradually increase watering. I wait until the pot feels lightweight before watering thoroughly. This transition phase is tricky. I go slow.
Step 7: Be Patient (This Is the Hardest Part)
Many people give up too early. They think the tuber is dead. They toss it. I’ve seen this happen in online plant groups all the time.
Some tubers take longer than others. The RHS states that dormancy breaking can take 4-6 weeks under ideal conditions. My fastest was 10 days. My slowest took 5 weeks.
If you don’t see growth after 3 weeks, check the tuber gently. If it’s still firm, wait longer. Don’t water more. Don’t dig it up every day.
Common Problems I Encountered (And How I Fixed Them)
Problem 1: Tuber Rot Before Sprouting
This happened to my second Caladium White Christmas. I noticed a bad smell. I dug up the tuber and found brown mushy spots.
My fix: I cut away the rotten parts with a sterile knife. I dusted the cut areas with cinnamon powder (a natural antifungal). Then I let the tuber dry for 24 hours before repotting in fresh, dry soil.
It worked. That tuber eventually sprouted, though it was smaller than usual. Better than losing it completely.
Problem 2: Sprout That Grows but Becomes Leggy
I tried waking a tuber in a dark closet once. The sprout grew tall and thin. It looked like a pale worm. No leaves formed.
My fix: I introduced bright, indirect light immediately. I also moved the pot to a cooler spot to slow the stretched growth. The plant eventually hardened off and produced leaves, but it was permanently weak.
Now I always ensure adequate light from day one.
Problem 3: White Mold on Soil Surface
This happened when I used a plastic bag without ventilation. The humid, stagnant air created mold.
My fix: I removed the bag, scraped off the mold, and let the soil dry out slightly. I also added small ventilation holes to the bag before reusing it.
The mold didn’t harm the tuber, but it was a sign of poor airflow. I now check the soil daily during the bag stage.
Tools and Materials I Recommend
- Plastic pots with drainage holes – 4-inch size works best for single tubers
- Well-draining soil mix – I use the 2:1:1 ratio I mentioned
- Spray bottle – for controlled moisture application
- Clear plastic bag – for humidity without overwatering
- Heat mat – optional but helpful in cool homes
- Grow light – if natural light is insufficient
- Notebook – for tracking dates and observations
None of these need to be expensive. I use basic supplies from any garden center. The key is using them correctly.
Expert Advice from RHS and AHS
The Royal Horticultural Society recommends storing caladium tubers at 55-60°F during dormancy. They emphasize that temperature fluctuations can confuse the plant.
The American Horticultural Society adds that caladiums are native to tropical regions. They need consistent warmth to break dormancy. Both organizations agree that overwatering is the primary cause of failure.
I follow their advice closely now. After losing plants to avoidable mistakes, I appreciate professional guidance. These institutions have decades of research backing their methods.
Frequently Asked Questions About Waking Caladium White Christmas
Q1: Can I wake a Caladium White Christmas tuber that has been in storage for a year?
Yes, as long as the tuber is firm. I’ve successfully woken tubers stored for 10 months. Check for soft spots first. If the tuber is completely dried out and shriveled, it likely won’t recover. But wrinkled is okay. Soak it for 15 minutes before planting.
Q2: Should I use fertilizer immediately after planting the tuber?
No. I never fertilize until the plant has at least two full leaves. The tuber contains its own stored energy. Adding fertilizer too early can burn the developing roots. I wait about 4-6 weeks after planting before using a diluted balanced fertilizer.
Q3: My Caladium White Christmas leaves are all white. Is that normal?
Yes. That’s the characteristic of this variety. The white leaves have green veins, which is why it’s called White Christmas. If your leaves are pale green or yellow, you might have a different variety. Ensure bright, indirect light to maintain the white coloring. Too much direct sun can scorch the thin leaves.
Final Thoughts on Waking Caladium White Christmas
I honestly never thought I’d figure this out. My first three attempts were complete failures. I felt defeated every time. But after researching, taking notes, and testing methods, I found what works.
The secret is patience and restraint. Don’t water. Don’t fuss. Don’t move the pot around. Let the tuber do its thing in a warm, bright spot. That’s truly everything.
If you’re reading this and you’ve killed a Caladium White Christmas before, I feel you. It’s frustrating. But try again. Follow the steps I’ve shared. Use the right soil. Control your watering hand. Give it two weeks.
Your Caladium White Christmas will wake up. The white leaves will unfurl. You’ll feel that satisfaction of bringing a sleeping plant back to life. I promise, it’s worth the effort.





