 bluename
 Let me be real with you. I killed my first Caladium Strawberry Star in under three weeks. The leaves turned yellow. The stems got mushy. It was a complete mess. I learned the hard way that this plant needs specific conditions to thrive, especially when paired with ferns. The trick is simple: mimic their natural rainforest floor habitat. Keep the soil consistently moist but never soggy, provide bright indirect light, and use a well-draining pot with drainage holes. That's the answer. Now let me walk you through the exact steps I took to finally get it right.
Why I Almost Gave Up on Caladiums
I remember the day I brought home my first Caladium Strawberry Star. It looked perfect. The pink and green speckled leaves were stunning. I placed it next to a Boston fern on my bookshelf. Within a week, the leaves started drooping. I panicked and watered more. Big mistake.
90% of indoor plants die from overwatering. I didn't know that then. I thought more water meant happier plants. Turns out, caladiums hate sitting in wet soil. Their roots rot fast.
I tried again with a second plant. This time I used a ceramic pot with no drainage hole. I thought it looked nicer. The caladium lasted two weeks before the leaves turned yellow and fell off. I was frustrated. Why couldn't I keep this plant alive?
What I Learned After My Third Failure
The third plant died because I put it in direct sunlight. I thought all plants love sun. Wrong. Caladium Strawberry Star needs bright indirect light. Direct sun scorches the delicate leaves. I watched the edges turn brown and crispy within days.
I almost gave up. But then I did some research. I talked to other plant lovers. I read everything I could find from the RHS. That's when I realized my biggest mistakes.
The Three Deadly Mistakes Newbies Make
Mistake #1: Watering Too Much
Many people think more water equals more growth. Not true. Caladiums are sensitive to moisture levels. They like consistent dampness, but not wet feet.
I used to water mine every morning. The soil never had time to dry out. The roots suffocated and rotted. The plant looked fine for the first week. Then suddenly all the leaves turned yellow.
How I fixed it: I started checking the soil with my finger. Stick your finger an inch deep. If it feels damp, skip watering. If it feels dry, water slowly until water drains from the bottom. I now water my Caladium Strawberry Star about once every 5-7 days, depending on the season.
Mistake #2: Wrong Light Placement
Light is tricky. Too much burns them. Too little makes them leggy and pale.
I had my first caladium in a south-facing window. The afternoon sun hit it directly for hours. The leaves got brown spots and crispy edges within a week. I moved it to a north-facing window. It stopped growing completely. No new leaves for a month.
The sweet spot: East-facing windows work best. Morning sun is gentle. Afternoon shade protects the leaves. If you don't have an east window, place the plant a few feet away from a south or west window. Use sheer curtains to filter harsh light.
Mistake #3: Choosing the Wrong Pot
This one still makes me cringe. I bought a beautiful ceramic pot without drainage holes. I thought it looked elegant. But water had nowhere to go. It pooled at the bottom. The roots rotted within two weeks.
My rule now: Always use pots with drainage holes. Terra cotta pots are great. They let the soil breathe and release excess moisture. Plastic nursery pots work too, but put them inside a decorative cache pot with no direct contact to the soil.
My Step-by-Step Companion Planting Guide
After killing three plants, I finally figured it out. Here's exactly what I did to grow Caladium Strawberry Star with ferns successfully. I documented everything over two weeks.
Week 1: Setting Up the Perfect Environment
Day 1: I bought a healthy Caladium Strawberry Star from a local nursery. The leaves were firm and upright. I also picked up a Boston fern. Ferns love similar conditions—humid air, indirect light, and moist soil.
I chose a wide, shallow terra cotta pot with multiple drainage holes. This shape works well because caladiums have shallow root systems. Ferns also spread horizontally.
Soil mix: I made my own blend. Regular potting soil holds too much water. I mixed 2 parts peat moss, 1 part perlite, and 1 part orchid bark. This combination drains well but stays slightly moist. Peat moss retains some water while perlite creates air pockets. Orchid bark adds structure.
Planting steps:
- I filled the pot one-third full with my soil mix
- I placed the caladium tuber about 2 inches deep with the eyes facing up
- I positioned the fern on the opposite side
- I gently filled around both plants
- I watered thoroughly until water ran out the bottom
I put the pot on a pebble tray. The tray has water, but the pot sits above it on the pebbles. This creates humidity without soaking the roots. Ferns and caladiums both love humidity.
Light setup: I placed the pot on a shelf near an east-facing window. The morning sun hits it for about 3 hours. The rest of the day it gets bright indirect light from the rest of the room.
Day 3 observation: The caladium leaves looked perky. No drooping. The fern fronds were still green and flexible. I checked the soil—still slightly damp from the initial watering. I did not water.
Day 5: I noticed a small new leaf emerging from the caladium. This was a good sign. The fern showed no new growth yet, but it looked healthy. I watered lightly because the top inch of soil felt dry.
Day 7: The caladium had two new leaves unfurling. The fern had tiny new fronds at the base. I trimmed off one older fern frond that had turned brown. This promotes new growth.
Week 2: Fine-Tuning and Observation
Day 8: I noticed the leaves on the caladium were slightly curled at the edges. I checked the humidity level. It was around 40%—too low for both plants. I added a small humidifier next to the shelf. I set it to run for 4 hours each morning.
Day 10: After two days of higher humidity, the curled leaves relaxed. The fern fronds looked glossier. I watered when the top inch felt dry. No signs of overwatering. The pebble tray was working.
Day 12: I rotated the pot 90 degrees. Plants grow toward light. Rotating ensures even growth on all sides. I noticed the fern had three new fronds. The caladium had four new leaves. The pink and green pattern on the Strawberry Star leaves was vivid.
Day 14: This is where I saw real progress. The caladium had doubled its leaf count. The fern was full and bushy. No yellow leaves. No brown tips. I felt like I finally cracked the code.
Why Ferns and Caladiums Are Perfect Partners
They share similar growing conditions. Both thrive in humid environments. Both prefer indirect light. Both like consistent moisture without waterlogging.
Ferns also protect caladiums. Their dense fronds create shade and maintain humidity around the lower leaves. The caladium's broad leaves add visual contrast against the fern's delicate texture.
Specific Fern Varieties That Work Well
I tried several fern types with my Caladium Strawberry Star. Some fared better than others.
Boston fern: This is my top pick. It's forgiving and grows well indoors. Its arching fronds create a nice backdrop for the caladium's upright leaves.
Maidenhair fern: These are beautiful but fussy. They need constant humidity. If you live in a dry climate, skip this one. I killed two before I learned my lesson.
Bird's nest fern: This variety works well in medium light. Its wavy leaves contrast nicely with the caladium's rounded leaves. It's more tolerant of drying out between waterings.
Common Problems You'll Face (And How to Avoid Them)
Yellow Leaves
This happened to me twice before I figured it out. Yellow leaves usually mean overwatering or poor drainage. Check the soil immediately. If it's wet and the pot drains slowly, repot into a better-draining mix with more perlite.
Sometimes yellow leaves happen from underwatering. The caladium will also droop. Stick your finger in the soil. Dry soil means your plant needs a deep drink.
Brown Leaf Edges
This is almost always from low humidity or fluoride in tap water. I switched to filtered water. I also set up a pebble tray. Within a week, the brown edges stopped appearing.
Leggy Growth
If your caladium stretches toward the light with long stems and sparse leaves, it needs more light. Move it closer to a window or add a grow light. I use a cheap LED grow light for 6 hours during winter months.
Wilting Leaves
This can mean too much or too little water. Check the soil. If it's dry, water deeply. If it's wet, stop watering and let the soil dry out. Wilting can also happen from temperature shock. Keep your caladium away from drafty windows and air conditioning vents.
The Fertilizer Trick I Wish I Knew Sooner
Fertilizing is easy to mess up. I used to dump fertilizer on my caladiums every week. They looked sick. Their leaves got pale and droopy.
Here's what I learned from the RHS: caladiums need gentle feeding during the growing season. I use a balanced liquid fertilizer at half strength every two weeks. Only from spring through early fall. Never in winter when the plant goes dormant.
I mix the fertilizer with distilled water. Then I apply it right after watering. This prevents root burn. The results show in about 10 days. Deeper colors, bigger leaves, and more growth.
Dormancy: What Happens When Winter Comes
Caladiums naturally go dormant in winter. I didn't know this my first year. I thought the plant was dying. I threw away a perfectly good tuber.
Now I know better. When the leaves start dying back in late fall, I reduce watering. I stop fertilizing. Once all leaves have died, I let the soil dry out completely. Then I store the pot in a dark, cool place around 55-60°F.
The fern can stay out through winter. It goes semi-dormant. I water it less, just enough to keep the soil barely moist.
In spring, I bring the caladium pot back to bright indirect light. I start watering again. New growth appears within two weeks. I've done this for three years now, and each year the caladium comes back stronger.
Why I Trust the Experts
After all my trial and error, I began following guidelines from the RHS. They have extensive research on tropical plant care. Their recommendations on soil composition and watering schedules matched what I had discovered through experience.
For advanced troubleshooting, I also check resources from the AHS. Their climate-specific advice helps if you're growing caladiums outdoors in warm regions.
Both organizations provide reliable information that goes beyond basic plant care. They explain the why behind each step.
The Most Common Question People Ask Me
FAQ 1: Can caladiums and ferns be planted in the same pot permanently?
Yes, but with conditions. They share similar needs, so they can coexist. But watch for overcrowding. Every 6-8 months, check the roots. If either plant looks cramped, repot into a larger container. My pot now is 12 inches wide. It gives both plants room to spread.
FAQ 2: Do caladiums grow back every year?
If you store the tuber properly through winter dormancy, yes. Keep it dry and cool. In spring, it will sprout again. Some people dig up the tuber and store it in peat moss. I leave mine in the dry potting soil.
FAQ 3: Why are my caladium leaves getting brown spots?
This is usually from sunburn or overwatering. Check the light intensity first. If the plant sits in direct afternoon sun, move it. Brown spots from sunburn won't go away, but new leaves will be fine. If it's overwatering, repot the plant into fresh soil with better drainage.
My Simple Routine for Healthy Caladiums
Here's what I do every week without fail:
- Check soil moisture by touching the top inch
- Water only when that top inch is dry
- Rotate the pot for even growth
- Mist fern fronds on dry days
- Check for pests like spider mites
Every two weeks:
- Apply diluted fertilizer (spring through fall)
- Trim any dead or yellow leaves
- Refill pebble tray water
Every winter:
- Let caladium go dormant
- Stop fertilizing completely
- Store pot in dark corner
The Results After Following My Own Advice
It took about two months for the Caladium Strawberry Star to fully establish in its pot with the fern. Now I have a lush, thriving combination that gets compliments from everyone who visits.
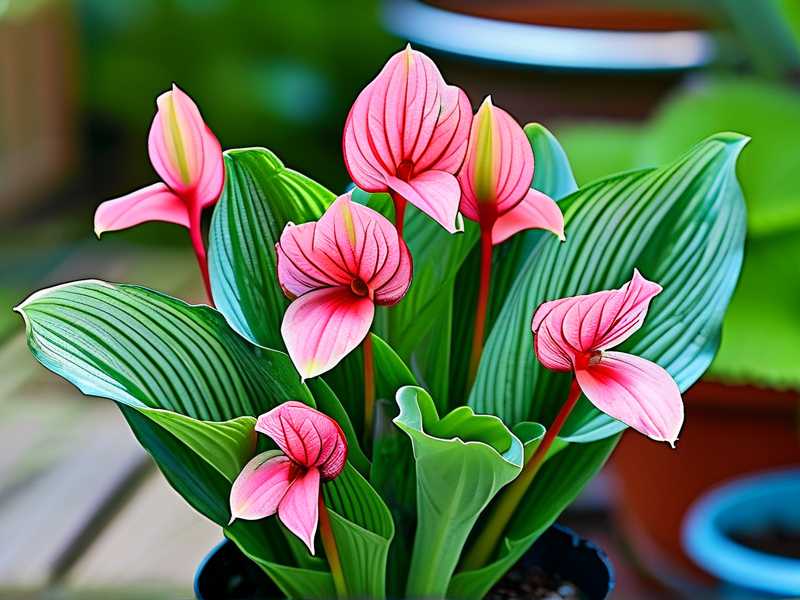
The caladium produces leaves the size of my palm. The pink spots are bright and distinct against the green background. The fern has grown so full that it cascades over the pot's edge.
I don't stress about them anymore. I know exactly how much water and light they need. I know when to step in and when to leave them alone.
If you've killed a caladium before, don't give up. Trust me, I've been there. Three times over. Each failure taught me something valuable. Now I have a setup that works year after year.
Start with the basics. Get a pot with drainage holes. Use a lightweight, airy soil mix. Place everything in bright indirect light. Water only when the top inch of soil is dry. Add a fern companion for moisture and beauty.
Follow these steps and you'll have a thriving Caladium Strawberry Star display in no time. I wish someone had given me this advice three years ago. It would have saved me a lot of heartbreak and dead plants.
If you have more questions about growing Caladium Strawberry Star with ferns, feel free to experiment. Every home has different conditions. You might find that your plant needs slightly more or less water than mine. That's normal. The key is observing and adjusting as you go.
Happy growing!





