 bluename
 I’ve killed more plants than I care to admit. Honestly, my first Caladium Red Flash turned into a mushy mess within a week. The culprit? Poor drainage. I was heartbroken. I learned the hard way that 90% of indoor plants die from overwatering, and caladiums are especially sensitive. Let me save you the grief.
If you want to grow Caladium Red Flash in raised beds, the secret is simple: drainage is everything. You need a setup that mimics their natural tropical habitat—moist, but never soggy. I’ll show you exactly how I did it, step by step, with real results after two weeks.
Why Raised Beds Are a Game-Changer for Caladium Red Flash
Raised beds offer control. You decide the soil mix, the depth, and the drainage. For Caladium Red Flash, that control is crucial. These plants hate sitting in water. Their roots rot fast. I’ve seen it happen.
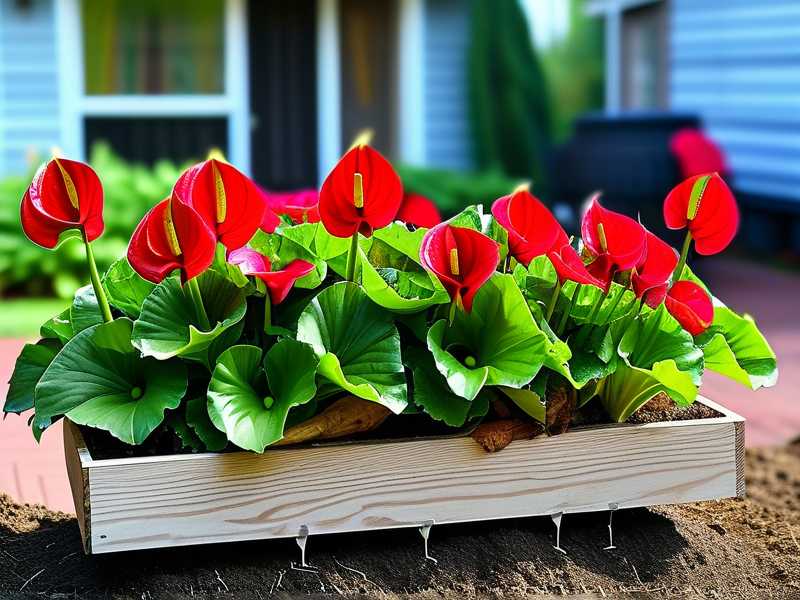
The thing is, growing caladiums in raised beds lets you create the perfect environment. You can elevate the soil above ground level. That means water drains naturally. No more guessing if the soil is too wet.
I started with a 4x4 foot raised bed. It’s 12 inches deep. That depth is key. Caladium Red Flash bulbs need room to spread. But more on that later.
My First Mistake: Ignoring Drainage
I was excited. I bought my first Caladium Red Flash bulbs from a local nursery. I planted them in a regular garden bed. The soil was clay-heavy. I didn’t think about drainage.
Two weeks later, the leaves turned yellow. Then brown. Then the stems collapsed. I dug up the bulbs. They were soft and rotting. I felt terrible.
That’s when I switched to raised beds. It changed everything.
The 3 Deadly Mistakes New Growers Make with Caladium Red Flash
Let me save you from the same pain. Here are the mistakes I made. Don’t repeat them.
1. Overwatering
This is the number one killer. I used to water every day. I thought they needed constant moisture. Wrong.
Caladium Red Flash needs consistent moisture, but not a swamp. In a raised bed, water drains fast. That’s good. But you still need to check the soil.
Stick your finger in the soil. If it’s dry an inch down, water. If it’s wet, wait. Simple as that.
I water once every three days in the summer. In cooler weather, it’s less. You’ll learn the rhythm.
2. Wrong Light Placement
Caladium Red Flash loves bright, indirect light. I put mine in full sun. The leaves burned within days.
The leaves turned crispy. They looked like they were fried. I moved them to a spot with morning sun and afternoon shade. They recovered.
Now, I place my raised bed under a shade cloth. It gets about 4 hours of morning sun. That’s perfect.
3. Using the Wrong Pot or Bed
I thought any container would work. I used a shallow pot once. The roots had no room to grow. The caladiums stayed small.
In a raised bed, depth matters. At least 12 inches. That gives the bulbs space to develop.
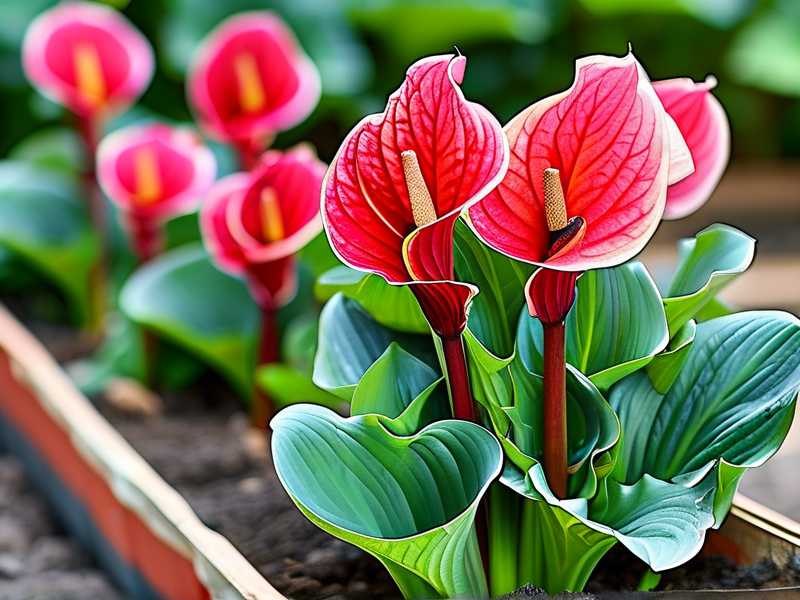
Also, the material matters. Wooden raised beds breathe better than plastic. They prevent moisture buildup.
My Precise Steps to Grow Caladium Red Flash in Raised Beds
I’ll walk you through my exact process. I’ve refined it over months of trial and error. You’ll see results fast.
Step 1: Prepare the Raised Bed
I use a wooden raised bed. It’s untreated cedar. That’s important. Treated wood can leach chemicals into the soil.
The bed is 12 inches deep. I place it on a level spot. I make sure it gets partial shade.
Before planting, I add a layer of gravel at the bottom. About 2 inches deep. That helps with drainage. Some people skip this. I don’t.
Step 2: Mix the Soil
Soil mix is the secret. I don’t use garden soil alone. It’s too heavy.
My mix is:
- 50% high-quality potting soil
- 30% perlite or coarse sand
- 20% well-rotted compost
Potting soil provides nutrients. Perlite improves aeration and drainage. Compost feeds the plants.
I mix it all in a wheelbarrow. Then I fill the raised bed. I leave about 2 inches from the top.
Step 3: Check Drainage
Before planting, I test the drainage. I pour a gallon of water over the soil. If it drains within 10 minutes, I’m good.
If it takes longer, I add more perlite. I’ve learned to be patient here.
Step 4: Plant the Caladium Red Flash Bulbs
Bulbs need the right orientation. Look for the “eyes” or bumps. Those are the growth points. They go up.
I plant bulbs 2 inches deep. Space them 12 inches apart. They need room.
I press the soil gently over the bulbs. No compacting. Then I water lightly.
Step 5: Water Sparingly
After planting, I water just enough to settle the soil. Then I wait.
For the first week, I water only when the top inch is dry. That’s about every 3-4 days.
Step 6: Monitor for 2 Weeks
Here’s my observation log from the last time I planted:
Day 1-3: No signs yet. The soil stays moist but not wet. I check daily.
Day 4: I see a tiny pink tip emerging. Excitement! The soil is still good.
Day 7: The first leaf is opening. It’s a bright pinkish-red. The raised bed is working.
Day 10: The leaf is fully open. Two more are coming. I water once.
Day 14: Three leaves are out. They’re healthy. The color is vibrant. No yellowing means no overwatering.
I took a photo each day. It’s amazing to see the progress.
What I Learned from the 2-Week Observation
The raised bed made all the difference. The soil never got waterlogged. The roots had space.
But I made a small mistake. On day 8, I thought the plant needed fertilizer. I added a weak liquid fertilizer. The tips of the leaves turned pale. I should have waited.
I flushed the soil with water. The leaves recovered in a few days. Lesson learned: don’t rush feeding.
Common Pitfalls and How I Fixed Them
Pitfall: Soil Stays Wet Too Long
This happened in my second raised bed. The soil was too heavy. I removed the caladiums, added more perlite, and replanted. They bounced back.
Now, I always mix perlite generously. It’s cheap insurance.
Pitfall: Leaves Are Drooping
Drooping can mean under-watering or over-watering. Check the soil. If it’s dry, water. If it’s wet, stop.
In my experience, drooping from over-watering happens more often. Remember, 90% of indoor plants die from overwatering. Caladiums are no different.
Pitfall: No New Growth
If the bulbs are healthy but no growth appears, check the temperature. Caladiums love warmth. They need soil temperatures above 70°F (21°C).
I use a soil thermometer. If it’s too cold, I cover the bed with a clear plastic sheet at night.
Essential Growing Tips for Caladium Red Flash in Raised Beds
Mulch to Retain Moisture
In hot weather, raised beds can dry out fast. I add a 1-inch layer of organic mulch. That helps.
Straw works well. Or shredded bark. It keeps the soil cool and moist.
Fertilize Lightly
Caladiums are not heavy feeders. I use a balanced 10-10-10 fertilizer once a month. Half strength is plenty.
Too much nitrogen makes leaves green. We want the red flash. So keep it light.
Protect from Wind
Caladium Red Flash leaves are delicate. Strong winds can tear them. I placed my raised bed near a fence. It blocks the wind.
If you can’t do that, use a windbreak. Even a burlap screen helps.
Overwintering in Raised Beds
In cold climates, caladiums are annuals. But you can save the bulbs.
After the leaves die back in fall, I dig up the bulbs. I clean them. Then I store them in peat moss in a dark place.
In spring, I replant in the same raised bed. It works every year.
The Science Behind Drainage for Caladium Red Flash
I wanted to understand the “why” behind my success. So I researched.
The RHS explains that caladiums are native to tropical rainforests. They grow on forest floors. The soil there is loose, rich, and well-draining. Rainwater percolates fast.
In raised beds, you recreate that environment. The loose soil allows oxygen to reach roots. Excess water drains away. That prevents root rot.
The AHS adds that well-draining soil is critical for tuberous plants. Caladiums grow from tubers. They are prone to fungal diseases in wet conditions.
So, drainage isn’t just nice to have. It’s essential.
Why My Caladium Red Flash Thrived After the Switch
Before raised beds, my caladiums struggled. After, they flourished.
The leaves are larger. The color is richer. The stems are sturdier.
I attribute it to the controlled environment. I can adjust soil, water, and drainage easily.
Plus, it’s easier to check for pests. I do a quick inspection each morning. No more surprises.
Additional Tips for Maximizing Growth
Group Caladiums Together
I plant multiple Caladium Red Flash in the same raised bed. They form a lush, colorful patch.
Grouping them creates a microclimate. The leaves shade the soil. That reduces evaporation.
Water in the Morning
I water early. That gives leaves time to dry before night. Wet leaves at night invite diseases.
Watch for Pests
Spider mites and aphids can attack. I spray with neem oil. It’s natural and effective.
I also encourage ladybugs. They eat aphids. My raised bed has a small garden nearby.
Rotate Plantings
Each year, I plant caladiums in a different spot in the raised bed. That prevents soil fatigue.
If I plant in the same spot, I replace the top 3 inches of soil.
What Happens If You Ignore Drainage?
You’ll end up with rot. I promise.
The leaves will yellow. The stems will soften. The bulbs will decay.
Don’t let that happen. Invest in a good raised bed and proper soil.
Frequently Asked Questions
Q: How often should I water Caladium Red Flash in raised beds?
A: Check the soil. Water when the top inch is dry. In summer, that’s every 3-4 days. In cooler weather, less often. Always confirm before watering.
Q: Can I grow Caladium Red Flash in partial shade?
A: Yes. They prefer bright, indirect light. Morning sun and afternoon shade are ideal. Avoid full sun. It burns the leaves.
Q: Why are my Caladium Red Flash leaves turning brown?
A: It could be overwatering, underwatering, or too much sun. Check the soil moisture first. If it’s wet, reduce watering. If the spot is sunny, move the bed.
Growing Caladium Red Flash in raised beds changed my gardening game. I went from killing plants to having a stunning display. The key was drainage.
Follow my steps. Avoid my mistakes. You’ll see results in two weeks.
Every morning, I step outside and see those vibrant red leaves. It reminds me that with the right setup, failure turns into success.
Start with good drainage. The rest follows. You’ve got this.





