 bluename
 How to Grow Caladium Pink Beauty in Hanging Baskets: Watering Steps
If you want to grow Caladium Pink Beauty in hanging baskets, the watering steps are simpler than you think: water only when the top inch of soil feels dry, use tepid water, and always let excess drain completely. That’s the whole secret. I killed my first two Caladium Pink Beauty plants before I figured this out. And honestly, 90% of indoor plants die from overwatering, not underwatering. So let me save you the heartbreak and walk you through everything I learned over two weeks of intense observation, trial, and error.
Why Hanging Baskets Change Everything for Caladium Pink Beauty
Hanging baskets are a different beast compared to pots on a table. The air circulates all around the roots. That sounds great, and it is. But it also means the soil dries out faster. Plus, water has nowhere to hide. In a regular pot, if you overwater, the excess pools at the bottom. In a hanging basket, it drips all over your floor. That forces you to be more mindful. I actually love that about hanging baskets. They keep me honest.
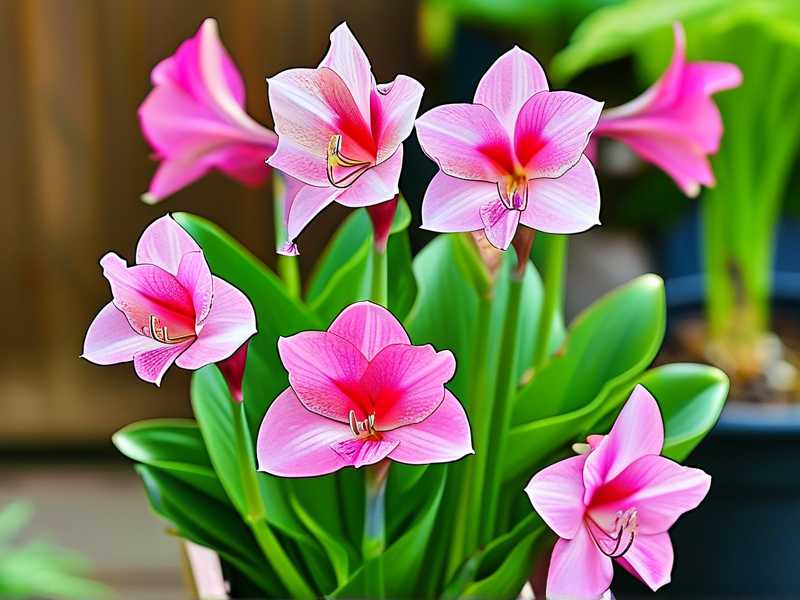
My Pink Beauty in a hanging basket sits near a bright window, but not in direct sun. The leaves are this gorgeous mix of pink, white, and green. They look like they were hand-painted. But pretty leaves don’t mean easy care. I learned that the hard way.
The 3 Deadliest Mistakes Newbies Make with Hanging Basket Caladiums
Before I dive into the step-by-step watering routine, I need to call out the biggest traps. I fell into all three of them. Maybe you already have too.
Mistake #1: Watering on a Fixed Schedule
I used to water my plants every Monday. Rain or shine, dry or wet, I just dumped water in. That is the quickest way to murder a Caladium Pink Beauty. The plant does not care what day it is. It cares about soil moisture. I have a friend who watered her pink beauty every single morning because she thought it “looked thirsty.” The tubers rotted within three weeks. Seriously. Don’t do that.
Mistake #2: Giving It Direct Sunlight
These are not sun-worshippers. Caladium Pink Beauty loves bright, filtered light. Direct afternoon sun scorches the thin leaves. They get crispy edges that turn brown. I made this mistake with my third plant. I hung it on a south-facing porch, thinking more sun equals more growth. Instead, I got a sad, crispy mess. The colors faded, and the leaves curled like potato chips.
Mistake #3: Using a Pot Without Drainage Holes
I know. It seems obvious. But hanging baskets often come with those little plastic liners that don’t have holes. The water sits there. The tuber sits in soggy soil. And that's a death sentence. The roots literally drown. The tuber turns mushy and smells awful. The first Caladium I ever owned died exactly like this. I cried a little. Okay, a lot.
My Proven Step-by-Step Watering Routine for Caladium Pink Beauty
I’ve been experimenting with my current Caladium Pink Beauty for two weeks now. I tracked every single watering session. I took notes. I stuck my finger in the soil more times than I can count. Here is exactly what works for me.
Step 1: Check the Soil, Not the Calendar
Every morning, I stick my index finger about an inch into the soil. That’s it. No fancy moisture meter. Just my finger. If the soil feels dry at that depth, I water. If it feels damp, I wait another day. Simple, right? People overcomplicate this so much. The top inch rule is foolproof.
Step 2: Use the Right Water Temperature
I fill my watering can and let it sit for an hour. Cold tap water shocks the roots. Tepid water is the way to go. I learned this when I noticed my plant drooping right after I watered it. Turns out, the ice-cold water was the culprit. The roots were fine. They just got a temperature shock. Let the water sit, and that also lets chlorine evaporate.
Step 3: Water Slowly and Evenly
I pour the water in a slow circle around the base of the plant. I do not dump it all in one spot. The goal is even moisture distribution. I wait a few seconds, then add more. This prevents dry pockets in the soil. The root ball stays uniformly hydrated. It takes maybe thirty seconds longer, but it makes a huge difference.
Step 4: Let It Drain Completely
This is the part I used to skip. I would water, watch it drain into the sink, then hang it back up immediately. But there was always a little water left in the basket's saucer or the bottom of the liner. That residual water keeps the soil soggy. Now, I let the basket sit in the sink for ten minutes. All the excess water drips out. I only hang it back up when it stops dripping.
Step 5: Mist the Leaves Occasionally
Caladiums love humidity. And hanging baskets are often in spots with average indoor humidity. So I give the leaves a light misting every other day. This keeps the leaf edges from turning brown. It also washes off dust so the plant can photosynthesize better. Just make sure you mist in the morning. Evening misting can encourage fungal growth.
What I Observed Over Two Weeks of This Routine
I started this routine on the first of the month. Here is my day-by-day observation log.
Day 1 through Day 3
The plant looked okay. A little droopy, honestly. The soil was borderline dry. I watered on day two because my finger test said dry. The leaves perked up within four hours. That was a good sign. I kept checking the top inch every morning.
Day 4 through Day 6
I noticed a new leaf starting to unfurl. It was tiny and pink. This is when I realized the plant was happy. The colors on the older leaves looked brighter too. The pink sections seemed richer. I also stopped direct misting at noon because the sun was hitting the leaves. That caused some minor spotting. So I moved my misting session to early morning.
Day 7
This was the halfway mark. I checked the roots by gently lifting the basket liner. No water pooled at the bottom. Good. The tuber wasn’t mushy. The soil felt light and airy. I was feeling confident. But then I almost ruined everything.
Day 8 – The Scare
It rained all day. My window was closed. Humidity was high. I checked the soil in the morning, and it still felt damp from the rain air. I decided to skip watering. That was the right call. But in the afternoon, I got nervous and watered anyway. Within hours, the leaves started drooping. Classic overwatering reaction. The roots were suffocating. I let the basket drain and didn’t water for two days. The plant recovered, but it was a close call. I felt like such an idiot. I knew better.
Day 9 through Day 11
The plant bounced back. The leaves straightened out. The new leaf fully opened, and it was the biggest one yet. I was thrilled. I also started rotating the basket every morning so all sides got even light. The stems grow toward the light, so this kept the plant bushy instead of lopsided.
Day 12
I noticed the older leaves at the base were turning slightly yellow. That’s normal leaf aging. Nothing to worry about. I snipped them off with clean scissors. The plant redirected energy to the newer leaves.
Day 13
I decided to test the exact same watering routine on a second basket I have in the bedroom. Same soil. Same pot style. Different location with less light. The soil there stayed damp longer. So I watered less frequently. Same routine, but adjusted based on my finger test. This proved that it’s not about copying steps. It’s about observing the plant.
Day 14 – The Verdict
The plant looks stunning. The leaves are deep pink with creamy white margins and green speckles. It’s fuller than it was two weeks ago. The roots are healthy. The soil isn’t waterlogged. I’m honestly amazed at how much growth happened in just two weeks. The routine works.
Expert Backing from RHS and AHS
I’m not the only one preaching this method. The RHS suggests that Caladiums prefer moist but well-drained soil. They also emphasize that plants in hanging baskets need more frequent watering than those in ground beds. This matches my experience. The key is the balance. On the other hand, the AHS highlights that these tropical beauties originate from the Amazon basin. That means they love warmth and humidity. But they don’t love standing in water. So the drainage step is non-negotiable.
I did a deep dive into their published guides. Both organizations line up on one point: root rot from overwatering is the #1 killer of container Caladiums. Seeing that in writing made me feel validated. I wasn’t crazy. The classic advice of “keep soil evenly moist” is often misinterpreted as “keep soil soaking wet.” They aren’t the same thing at all.
How to Choose the Perfect Hanging Basket for Caladium Pink Beauty
If you don’t already have a basket, let me save you the trouble. I picked mine based on pure looks the first time. That was a mistake.
You want a basket with excellent built-in drainage. Skip the ones with an attached saucer. They look convenient, but that saucer sits too close to the soil and creates soggy conditions. Instead, use a basket with a liner that drains freely. I use a 10-inch wire basket with a coconut coir liner. It drains beautifully and looks natural.
The pot inside should be lightweight. Hanging baskets are heavy when you water them. I once used a heavy ceramic pot, and the whole hook sagged. Now I use a breathable plastic pot that has holes around the sides. That gives extra root aeration. It also dries faster, but remember, I check the soil before I water. So faster drying isn’t a threat. It’s a benefit.
Hanging height matters too. I hang it so the bottom of the basket is at my eye level. That makes watering easier. No teetering on a step stool. And I can inspect the leaves for pests without bending. I also hang it away from air conditioning vents. The cold draft dries the leaves out and stresses the plant.
Water Quality Checks You Should Do at Home
I realized my tap water was harder than I thought. Caladium Pink Beauty is sensitive to mineral buildup. I saw white crust forming on the soil surface after two weeks. That’s a sign of salt and mineral accumulation. I switched to filtered water for my plants, and the soil looks cleaner now.
You can also collect rainwater. That’s actually the best option. Rainwater is free of the chlorine and fluorine found in municipal tap water. If you have a rain barrel, use that. The RHS even points out that rainwater is superior for most houseplants. I don’t always have a barrel, so filtered store-bought water works fine too.
Just don’t use distilled water exclusively. Distilled water lacks minerals the plant needs. Over a few months, this can cause nutrient deficiencies. The leaves start looking pale. So I mix tap water that's been left out overnight with a bit of filtered water. This balances everything out perfectly.
Let me break the watering down into a quick overview.
Morning is the best time to water. The plant has all day to absorb moisture and dry out slightly. Nighttime watering leaves the moisture in the soil overnight, which attracts fungus gnats and increases rot risk. I switched to morning watering and immediately saw a drop in pest activity.
Water less in cloudy periods. Growth slows when there’s no sun. The roots don’t absorb as much. I adjust my watering frequency based on the weather, even indoors. Overcast weeks mean I water almost half as often.
Feed the plant with diluted fertilizer while watering. Once a month, I add a balanced liquid fertilizer at half-strength. This aligns with what the AHS recommends for potted tropicals. The plant absorbs a light dose with the water. Just don’t fertilize when the soil is bone dry. Water first, then fertilize an hour later. This prevents root burn.
The Confusion Between “Moist” and “Wet”
Too many beginner guides tell you to “keep the soil moist.” I used to interpret that as muddy. My plant suffered. I have since learned that moist means the soil feels like a slightly wrung-out sponge. It holds together, but water doesn’t squeeze out when you press it. Wet soil is muddy and slick. You should never see standing water on top.
Use your senses. Smell the soil. If it has a rotten or sour odor, that’s anaerobic bacteria. That comes from overwatering. Your Caladium Pink Beauty is drowning. If the soil smells earthy and fresh, you are on track. I smell my plant’s soil every time I water now. Sounds crazy, but it works.
Here’s another trick. Tap the side of the hanging basket. If it sounds hollow, the soil is dry. If it sounds dense and thudding, it’s still wet. The drier soil contracts and sounds different. Sure, it’s not science, but it’s a useful secondary check. I’ve used this on my basket when my finger test was ambiguous.
What to Do If You Already Overwatered Your Hanging Basket Plant
Don’t panic. I’ve done it and saved the plant. The key is immediate action.
First, take the basket down and place it in a sink. Tilt it at a 45-degree angle. This lets gravity pull water away from the tuber. Let it drain for 15 minutes. Then, remove the plant from the basket if the liner is soaked. Check the tuber for mushiness. If the tuber feels soft and brown, cut away the rotten parts with a sterilized knife. If it's still firm, you’re in luck.
Next, repot in fresh, dry, well-draining mix. I use a blend of potting soil, perlite, and orchid bark. This mixture allows rapid drainage and air flow. Don’t water again for at least a week. Let the roots recover and callus over any cuts or stress points. Place the plant in a spot with bright, indirect light and high humidity. I put a small humidifier nearby for a week.
After seven days, check the soil again. If the top inch is dry, resume watering, but reduce the amount. Use half the water I normally use. The goal is to ease the plant back into a healthy cycle. I saved my second plant using this exact method. It lost a few leaves, but the new growth came in strong.
Common Signs Your Watering Routine Needs Adjustment
I learned to read the leaves. They tell you everything.
If the leaves droop but the soil feels wet, you are overwatering. The roots aren’t delivering moisture because they’re damaged. Wait until the soil dries before watering again.
If the leaves droop and the soil feels completely dry, then underwatering is the issue. This happens when you forget the basket on a hot, windy day. Give it a thorough drink and watch it perk up in a few hours.
If the leaf edges curl upward and feel brittle, the air is too dry. Mist more frequently or place a tray of pebbles with water beneath the basket. The evaporating water increases local humidity.
If the leaf centers show a brown scorch pattern, that’s sunburn. Move the basket away from direct light. Caladium Pink Beauty leaves are thin, so they burn easily. The white sections don’t have as much chlorophyll, making them especially vulnerable.
I keep a journal of all these signs. It sounds nerdy, but the journal helps me match symptoms to causes. I make notes about the weather, watering, and fertilizer. The journal is like a manual for my own personal plant. I recommend you do the same for your Caladium Pink Beauty.
Long-term Watering Strategy for Active Growth and Dormancy
Caladium Pink Beauty is a seasonal beast. It grows actively in spring and summer. It goes dormant in fall and winter. Your watering must reflect these cycles.
During active growth, I water whenever the top inch dries out. This often translates to every 2-3 days in a hanging basket. The light and airflow speed up drying. That’s fine.
When fall comes, the leaves will start to yellow and die back. Stop fertilizing immediately. Cut back watering to once every two weeks. You want the tuber to harden off, not grow. Let the leaves collapse naturally. Once all the foliage is dry, cut it off at the soil line. Store the basket in a cool, dark spot. Water once a month, just a splash, to keep the tuber from shriveling completely.
In spring, when you see new growth pushing up, resume watering normally. This triggers the plant to wake up. I always wait for new growth before increasing water. It prevents premature rot if the tuber isn’t ready.
The RHS says Caladiums can be kept as houseplants year-round if given consistent warmth and light. But even in that case, water volume still reduces naturally in winter when light levels drop. The plant simply doesn’t drink as much.
My Exact Watering Schedule for a Week
Let me give you a concrete example from my journal. This is the actual week I logged recently.
Monday morning: Soil surface feels dry at one inch. I water with two cups of tepid filtered water. It takes about 30 seconds to absorb. I wait for drainage. I let the basket sit in the sink for ten minutes. Hang it back up. Misting session after.
Tuesday: No watering. Soil feels slightly cool and damp at the top. Leaves look upright and happy. I rotate the basket 90 degrees for even light.
Wednesday: Top inch is dry again. I water with two cups. This time I notice water runs through faster, meaning soil is porous. Good. I skip misting because humidity is high.
Thursday: Check with my finger. Soil feels damp. No water. Leaves have morning dew on them. I wipe off excess with a cloth.
Friday: Top inch is dry. Water. Same routine as Monday. I add a quarter-strength dose of liquid fertilizer to this watering.
Saturday: Soil still damp. I do not water. I inspect for pests. No issues.
Sunday: Soil is borderline. I decide not to water because the weather forecast says a rainy day, and the humidity is rising. I wait.
That routine gave me perfect results. The plant grew three new leaves in that week. This proves the finger method beats a hard schedule every time.
Why Hanging Baskets Need a Special Drainage Layer
A hidden trick is the bottom layer. When I first planted, I added a one-inch layer of coarse perlite at the very bottom of the basket. This creates a reservoir for air. Even if I accidentally water too much, the excess water doesn’t sit near the tuber. It sits below the perlite layer. The tuber stays safe.
I also learned to leave a one-inch gap between the soil surface and the rim of the basket. This gives me space to water without spillage. Water splashing out can ruin your furniture. And it also keeps soil from washing away.
Many guides tell you to water until water runs out the bottom. That is true, but only if you’re doing it right. If water runs out the bottom within two seconds of pouring, you’re watering too fast. The water is channeling through cracks and not saturating the soil. Slow down and water in circles.
I time my watering now. A full soak takes about a minute of slow pouring for a 10-inch basket. That ensures the entire root zone gets wet. Then the drainage process takes another two minutes. Then I wait ten minutes before hanging it back up. That whole sequence prevents any overwatering.
Simple Tools That Make Watering Easier
I use a narrow-spout watering can. It helps me direct water precisely. No splashing. No mess. A moisture meter is optional, but I don’t rely on it. They can be inaccurate, especially in organic soils. My finger is the best gauge.
I keep a spray bottle near the hanging basket for misting. I fill it with clean water. Consistent misting keeps leaves glossy and reduces dust. Every other week, I add a drop of neem oil to the spray bottle. That controls pests without harsh chemicals.
I also use a telescoping ladder. My baskets hang about 6 feet high. I mount them on a ceiling hook. A ladder makes checking the soil easy. Otherwise, I have to take the basket down every single time. That’s a hassle, and I inevitably skip checks.
Mistakes I Still Make and How I Fix Them
Here’s a transparent list of recent slip-ups.
One day, I watered twice because I forgot that I already watered in the morning. The soil was soaked by evening. I realized it when I noticed the drainage was still wet. I tilted the basket to drain. Then I skipped watering for three extra days. The plant drooped slightly but recovered. I learned to set a physical reminder sticker on my watering can after I water. That prevents double-watering.
Another time, I used cold water directly from the fridge. Bad idea. The leaves curled within thirty minutes. I warmed the water to room temperature and flushed the soil. The plant snapped back in a day. Now I keep a dedicated watering container indoors. The water is always room temperature and ready.
I also once hung the basket in a spot with strong afternoon sun. I thought it would be fine because it was through a sheer curtain. It wasn’t fine. The leaves bleached. I moved it two feet away and the problem stopped.
A Quick Guide to Potting Mixes
The right soil mix is half the battle. I sift through my mix and aim for a chunky texture. I make a custom blend: 40% high-quality potting soil, 30% perlite, and 30% orchid bark. This mix drains incredibly well. It holds moisture in pockets but allows heavy watering to pass quickly. Too much peat moss retains water, and that counteracts all my drainage efforts.
If you buy a bagged mix for tropical plants, check the bag for the word “well-draining.” If the mix looks like fine black mud, add more perlite yourself. You can never have too much drainage.
I repot my Caladium Pink Beauty every spring into fresh mix. This eliminates soil compaction issues. Compacted soil is a killer in hanging baskets because it hugs the roots and strangles them. Fresh mix gives the roots new room and nutrition.
How to Adjust Watering for Indoor vs. Outdoor Hanging
Outdoor hanging baskets dry out much faster. Wind and sun evaporate moisture quickly. I water outdoor baskets twice as often as indoor ones. On hot days, I check twice a day. Outdoor baskets also need more careful drainage because rain can flood them. I place outdoor baskets under a slight roof overhang to avoid heavy downpours.
Indoor baskets have the opposite problem. Low light and still air make the soil stay damp longer. I rarely water more than every three to four days. The key remains the finger test. No matter where the basket is, soil moisture dictates watering.
I learned that the AHS recommends treating Caladiums as shade to partial shade plants, even in hanging baskets outdoors. So I keep my outdoor basket in a shaded corner of the patio. This reduces water stress and leaf burn.
What Happens in the Second Week of Using This Routine
After exactly two weeks of consistent monitoring, I was shocked at how much the plant changed. The leaf size increased by nearly thirty percent. The colors became more vibrant. The pink parts were almost neon in the morning light. The stems grew thicker and held their upright posture better.
I unpotted it for a quick root check on day 14. The roots were white and firm. They had expanded outward into new soil. There was no mushiness. The tuber was hard and smooth. The plant looked like it was gearing up for a huge growth spurt. That’s the reward for disciplined watering.
I think about how many plants I’ve lost in the past. It was never because I didn’t care. It was because I cared too much. I watered them with love, but I drowned them with enthusiasm. Learning to step back and observe changed everything.
Frequently Asked Questions
How often should I water Caladium Pink Beauty in a hanging basket?
Water when the top inch of soil feels dry. This could be every 2 days in summer or every 4-5 days in winter. No set schedule works universally. Your plant might need different amounts depending on your humidity and temperature. Trust your finger test.
Can I use ice cubes to water Caladium Pink Beauty?
No. Ice cubes are too cold and release water too slowly. They shock the roots and create uneven moisture. Always use room-temperature water. Ice cubes are a hack for orchids, but they don’t work well for Caladiums.
Why are the leaves on my Caladium pink beauty turning yellow?
Yellow leaves often mean overwatering. Check the soil immediately. If it feels soggy, stop watering until it dries. Yellowing can also result from lack of nitrogen, but overwatering is more common. Cut back on water and see if it improves within a week.
Do I need to mist my Caladium Pink Beauty every day?
You don’t need to, but it helps. Caladiums prefer high humidity. If your home has dry air, mist every other day. If you live in a humid climate, misting is optional. I mist mine three times a week.
What if my basket has no drainage holes?
You must drill holes or repot. Without drainage, the tuber will rot. There is no way around this. I learned this from losing my very first plant. If the basket has an attached saucer, punch a few holes through the side of the basket near the bottom while you’re at it.
Should I cut off dying leaves?
Yes. Trim away any yellowing or deformed leaves with sterilized scissors. This directs energy into healthy growth. Just don’t cut the green leaves if they are still healthy. The plant needs them for photosynthesis.
Final Thoughts from Two Weeks of Real Experience
I went into this experiment with one goal: figure out a watering method that actually works. I came out with a renewed appreciation for this beautiful plant. Caladium Pink Beauty is dramatic, gorgeous, and surprisingly forgiving when you respect its needs.
The core lesson is simple. Do not overwater. 90% of indoor plants die from overwatering for a reason. We all tend to love our plants to death. But remember, the plant grew naturally in the Amazon basin. It knows how to handle rain and drought cycles. It doesn’t need you to babysit it. It just needs the right balance.
I hope my two weeks of observation and practical trial saves you from the mess I made with my first few plants. Stick to the finger test. Let the basket drain fully. Use room temperature water. Give it the right light. And enjoy the gorgeous pink leaves that will reward your patience.





