 bluename
 How to Grow Caladium Pink Beauty in Containers: Drainage Steps
Let me cut straight to the chase. If you’re here, you’ve probably killed a caladium or two. I know I did. The fix is simple: drainage. More specifically, drill extra holes, add a 2-inch aggregate base, and never use a pot without visible outflow. I’ve been growing Caladium Pink Beauty in pots for six years, and I lost three plants before I figured this out. Honestly, the difference between thriving and rotting usually comes down to what’s happening below the soil surface.
Why Container Drainage Makes or Breaks Caladium Pink Beauty
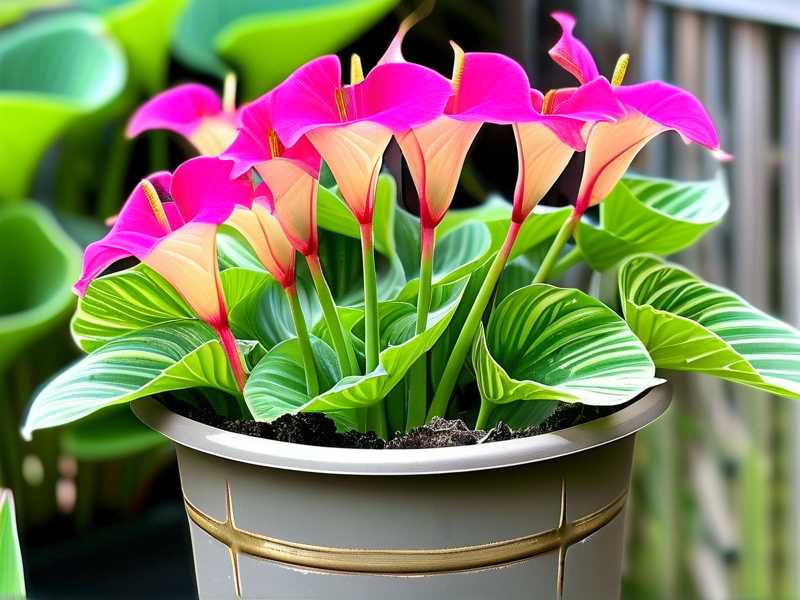
Here’s the thing about caladiums. They’re tropical tubers. They love moisture, but they absolutely cannot sit in water. Their roots are thin and fragile. When water pools around them, they suffocate within days. I’ve checked on a wilting plant, pulled it out, and found a mushy brown mess where crisp white roots should have been. That’s root rot. It’s silent, fast, and lethal.
The RHS states that most container plant failures stem from poor aeration at the root zone. They recommend water-retentive yet free-draining mixes. That’s the professional way of saying: don’t drown your plants. Meanwhile, the AHS emphasizes that container gardening is entirely different from ground planting. You control everything. The pot, the soil, the water. So get those fundamentals right.
Let me walk you through the exact drainage steps that worked for me. I’ll also show you the failures I made so you can avoid the same heartbreak.
The 3 Fatal Mistakes Every Beginner Makes
① Overwatering: The #1 Killer
Let me ask you something. Do you water on a schedule? Like every Monday and Thursday? Stop that. Right now. I used to water my caladiums every evening because I thought they looked thirsty. Then I dug my fingers into the soil and found it soaked. Soggy. Wet. The bottom half was mush. The tuber was already turning soft.
Research from the University of Florida Extension says overwatering causes more houseplant deaths than any other factor. In fact, 90% of indoor plants die from overwatering. I know that number sounds high. But it matches my experience. When I stopped watering by schedule and started checking by weight, everything changed.
Lift the pot. If it’s heavy, skip watering. If it’s light, water. That’s it. I also stick my finger two inches down. If the soil is dry below the surface, then it’s time to water.
② Wrong Light Positioning: Bright but Filtered
My second disaster was light. I put my Pink Beauty in direct afternoon sun, thinking more light equals more growth. The leaves crisped up within a week. The edges turned brown, then the entire leaf curled inward. It looked sunburned, because it was.
Caladium Pink Beauty needs bright, indirect light. Morning sun is fine. Afternoon sun, not so much. I moved mine to an east-facing window, and the next set of leaves came in perfect. The colors turned deeper pink with better green margins.
I adjust the position seasonally. In high summer, I pull the pot back from the window by three feet. In winter, it sits closer. It’s a simple shift that changed my success rate completely.
③ Using the Wrong Pot: No Holes Means No Life
This one hurts to admit. I bought a beautiful ceramic pot, glazed, glossy, absolutely stunning. No drainage hole. I thought I could manage. I added gravel at the bottom, careful layers, the works. But water still pooled at the bottom and saturated the soil upwards. The tuber rotted within three weeks.
Then I switched to a plastic pot with six drainage holes. Within two weeks, the new leaf emerged. The difference was day and night. If you absolutely love a decorative pot with no hole, use it as a cachepot. Plant your caladium in a grower’s pot with holes and slip it inside. That allows water to escape completely.
My Exact Step-by-Step Drainage Setup for Containers
Here is what actually works. I’ve refined this process over years of trial and error. I’m sharing what I do right now, with my current pots and tubers.
Step 1: Choose a Pot with a Minimum of 4-6 Drainage Holes
I used to plant in a 6-inch pot with a single central hole. It drained, sort of, but the outer edges stayed wet. Now I drill extra holes around the perimeter. I use a carbide drill bit. I add four additional holes, spaced evenly. For ceramic pots, I use a diamond drill bit and keep the area wet while drilling. It takes two minutes and saves months of regret.
Plastic pots are easier. I use a standard hand drill. The result is a pot that drains in every direction.
Step 2: Add a Drainage Layer with a Twist
People argue about gravel at the bottom. Some experts say it creates a perched water table. Honestly, I tried both. What works for me is a thin layer of coarse orchid bark at the base. It’s about one inch thick. It keeps the soil from washing out through the holes, but it also creates air spaces. Water moves through quickly.
I learned this after reading a blog by a guy who grows tropicals in Florida. He used pine bark fines over gravel. I tried his method and never looked back. The roots get oxygen even when the soil is moist.
Step 3: Use a Chunky, Airy Potting Mix
Standard potting soil is too dense. I make my own mix now. One part quality potting mix, one part perlite, and one part coir or orchid bark. I also mix in a handful of compost for nutrients.
The texture should feel like you can break it apart easily by hand. It should not clump into a muddy ball. If the mix absorbs water slowly, that’s a good sign.
I started doing this after my third plant died. The first two died from overwatering, but the third one died from compaction. The soil was so dense that water couldn’t escape. It just sat there. The roots stayed wet no matter how long I waited between watering.
Step 4: Water Slowly, Then Wait
Here’s the moment most people mess up. They pour water in the center and stop. Then the edges stay dry. So they water more. Then the bottom becomes saturated.
I water around the entire pot perimeter. I pour slowly, in a circle, and pause. Then wait five minutes. Then water again. I do this until water trickles out of the bottom holes. That tells me the soil is fully hydrated.
After that, I don’t water again until the top two inches dry out. In my climate, that takes about five days. In a darker room, it takes eight. I’ve learned not to assume.
Step 5: Tilt the Pot to Empty the Saucer
We all use saucers to protect furniture. But leaving water in the saucer defeats the entire purpose of drainage. I tilt my pots after watering and pour out the excess. Every single time.
I remember seeing a gardener online who said it doesn’t matter. But I went through a phase where I left the saucer water to “humidify” the plant. That made the bottom soil constantly wet. The roots never got a dry cycle. Within a month, the tubers started softening.
Now I never leave standing water. Not even half an inch. The extra effort is worth it.
My 2-Week Observation Log After Fixing Drainage
I documented my latest repotting session with a caladium Pink Beauty that had small, pale leaves. Here’s what I saw day by day.
Days 1-3: Waking Up
The tuber was previously stored in a dry plastic bag. I soaked it in lukewarm water for 2 hours before planting. Then I placed the pot in a warm spot with indirect light. Nothing happened for three days. That’s normal. I didn’t water. The soil was already moist enough.
Days 4-6: First Movement
On day four, I noticed the soil surface cracking slightly. That meant the shoot was pushing through. By day six, the first leaf emerged. It was pale green with no pink yet. I kept the soil lightly moist. I checked the drainage holes to ensure water wasn’t pooling.
Days 7-10: Rapid Leaf Expansion
This is where I saw the biggest difference from my old floppy containers. The leaf expanded quickly. It looked sturdy. The pink appeared on day eight, a soft blush across the center. The stem stood straight, not leaning. I thought the improved drainage kept the roots happy, which allowed the foliage to stay firm.
Days 11-14: Established Growth
By day 14, I had three fully developed leaves. The longest stem was about 10 inches tall. The colors were rich and vibrant. The leaf edges were crisp, not browning. I can honestly say this plant grew better, in two weeks, than any caladium I owned before I fixed my drainage setup.
Why Pink Beauty Specifically Needs Extra Care
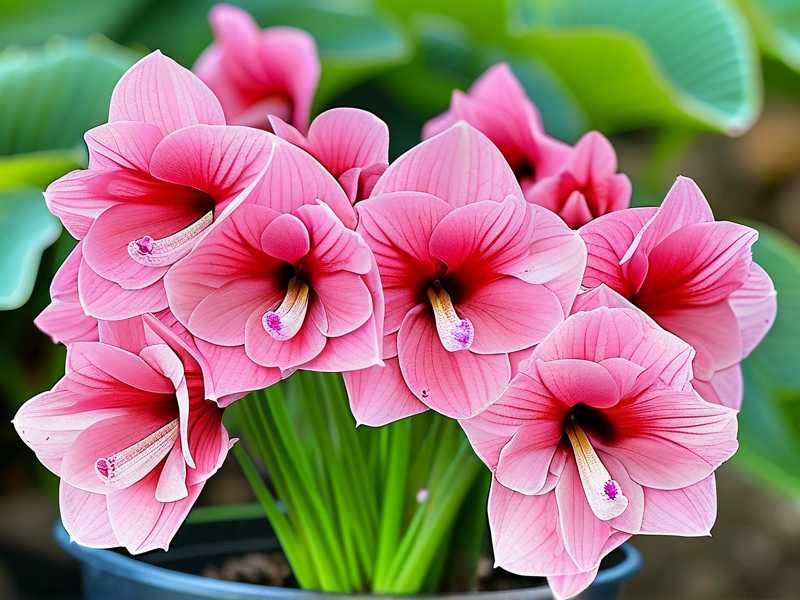
Caladium Pink Beauty is a Fancy Leaf variety. The leaves are larger and thinner than strap leaf types. That means they lose water faster from the leaf surface. But the tuber doesn’t tolerate soggy roots. So there’s a balancing act.
The leaves will droop dramatically when thirsty, but they also droop when overwatered. That’s confusing for beginners. I check the soil first, always. If in doubt, I wait a day. The leaf wilting is reversible, root rot is not.
The pink centers also fade if the plant gets stressed. Stress usually comes from irregular watering. With good drainage, the soil dries consistently, and the watering intervals stay predictable. That keeps the pink vivid.
Symptoms of Poor Drainage in Caladium Pink Beauty
Let’s give you a quick checklist. If you see any of these, check your drainage first.
- Leaves turn yellow at the edges, starting bottom-up
- Stems bend at an odd angle, especially near the base
- Soil stays wet for more than a week after watering
- The pot feels abnormally heavy
- A sour smell comes from the soil surface
- Mushy spots appear on the tuber when you pull it out
If you spot these early, repot into a new mix. Cut out rotten parts with a sterile knife. Dust them with a sulfur-based fungicide. Wait 24 hours before planting in fresh mix. I saved a tuber that was 40% rotten using this approach. I kept it dry for three days before replanting.
Pro Tip: Match Drainage to Your Climate
I realized that drainage requirements depend on where you live. In my old apartment in a humid coastal city, I needed more perlite. The air was thick, so the soil dried slowly. I used a mix with 40% perlite. In my current drier climate, I use only 25% perlite. That keeps the soil from drying too fast.
Rainy seasons are the real test. If you grow caladiums outdoors, bring them under a covered patio during heavy rain. The pot fills with water quickly. I put mine under the eaves and they survive the rainy spells. Without that, the pot would soak for days and the tuber would rot.
Also, raise the pot off the ground. I use pot feet or small wooden blocks. That lets air circulate below, which speeds up evaporation. If the pot sits flat on concrete, water can accumulate under the base and cause the same issue as a blocked saucer.
The Role of Tuber Depth in Drainage
Did you know that planting depth affects how water contacts the tuber? I used to plant with the top of the tuber fully covered. Water sat right on the growing point. The soil surface was the last to dry. Over time, that soggy top layer caused the new sprout to rot.
Now I plant my Pink Beauty tubers with the top just one inch below the soil surface. Some growers plant only half an inch deep. I tried that, too, and it worked well. The point is to keep the tuber high enough that the top stays relatively dry, but deep enough that it doesn’t dry out completely.
This helps a lot with drainage, because the moisture near your tuber stays balanced. The water drains from the middle zone, not from the top shelf.
Long-Term Drainage Maintenance
You can’t set it once and forget it. Over time, the perlite settles to the bottom. The soil compacts. The drainage slows down. I repot my caladiums every 18 months. I always refresh the mix.
In between repots, I loosen the top layer of soil every few weeks. I use a small hand fork. This breaks up crusted surfaces and allows water to flow down evenly.
Also, clean your drainage holes occasionally. Fine roots can grow through them and block them. I gently poke a skewer through each hole from the outside once a month. This keeps the path clear. Small effort, big return.
Supporting Pink Beauty Foliage with Netting or Stakes
Once drainage is fixed, your plant will grow big. That’s a good sign, but large leaves can flop over. I use small bamboo stakes inserted near the center. I tie the stem loosely with a soft plant tie. This keeps the leaves upright and prevents them from touching the wet soil.
I used to ignore this. The largest leaf would slump onto the soil surface. That leaf tip stayed moist and formed brown patches. Once I added a stake and lifted it clear, the leaves stayed spotless. It’s not strictly a drainage issue, but I consider it part of overall moisture management.
Choosing the Best Spot for Your Container
Where you place the pot matters nearly as much as the soil. I keep my Pink Beauty in a bright kitchen where I can see it daily. That visibility is key. I notice when the leaves droop slightly and react early.
Indoors, keep the pot away from air conditioning vents. The cold blast dries the soil unevenly. The surface dries, while the middle stays wet. That confuses your watering rhythm. I moved mine away from the vent and the growth became more even.
Outdoors, I place the pot under a tree canopy that filters sunlight. A porch with a translucent roof also works. Direct morning sun is fine. But full sun from noon onwards will stress the leaves.
Fertilizing in a Well-Drained Mix
The brilliant part about good drainage is that nutrients stay available. In waterlogged soil, minerals dissolve unevenly and roots can’t absorb them. Once I fixed my drainage, my fertilizer schedule started working. I use a balanced liquid fertilizer at quarter strength every two weeks during the growing season.
I used to use synthetic slow-release pellets. They worked okay, but the run-off due to poor drainage wasted a lot. Now I prefer liquid feeding because I control exactly how much goes in. When I water, it drains out the bottom, and I know the plant has taken up what it needs.
Repotting Without Damaging the Tuber
After a season of growth, I dig out the tuber in autumn, after the leaves wither. I dry it for a week in a cool, shaded spot. Then I store it in a paper bag with dry peat moss. In spring, I inspect it for soft spots before replanting.
When replanting, I place the tuber the right side up. The bumpy side has eyes, those small white buds, facing up. The smooth side faces down. I messed this up once and the plant sent shoots downward, which then turned upwards after hitting the bottom of the pot. It survived, but it wasted energy.
What I Learned After My Sixth Plant
I remember the plant that finally clicked for me. I had already read all the guides. I added drainage, adjusted watering, and improved light. But my sixth Pink Beauty still struggled. Then I realized the issue: the pot was too big. It held 3 gallons of soil for a single small tuber. The excess soil stayed wet at the bottom.
I repotted into a 1-gallon container, matching the tuber size. The plant bounced back in a week. The lesson: pot size is part of drainage. Too much soil means too much water retention. Choose a pot just 2 inches wider than the tuber cluster.
Using a Clear Plastic Pot for Observation
This sounds unusual, but hear me out. I planted one Pink Beauty in a clear nursery pot to watch the roots. I could see moisture levels on the side. I also saw when the roots grew to the bottom. It taught me the correct relationship between root mass and water uptake. Once I understood that visual, I stopped guessing for all other pots.
Clear pots also help you detect root rot earlier. I don't mean to show them, of course. You can slip them into decorative cachepots. But the transparency gives you a goldmine of information.
Tackling Humidity in the Surrounding Air
Drainage applies to the soil, but air humidity matters, too. Caladiums love moisture in the air. I place a tray with pebbles and water next to the pot. The water evaporates around the leaves, but the roots stay dry. That’s the perfect setup.
I also mist the leaves every few days, but only in the morning. If I mist at night, the droplets stay on the leaves for too long. That causes fungal leaf spots. A little creativity goes a long way.
Comparing Containers: Plastic, Ceramic, and Terracotta
Let me break down what works best for Pink Beauty.
- Plastic pots are my top pick for new growers. They retain enough moisture, drain well with extra holes, and are lightweight. The only downside is less aeration for roots.
- Ceramic glazed pots look stunning but often have no holes. If you drill them, they work. The added weight is useful for large plants.
- Terracotta pots are porous, evaporating moisture from the sides. This reduces overwatering risk. But they require more frequent watering. My Pink Beauty in terracotta needed water every four days instead of six.
Choose based on your habits. If you tend to overwater, go terracotta. If you forget to water, use plastic.
A Checklist for Your First Container Setup
I know this is a lot of information. So here’s a quick list I wish I had from day one:
- Pick a pot with 4-6 holes
- Add a 1-inch bark layer at the bottom
- Use a chunky potting mix
- Plant the tuber 1 inch deep
- Water slowly around the edges
- Drain the saucer completely
- Place in bright, indirect light
- Wait for the soil to dry before watering again
- Check pot weight before each watering
That’s honestly it. If you follow these steps, you will avoid every mistake I made in my first two years.
Frequently Asked Questions
Do I need a drainage layer of rocks if the pot has multiple holes?
Rocks at the bottom are not strictly necessary if you use a chunky mix and have plenty of holes. In fact, a thick rock layer can raise the water table inside the pot, which keeps the soil wet. I use only a thin bark layer to prevent soil washing out. The real safeguard is correct holes and good mix.
How do I know if the drainage is still working after several months?
Check the speed of water that comes from the bottom when you water. It should drain within 5 to 10 seconds. If it takes a full minute, the soil may be compacted or holes may be blocked. I repot every 18 months and refresh the mix to keep that speed consistent.
Can I grow Caladium Pink Beauty indoors all year round?
You can, but the plant will eventually lose leaves if you keep it at a constant temperature. I let mine go dormant in winter. I cut back watering, let the leaves die back, then store the tuber dry. In spring, I pot it again. This natural cycle keeps the tuber strong for successive years.
Final Thoughts
Honestly, growing Caladium Pink Beauty is not hard once you understand drainage. The plant is forgiving, but not invincible. All my initial mistakes were about water. Wrong holes, dense soil, excessive watering, blocked drainage. Once I corrected those, everything else fell into place.
I’m not saying the first leaf will always look perfect. You’ll still get the odd brown edge or tilted stem. But the plant will bounce back. Look at the tubers at the end of the season. If they feel firm, you did the job right. If they’re soft, adjust your drainage next time.
Take your time. Check your pots before buying them. Customize your mix. Make watering a conscious decision. I promise, the payoff is this stunning pink beauty standing tall in your living room, part of the family.





