 bluename
 If you are searching for a showstopper that thrives in pots, you need to know how to grow Caladium White Christmas in containers. The short answer is this: use a pot that is 10 to 12 inches in diameter for one mature tuber, plant it 2 inches deep with the eyes facing up, and place it in bright, indirect light. Stop there. Do not water it on a schedule. Honestly, 90% of indoor plants die from overwatering, and this variety is no exception. I learned that the hard way when I turned my first batch of bulbs into mush within ten days.
I remember unboxing those pale, knobby tubers. They looked like dried-up ginger pieces. I was so excited to get them into soil that I grabbed the biggest ceramic pot I owned. That was mistake number one. It was a massive, glazed urn with no drainage holes. I thought the layer of pebbles I added would save me. It did not. Two weeks later, I was staring at a pot of sour-smelling soil and rotting roots. The tuber had literally dissolved. That is when I started taking notes, measuring everything, and treating container gardening like a science project. Now, I am here to save you from my soggy, tragic start.
Why Container Size Matters More Than You Think
The pot size is not just about aesthetics. It is about the root-to-soil ratio. In the ground, roots can wander freely to find moisture. In a container, they are trapped. The soil volume dictates how much water hangs around after you pour it in. If the pot is too big, the soil stays wet for too long. The tuber sits in a cold, damp sponge. It rots. If the pot is too small, the roots get cramped, and the leaves will yellow from stress.
The Golden Range for a Single Tuber
For one healthy Caladium White Christmas tuber, I stick to a pot that is 10 to 12 inches across the top. The depth is just as important. I look for a container that is at least 8 inches deep. This gives the roots room to stretch downward without leaving a huge reservoir of wet soil at the bottom.
People often ask if they can squeeze two tubers into one pot. You can, but you have to size up. If you want a lush, full display, push the pot size up to 14 or 16 inches. That gives each tuber about four inches of personal space. Cramming them into a smaller pot leads to competition. The dominant tuber steals the water, and the weaker one sulks and stops growing.
What Happens When You Use a Pot That Is Too Big
I have to be blunt here. I have killed more plants with oversized pots than with anything else. When I moved my White Christmas into an 18-inch planter, the leaves came up beautiful for about ten days. Then, the tips started browning. The soil, two inches below the surface, was still damp a week after watering. The roots were drowning. The plant was trying to drink, but the root system was too small to use the water, so the water just sat there. Bacteria moved in. The tuber turned to jelly.
What Happens When You Use a Pot That Is Too Small
The opposite is also a problem. A tiny 4-inch nursery pot will cause the soil to dry out within hours. The leaves will curl, and the edges will crisp up like bacon. I tried this with a tiny pot once because I thought it would look cute on my windowsill. It did not look cute. It looked sad and crispy. The plant was root-bound before it even pushed out its second leaf. The roots were circling the bottom, strangling each other. When I finally repotted, I had to unwind a solid knot of white roots. It set the plant back a full month.
Selecting the Perfect Container Material
The material of the pot is not just a style choice. It directly affects how often you need to water.
Plastic and Resin Pots
Plastic pots are my go-to for beginners. They are cheap, lightweight, and they hold moisture well. However, they hold moisture a little too well sometimes. If you are someone who loves to water out of habit, plastic is dangerous. It does not breathe. The soil stays moist for days. For a tuber that hates wet feet, this is a recipe for disaster. If you use plastic, you must be disciplined. I use plastic pots only when I am using a very chunky, well-draining mix.
Terracotta and Clay Pots
Terracotta is my personal favorite. It is porous, which means it allows air and water to move through the walls. This dries the soil faster. That is a good thing for caladiums. The danger here is the opposite of plastic. Terracotta can dry out so fast that the plant gets stressed. During a hot summer streak, I had to water my terracotta pot every single day. The plant looked great, but I was chained to the watering can. If you struggle with remembering to water, terracotta might be too much maintenance.
Ceramic and Glazed Pots
Glazed ceramic pots are pretty, but they act just like plastic. They do not breathe. They hold the moisture hostage. I use these only when they have a drainage hole and when I am feeling very confident about my soil mix. Keep in mind that glazed pots are heavy. Once you add soil and water, moving them is a workout. Considering that caladiums need to be moved to a dark, dry spot for winter dormancy, this becomes a pain point. You will be wrestling with this planter in November.
The Recipe for the Perfect Soil Mix
I cannot stress this enough. Store-bought potting soil straight out of the bag is too dense for caladium tubers. I tried that. I ended up with compacted mud. The roots could not breathe. The soil needs to be fluffy. It needs air pockets.
Mixing It Myself
I finally landed on a mix that works wonders. I take one part high-quality potting soil. I add one part perlite. Then, I take half a part of orchid bark. This sounds fussy, but it takes me less than five minutes to mix up a batch. The perlite provides drainage and keeps the soil light. The bark creates air spaces and helps prevent compaction. When I water this mix, the water flows right through the drainage hole. It does not sit on the surface.
The Drainage Layer Question
People argue about whether to put gravel at the bottom of the pot. I used to do this. I stopped. The "gravel layer" actually raises the water table inside the pot. Instead of the water draining away, it creates a perched water table at the bottom of the soil. That keeps the bottom few inches of soil permanently soggy. That soggy zone is exactly where your tuber sits. I removed the gravel, and my rot problems disappeared overnight.
How to Plant the Tubers (Step-by-Step)
I have a specific routine now. Trust me when I say that the orientation of the tuber matters. I have planted them upside down before. You wait three weeks for a sprout that never comes. You dig around, confused. The roots were growing up toward the ceiling, and the leaves were pointing down into the dark soil. It was a mess.
Step One: Find the "Eyes"
The top of the caladium tuber has little pink or white bumps. These are the growth points, or "eyes." They usually look like small nodules. The bottom of the tuber is smoother and rounder. Sometimes, it is hard to tell. If you are unsure, place the tuber on its side. That is the safest bet. It will sort itself out.
Step Two: Depth and Positioning
I fill my pot with the soil mix until it is about one-third full. I place the tuber on the soil. I cover it with mix until there is about 1.5 to 2 inches of soil on top of the eyes. Then, I water it lightly. Just enough to moisten the soil. I do not soak it. The mix should feel like a wrung-out sponge, not a swimming pool.
Step Three: Patience for Sprouting
This is the hardest part for me. I always want to dig up the tuber to check on it. Do not do this. It takes two to four weeks for a sprout to emerge. During this time, the soil needs to stay slightly moist. But it cannot stay wet. If the temperature is below 65°F, the tuber will just sit there. It will not rot if the soil is dry, but it will not grow if it is cold. I keep my pots in the warmest room, usually near the kitchen window.
The Crucial Lighting Factor (And My Big Mistake)
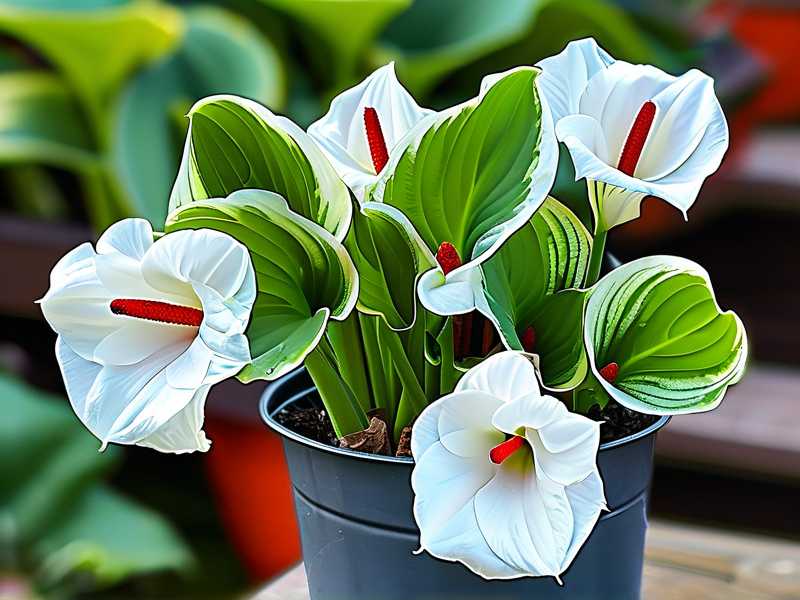
The "White Christmas" variety is famous for its white leaves with green veins and red speckles. It is stunning. However, its pigmentation makes it sensitive to light.
Direct Sunlight Is a Killer
I learned this the hard way this past July. I moved my plant outside to get some "fresh air." I placed it in a spot that got direct morning sun. Within three days, the white parts of the leaves looked like burnt paper. The tissue was scorched and translucent. That damage does not heal. I had to cut those leaves off entirely. The plant looked bald for two weeks.
The Bright, Shaded Spot
The sweet spot is bright, filtered light. I now place my White Christmas on a patio table under a 40% shade cloth. Indoors, I keep it about three feet away from an east-facing window. The light is bright enough to see shadows, but the sun never directly touches the leaves. I have also had good luck with a west-facing window that is covered by a sheer curtain.
Do Not Chase the Sun
The leaves will lean toward the light. I know the instinct is to turn the pot. I did this every day, thinking I was being helpful. The plant got stressed. It kept trying to correct its growth pattern, and the leaves became twisted and contorted. Now, I just leave it alone. I rotate it a quarter turn once a week, and that is it. Let it find its own balance.
Watering: The Fine Line Between Alive and Dead
Earlier, I mentioned that 90% of indoor plants die from overwatering. Caladiums are the poster child for this statistic. But there is a trick. They also hate to dry out completely.
The Finger Test
I stick my index finger into the soil, up to the second knuckle. If the soil feels dry at that depth, I water. If it feels even slightly cool or damp, I walk away. I do not water again. Period. I would rather have a slightly thirsty plant than a rotting one.
The "Wet Feet" Disaster
I once decided to use a self-watering pot. It had a reservoir at the bottom that wicks water up to the roots. I thought this was genius. It was not. The wicking action kept the bottom of the soil soaking wet. Three weeks in, I noticed a foul, earthy smell. The tuber had collapsed. The roots had turned black and slimy. I have not used a self-watering pot since. These plants need a wet-and-dry cycle. They need to breathe.
Water Quality Matters
Tap water with high chlorine or fluoride can cause the leaf tips to turn brown. I noticed this because my city water is heavily treated. I switched to filtered water or rainwater collected in a barrel. The difference was visible within a week. The new leaves came out cleaner and crisper. If you cannot collect rainwater, just let your tap water sit out in an open bucket for 24 hours. This lets the chlorine evaporate.
Fertilizer: What I Use and What I Avoid
Caladiums are not heavy feeders, but they do need nutrition to keep those massive leaves going all season.
The Nitrogen Trap
A lot of general-purpose fertilizers have high nitrogen to push green growth. That is not what we want here. Too much nitrogen will make the leaves turn greener and reduce the white variegation. I actually want the plant to stay as white as possible. I use a fertilizer with a lower first number, like a 10-10-10 or even a 6-8-6. I mix it at half strength.
How Often I Feed
I feed mine every two weeks during the active growing season, which is roughly April through August. I add the liquid fertilizer to my watering can and water normally. I stop feeding entirely in September. That is when I start preparing the plant for dormancy. Over-fertilizing in the fall will keep the leaves growing, which prevents the tuber from storing energy for next year. It confuses the plant.
The Temperature and Humidity Factor
This is a tropical plant. It likes it warm. I used to keep my house at a comfortable 68°F in the summer. The caladium hated it. The growth was slow, and the leaves looked droopy.
Keep It Warm
The soil temperature needs to be above 65°F for the tuber to even wake up from storage. Once the leaves emerge, they grow best when the air temperature is between 70°F and 85°F. If you live in a cooler climate, place the pot on a seedling heat mat. I have one underneath my pot right now. It raised the soil temperature by about ten degrees. The difference in growth rate was shocking. The plant just took off.
Misting Is a Waste of Time
I tried misting the leaves daily with a spray bottle. The humidity in my room was around 30%. The mist only raised it for about five minutes. It also left white mineral deposits on the pretty leaves. Honestly, it was a waste of time. If your air is bone dry, use a small humidifier next to the plant, or place a tray of wet pebbles under the pot. That is much more effective than a quick spritz.
The Group Potting Strategy
If you are planting multiple tubers in a large container, there is a layout trick I use.
The Triangle Method
I take three tubers and place them in a triangle shape. If the pot is wide enough, this creates a balanced, full plant. I actually tried this last spring with a 16-inch bowl. I planted three tubers with the eyes facing slightly outward. The effect was a stunning, dome-shaped mound of white leaves. It looked professionally grown.
Spacing and Growth
Do not plant them too close together. They need at least an inch of space between the tubers. If they touch, they will compete and sometimes slow down growth. Remember that the leaves grow large. They overlap naturally, but the tubers should not be physically touching.
Dealing with Pests and Diseases
White Christmas caladiums are relatively tough, but they are not immune to problems. Spider mites love them, especially in dry, hot conditions.
Recognizing Spider Mites
I noticed the leaves looked stippled and dusty. I checked the undersides and found tiny webs. It was spider mites. I treated it with a steady stream of water in the sink and then applied a neem oil solution. It took two applications to clear them up. Make sure you spray the undersides of the leaves. That is where they live.
Preventing Root Rot
I have mentioned root rot multiple times because it is that serious. The way to prevent it is structural. It is about the pot size and the soil mix. Once you get those two things right, rot is rarely an issue. If you do spot a soft, mushy tuber when you dig it up, throw it away immediately. Do not compost it. The fungus will spread to your healthy tubers stored nearby.
What to Do at the End of the Season
This is the part most people forget. The leaves will start dying back in autumn. It looks alarming, but it is normal.
Do Not Cut Green Leaves
I know it is tempting to clean up the plant. Do not cut the leaves until they have turned yellow and flopped over. The plant is sending energy back to the tuber. If you cut early, you rob the tuber of vital nutrients. That results in a smaller plant next year.
Storage Routine
Once the leaves have completely died back, I stop watering entirely. I let the soil dry out for two weeks. Then, I lift the tuber out of the soil. I shake off the dirt and let it dry for a few days. I store it in a paper bag with some dry peat moss. The storage spot is a dark cupboard that stays around 60°F. I check on it once a month. If it looks shriveled, I lightly mist the bag. If it looks moldy, I open the bag for a day to let it breathe.
The Ongoing Observation (2-Week Journal)
I decided to test my routine one more time just to be sure. I grabbed a new White Christmas tuber and a standard 12-inch terracotta pot. I filled it with my chunky mix and planted the tuber. Here is what I saw over a strict 14-day period.
Day 1: Soil is slightly damp. Pot is placed near the east window. Room temperature is 74°F. Day 5: No visible changes. I did not water. The finger test showed the soil was still cool an inch down. Day 8: A small green spear is peeking through the soil. It looks like a pencil tip. I jump up and down. Day 10: The spear is taller, about 1 inch high. I can already see the white flecks on the emerging leaf. I check the soil again; the top inch is dry, but the bottom is still moist. I hold off watering. Day 12: The leaf is starting to unfurl. It looks like a folded umbrella. I decide to water with the diluted fertilizer. Day 14: The first leaf is fully expanded. It is about 4 inches wide, stark white with green veins and little red dots. The second leaf is pushing up right next to it. The soil feels dry at the knuckle, so I water thoroughly.
This timeline is consistent. The plant took about two weeks to establish and show its first full leaf. After that growth exploded, but those first two weeks were a test of my patience.
Common Mistakes and Fixes (A Quick Reference)
If you are still stuck, check these common issues.
- Yellowing lower leaves usually mean too much water. Let the soil dry out more.
- Pale, washed-out leaves mean too much sun. Move it out of direct light.
- Stunted growth means it is too cold. Move it to a warmer area.
- Crispy brown edges mean the air is too dry or there is too much salt in the water. Flush the soil with distilled water.
Frequently Asked Questions
Q: Can I keep Caladium White Christmas indoors all year round?
Absolutely. As long as you can provide warmth (above 65°F) and high humidity. However, I have found that they naturally want to go dormant. Even indoors, they will start to decline in the fall. It is a natural cycle. If you do not want dormancy, you can keep it under a grow light with a consistent 78°F temperature, but the plant will be weaker in the long run. I let mine sleep in the winter. It is easier and the tuber stays robust.
Q: Should I cut off the flower buds?
This is a good question. Caladiums produce a small, calla-lily-like flower. I used to let them bloom because they looked interesting. But the flowers steal energy from the leaves. If you want the best foliage display, pinch the flower buds off as soon as you see them. I do this every time. It keeps the plant focused on leaf production.
Q: Why are the leaves turning green?
This is usually a light issue. The plant needs more brightness to keep the white color. But it cannot be direct sun. I had this happen when I moved my pot too far from the window. The plant compensated by producing more chlorophyll, turning the white parts green. Move it closer to a bright window with sheer curtains. The new growth will come out whiter.
My Final Thoughts on This Stunning Plant
Growing Caladium White Christmas in containers is actually easy once you understand the balance. It is a plant of extremes. It wants light but not direct light. It wants water but not wet feet. It wants food but not too much. Treat it with a balanced hand, and it will reward you with the most elegant leaves in the plant world.
I have killed more plants than I care to admit. But this one has taught me to slow down. Do not hover. Do not over-care. Let the soil tell you what it needs. Let the leaves tell you if they are happy. The silence of a healthy plant is extremely rewarding. Once you get the size of the pot right, you are already halfway to success. The rest is just patience.





