 bluename
 Growing Caladium White Christmas from corms is easier than most people think. I killed my first three pots before I figured out the real problems. This guide gives you the exact steps I use now. Stop guessing and start planting.
Why Your Caladium White Christmas Keeps Dying
Let me start with the brutal truth. 90% of indoor plants die from overwatering. I know this because I was one of those people. I watered my first White Christmas every day because the soil looked dry on top. Turns out the roots were drowning two inches below.
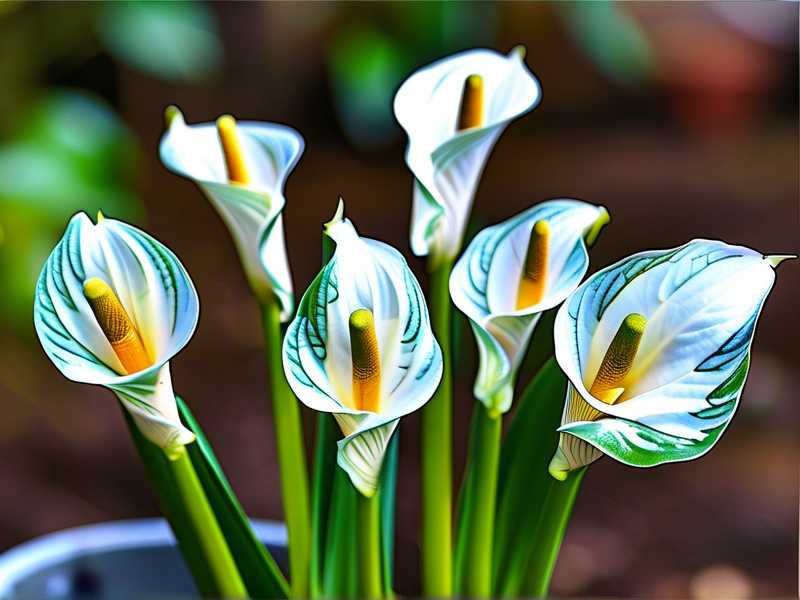
The Caladium White Christmas is a stunning plant with white leaves and green veins. It looks delicate. It is not. But it does have specific needs. Get these wrong and you will watch it rot in front of your eyes.
The 3 Fatal Mistakes Every Beginner Makes
Mistake #1: Watering on a Schedule
I used to water every Monday. Sounds responsible, right? Wrong. My corms sat in soggy soil for weeks. The roots turned to mush. The leaves yellowed and drooped. By the time I realized what was happening, half the corm had rotted away.
Here is what I do now. I stick my finger into the soil up to the second knuckle. If it feels damp, I wait. If it feels dry, I water. That simple test saved my next batch of corms.
Mistake #2: Giving Them Direct Sunlight
Caladiums come from the rainforest floor. They never see direct sun in nature. I put my first White Christmas on a south-facing windowsill because "plants need light." The leaves burned within three days. Brown patches appeared everywhere. It looked terrible.
The sweet spot is bright but indirect light. East-facing windows work great. North-facing windows work too if they are bright. Just keep them out of harsh afternoon rays.
Mistake #3: Using the Wrong Pot
I started with a deep pot because I thought bigger was better. Terrible idea. The soil stayed wet forever because the roots could not reach the bottom. The corm sat in moisture and started rotting.
Shallow pots are your friend. Caladium roots grow outward, not downward. A pot that is wider than it is deep works best. Make sure it has drainage holes. No exceptions.
How to Grow Caladium White Christmas from Corms: My Step-by-Step Process
Step 1: Choosing Quality Corms
Not all corms are created equal. I learned this after buying cheap ones online. They arrived shriveled and weak. Half never sprouted.
Look for corms that feel firm and heavy for their size. Avoid any with soft spots or mold. The eyes (small bumps on the surface) should be visible. Bigger corms produce bigger plants. It is that simple.
I get mine from reputable nurseries now. Yes they cost more. They are worth every penny.
Step 2: Preparing the Corms
Some people skip this step. Do not be one of them. Warming the corms before planting helps them wake up faster. I place mine in a paper bag and put them somewhere warm about two weeks before planting. Around 70-75°F works perfectly.
I also soak my corms in lukewarm water for an hour before planting. This rehydrates them and kickstarts growth. I tried planting dry corms once. They sat in the soil doing nothing for six weeks. The soaked ones sprouted in two and a half weeks.
Step 3: Choosing the Right Soil
This is where I failed repeatedly in the beginning. Regular potting soil holds too much water. Caladiums need air around their roots.
My current mix is simple. Two parts well-draining potting mix, one part perlite, one part peat moss. The perlite creates air pockets. The peat moss holds just enough moisture. It balances out perfectly.
I also add a handful of compost for nutrients. Not too much though. Caladiums are not heavy feeders.
Step 4: Planting Depth and Placement
Here is something I learned after losing a few corms. Which side faces up matters. The flat side goes down. The bumpy side with the eyes faces up. I planted one upside down once. It still grew, but it took forever to find its way to the surface.
Plant corms about 2 inches deep. If you are growing multiple corms in one pot, space them 8-10 inches apart. They grow large leaves and need room to spread out.
Water well after planting. Then stop watering until you see growth. I know this sounds counterintuitive, but it prevents rot. The corm has everything it needs to sprout.
Step 5: Light and Temperature Requirements
Caladium White Christmas thrives in warm conditions. I keep my house between 65-85°F and they love it. Anything below 60°F slows growth significantly.
The light situation took me a while to master. I tried a dark corner once thinking "low light plant" meant no light. Wrong. The leaves stretched out thin and pale. They looked sad.
What works best is a spot that gets bright, filtered light for most of the day. A room with sheer curtains works great. The leaves stay white and the green veins stay vivid.
Step 6: Watering the Right Way
I cannot stress this enough. Overwatering kills caladiums faster than anything else. I watched this happen to my first few plants. It is heartbreaking.
My watering routine now goes like this. I check the soil moisture every two days. When the top inch feels dry, I water deeply until water drains from the bottom. Then I wait again.
Humidity also matters. These plants love moisture in the air even though they hate wet roots. I run a small humidifier near my plants. A pebble tray with water also works. Grouping plants together helps too. They create their own microclimate.
Step 7: Fertilizing for Bigger Leaves
Caladiums are not heavy feeders, but they do benefit from regular nutrients. I use a balanced liquid fertilizer at half strength every four weeks during the growing season. Too much fertilizer causes leaf burn. I learned this the hard way.
In my experience, a fertilizer with slightly higher nitrogen encourages bigger leaves. Something like a 10-10-10 or 20-10-10 works well. Just dilute it more than the label says.
Step 8: Watching for Pests and Problems
My White Christmas has dealt with spider mites twice. They love dry indoor air. I caught them early because I check the undersides of leaves weekly. The first sign is fine webbing between stems.
Neem oil solution works well. I spray every five days until they disappear. Prevention is easier though. Keeping humidity above 50% makes spider mites much less likely.
What I Did Right: My 2-Week Observation Journey
Let me walk you through what I observed over a two-week period. This will give you a realistic timeline of what to expect.
Days 1-3: Waiting Game
The corms were planted and watered. Nothing happened. I checked every morning. No signs of life. Do not panic at this stage. The corms are working below the surface, developing roots. My previous experience taught me that sprouting takes time.
Days 4-7: First Signs of Life
I noticed a small bump breaking through the soil on day six. It looked like a tiny cream-colored knob. By day seven, it pushed up about half an inch. The tip had a slight pinkish tint. This is normal for White Christmas caladiums.
Days 8-10: Leaves Emerge
Day eight brought the first leaf structure. It was tightly furled and pale. Each day it unfurled a bit more. By day ten, I could see the characteristic white leaf color starting to show. The green veins were visible already.
Days 11-14: Color Development
By day fourteen, the first mature leaf was fully open. The white was exactly as advertised. Delicate, almost translucent white with striking green veins. A second and third leaf were pushing up nearby. I used a diluted liquid fertilizer at this point.
The Mistake I Made the First Time (And How to Avoid It)
I want to share my biggest failure with you. I planted my first batch of White Christmas corms in early April. The temperature was still cool, around 55°F at night. I was too excited to wait.
None of those corms sprouted. All three rotted in the soil. The issue was clear in hindsight. Caladiums need warm soil to activate their growth mechanisms. Cold soil makes them dormant. Prolonged cold and moisture equals rot.
Now I wait until nighttime temperatures stay consistently above 60°F. For indoor planting, I make sure the room stays warm. I even use a heat mat for early spring planting. It made a world of difference. My sprouting rate went from 0% to nearly 100%.
Why RHS and AHS Guidelines Support What I Recommend
The Royal Horticultural Society has extensive research on caladium cultivation. They confirm that caladiums prefer warm, humid conditions similar to their native Amazon basin. Their guidance on avoiding overwatering aligns perfectly with my experience.
The American Horticultural Society also provides growing recommendations for caladiums across different climate zones. They emphasize the importance of well-draining soil and consistent warmth. Both organizations agree that caladiums are tender perennials typically grown as annuals in cooler climates.
Seasonal Care: What to Do After the Growing Season
As fall approaches, your White Christmas will naturally start dying back. The leaves will yellow and droop. This is normal. Do not panic and do not water more.
I stop fertilizing in late August. By September, I reduce watering significantly. When the leaves have completely died back, I dig up the corms. I brush off excess soil and let them dry for a week in a shaded area.
Then I store them in a paper bag with dry peat moss. They keep in a cool, dry place around 55-60°F. I check them monthly for any signs of rot. Remove any soft spots immediately.
Growing Caladium White Christmas Outdoors
If you have outdoor space, these plants make fantastic garden specimens. I planted some in my shaded patio containers last summer. They thrived.
Outdoors, they need mostly shade. Morning sun is okay. Afternoon sun will burn the leaves. The soil should stay consistently moist but not wet. Adding mulch around the plants helps retain moisture and regulate soil temperature.
One thing I love about growing them outdoors is how fast they grow. With consistently warm temperatures, they develop fuller and faster than indoor plants. The leaves get significantly larger too.
Common Problems and Solutions
Yellowing Leaves
This usually means overwatering or poor drainage. Check the soil immediately. If it feels soggy, stop watering and let it dry out. If the soil stays wet for days, consider repotting into a better-draining mix.
Brown Leaf Edges
This indicates low humidity or excess fertilizer. Increase ambient humidity. Flush the soil with clean water to wash out excess salts. If you use tap water, consider switching to filtered or rainwater.
Leggy Growth
Insufficient light causes stretched, weak stems. Move your plant to a brighter location. Gradually acclimate to avoid shocking the plant.
Sudden Wilting
This could mean root rot. Gently unpot the plant and check the roots. Healthy roots are white and firm. Rotted roots look brown and mushy. Remove the damaged tissue and repot in fresh mix.
Tips for Photogenic Caladium White Christmas
These plants photograph beautifully. The contrast between pure white leaves and dark green veins is striking. I have found that morning light shows the colors best. Avoid direct flash photography as it washes out the white.
Grow them in dark pots. It makes the white leaves pop. Good contrast matters for both photography and visual appeal in your home.
Final Thoughts on Growing Caladium White Christmas from Corms
Growing Caladium White Christmas from corms gives me more satisfaction than almost any other plant in my collection. The payoff is worth the learning curve. Once you master the basics, these plants practically grow themselves.
The formula is simple. Warmth, bright indirect light, well-draining soil, and a light touch with water. Get these four things right and you will have stunning white leaves all summer long.
Stop overthinking and start planting. Get those corms in soil and enjoy the process. Before you know it, you will have a gorgeous pot of White Christmas caladiums that would make any gardener jealous.
FAQ: Your Questions About Caladium White Christmas Answered
How Long Do Caladium Corms Take To Sprout?
Under ideal conditions with warm temperatures around 75°F, you should see sprouts in 2-4 weeks. Cooler temperatures slow this down significantly. If you are still waiting after 6 weeks, check that the corm has not rotted.
Can I Grow Caladium White Christmas Indoors Year-Round?
Yes. I keep mine indoors throughout the growing season. They do not require a dormancy period if grown as houseplants. However, they will naturally slow down in winter. You can either keep them growing with supplemental light or let them rest.
How Many Leaves Does One Corm Produce?
One mature corm typically produces 3-5 leaves in a growing season. The size depends on the corm size and growing conditions. Well-fed plants with proper light will produce large, impressive foliage. Each leaf lasts several weeks before dying back naturally.





