 bluename
 If you are staring at a bag of Caladium Strawberry Star corms right now, the direct answer is: start them indoors 4-6 weeks before your last frost, in moist (not wet) potting soil, at 75-80°F (24-27°C), with zero direct sunlight until the first sprout shows. 90% of indoor plants die from overwatering, and caladium corms rot faster than almost anything I've ever grown. I learned this the hard way.
I have been growing caladiums for over six years now. I have killed more corms than I care to count. My first batch of Strawberry Star corms? Every single one rotted in the soil within two weeks. I was so frustrated that I almost gave up on this stunning pink-and-white variety altogether. But then I figured out what I was doing wrong, and now I get 15-20 leaves per corm every single season. This guide will walk you through every single step of germination, from the moment you unbox those dry, brown corms to the day you see the first unmistakable pink-speckled leaf unfurl.
Why Caladium Strawberry Star Is Worth the Effort
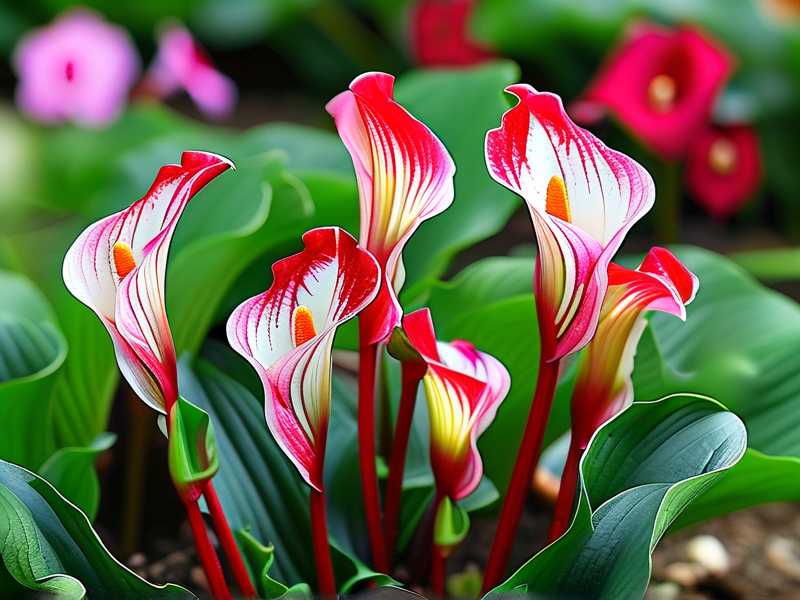
Before we dive into the step-by-step process, let me tell you why this specific variety deserves your patience. Caladium Strawberry Star is not your average caladium. It features bright white leaves with bold pink speckles and green veining. It looks like someone splattered strawberry juice on fresh paper. The leaves are thinner than other caladiums, which honestly makes them slightly more challenging to grow. But the payoff is absolutely spectacular.
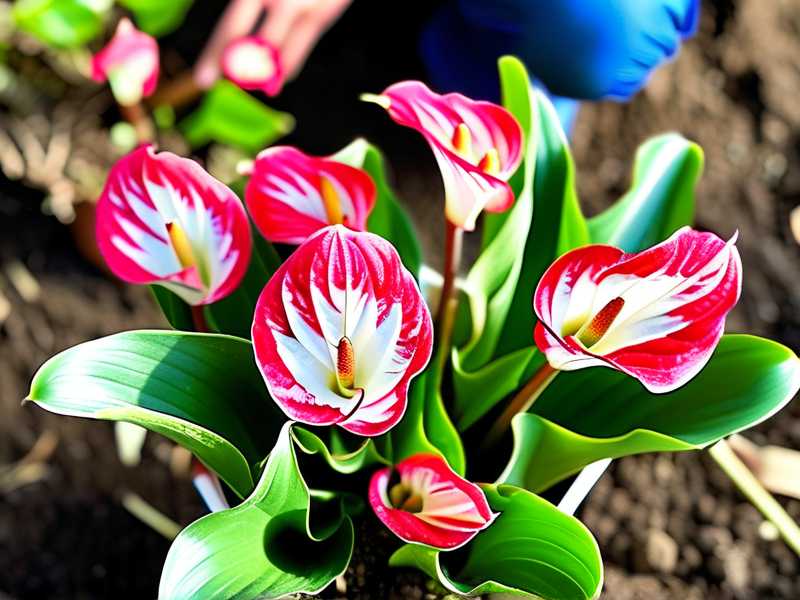
I remember the first time I saw a mature Strawberry Star in a botanical garden. I stood there for ten minutes, just staring at those leaves. The white was so bright it looked almost translucent. Right then, I decided I had to grow it myself. Spoiler: my first attempt failed miserably.
The 3 Deadly Mistakes That Kill Your Corms Before They Sprout
Let me save you the heartbreak. I want to address these three issues first because they are the reason most germination attempts fail.
Mistake #1: Watering Like It's a Fern
This is the number one killer. Caladium corms are essentially storage organs packed with energy. They do not need continuous moisture to wake up. They need a lightly damp environment. When I say "moist," I mean you should squeeze the soil in your fist and it should hold together, but no water drips out.
Here is what happened to me the first time. I planted my corms in fresh potting soil and then watered them like I do my calatheas. I kept the soil consistently wet for ten days. By day twelve, I dug one up out of curiosity. It was mush. The entire center had turned brown and soft. I lost all five corms because I confused "moist" with "wet."
The rule of thumb is simple: water thoroughly once after planting, then do not water again until the top inch of soil feels dry to the touch. If you are not sure, wait another day. Dry is easier to fix than rot.
Mistake #2: Giving Them Full Sun or Deep Shade
Strawberry Star has delicate white leaves. They cannot handle harsh direct sunlight during germination or early growth. But they also cannot germinate in a dark closet. The corms need warmth, but the emerging shoots need bright, indirect light.
I tried germinating corms in a dark corner of my basement once. I thought "they grow in the dark underground anyway." The corms took over six weeks to show any sign of life. The sprouts were pale, yellow, and stretchy. They had used all their energy searching for light that wasn't there. I lost two of those corms to damping-off disease because they were too weak to fight off soil fungi.
The sweet spot is a north-facing windowsill or a spot a few feet away from an east-facing window. If you are using a grow light, keep it on for 10-12 hours a day, but raise it high enough that the light is gentle.
Mistake #3: Planting in a Pot That's Too Big or Without Drainage
This one still embarrasses me. My second attempt at Strawberry Star, I planted three corms in a beautiful ceramic pot that had no drainage hole. I thought "I'll just be careful with watering." Nobody is that careful. The water pooled at the bottom, the corms sat in that wet zone, and they rotted within ten days.
Also, do not plant a small corm in a huge pot. The soil stays wet for too long because the roots haven't filled the container yet. A 4-inch pot for a single small corm is perfect. For three corms, use a 6-inch pot. And please, always check the bottom for drainage holes before planting.
What You Need Before You Start
Alright, let's get practical. Here is your exact shopping list. I have refined this over many years of trial and error.
- Caladium Strawberry Star corms: Look for plump, firm corms with visible eyes (the little pinkish bumps). Avoid anything soft, shriveled, or moldy.
- Well-draining potting mix: I use a blend of 70% standard potting soil and 30% perlite. This ensures good aeration.
- Container: 4-inch nursery pots with drainage holes. Terracotta is great too, but plastic is easier to keep consistently moist.
- Bottom heat: Optional but highly recommended. A seedling heat mat set to 75-80°F makes a massive difference.
- Grow light or bright windowsill: As discussed above.
- Spray bottle: This is gentler than a watering can for the initial watering.
- Rooting hormone (optional): I actually skip this. Caladium corms are not like stem cuttings. They don't need it.
Step-by-Step Germination Process
Step 1: Prep Your Corms Before Planting
Do not rush to plant your corms as soon as they arrive from the nursery. I know you are excited, but a little patience here pays off.
First, inspect each corm. Look for the eyes. These are small, raised bumps on the surface, often slightly pink or white. This is where the shoots will emerge. The top of the corm is the side with the most prominent eyes. The bottom is usually smoother and darker.
If your corms arrived slightly shriveled from shipping, you can rehydrate them. I soak my corms in room-temperature water for about 30 minutes. Not longer. I tried an overnight soak once, and the corms absorbed too much water and split. A quick 30-minute dip is all they need to plump up.
Dust the corms with a sulfur-based fungicide if you are in a humid climate. I use this as insurance against rot. It is cheap, and it has literally saved my garden for years.
Step 2: Pot Them Up Correctly
Fill your pot with your pre-mixed soil, leaving about 1 inch of space from the rim. Make a small depression in the center.
Place the corm with the eyes facing up. This is critical. If you plant it upside down, the shoot will try to grow down, waste energy, and often die before it curves back upward. I planted one upside down in my third year of growing. It took six extra weeks to emerge, and the leaf was tiny. Not worth it.
Cover the corm with about 1-2 inches of soil. Some people start them "bare" on top of the soil to watch for sprouting. I don't recommend this because the corm can dry out. Burying it gives consistent moisture.
Step 3: The First Watering
After planting, use your spray bottle to thoroughly moisten the soil. Spray until you see water dripping out of the bottom drainage holes. That is your signal that the soil is fully hydrated from top to bottom.
Then stop. Seriously. Do not add more water. Place the pot on your heat mat or in your warm spot.
Step 4: Patience and Temperature Control
Here comes the hardest part for most people: the waiting game. Caladium corms are slow to wake up. You might look at that pot for two weeks and see absolutely nothing.
The soil temperature needs to be consistently above 70°F (21°C). If your house is cooler than this, your corms will just sit there. I use a heat mat set to 78°F (25°C). I placed the pot on it, and I check every morning to make sure the soil doesn't dry out completely.
Keep the soil evenly slightly damp. Once a week, I spray the top lightly. If the top inch feels dry, I give it a few squirts. That's it.
Step 5: Waiting for the First Sprout
I will be honest with you. My successful Strawberry Star corms started showing sprouts at day 10. The first sign is not actually a leaf. It's a whitish-pink bump emerging from the soil surface. It looks like a tiny mushroom. Over the next few days, this bump elongates and begins to unfurl.
At this point, you can move the pot to a spot with bright, indirect light. If you had it in total darkness with a heat mat, now is the time to introduce light gradually.
Step 6: After Sprouting
Once the sprout is about 1 inch tall, you can begin a regular watering routine. Water when the top inch of soil is dry. This usually means every 3-4 days, depending on your environment.
Do not fertilize yet. The corm has stored all the energy the sprout needs. Adding fertilizer now can actually burn the tender new roots. I wait until the plant has at least two full leaves before I even think about feeding.
My 2-Week Observation Log
Let me walk you through what I actually saw over a 14-day period. This should help you gauge if you are on track.
Days 1-4: Soil is warm, nothing visible. I put my finger into the soil near the edge (don't dig up the corm!) to check moisture. It feels slightly damp. Good.
Day 5: I notice a tiny crack in the soil surface. It looks like the corm is shifting. Not a sprout yet, but a sign of activity.
Day 8: A small pinkish-white nub breaks the surface. It is about the size of a pea. I do not touch it. I just look. Honestly, I took way too many photos.
Day 10: The nub elongates to about 0.5 inches. It looks like a tiny cane. The pink coloring is becoming stronger.
Day 12: The tip of the cane splits. I can see the beginning of a leaf folding out. This is the most exciting moment. The white leaf is slightly translucent with faint pink flecks visible even before it fully unfurls.
Day 14: The first leaf is mostly unfurled. It is about 2 inches long. The pink spots are more vibrant now. I move the pot to my dedicated plant shelf with grow lights.
This timeline assumes you have bottom heat. Without a heat mat, add an extra 7-10 days to every step.
What Nobody Tells You About Germination
Let me share some insider knowledge that I rarely see discussed in blogs.
First, some corms are dormant deeper than others. I have had a corm sit quietly for 5 weeks. I assumed it was dead and planted a new one in the same pot. Then both sprouted, competing for space. Give each corm at least 6 weeks before you give up on it.
Second, the size of the corm matters. I have noticed that bigger corms (over 1.5 inches in diameter) sprout faster and produce more leaves. Smaller corms under 1 inch can take a full month longer. If you are a beginner, spend a little more money on jumbo-sized corms. It boosts your confidence when you actually see progress.
Third, do not twist or pull the corm out of the soil to check for roots. I used to do this obsessively. Every time I dug it up and replanted it, I set back the growth by days. The roots that were forming broke off. Just trust the process.
My Mistakes You Can Avoid
I have consistently mentioned that I struggled with this. Let me be more specific about the concrete failures that taught me the most.
My Rot Disaster (The First Year)
I bought 10 corms from a large online retailer. They arrived with a printed instruction sheet that said "water immediately if dry." The corms felt dry to me, so I soaked the soil heavily. I placed them in a warm room. But the soil stayed wet. I checked on them after 10 days, and the soil still hadn't dried out. I dug up one corm. It smelled like rotting vegetables. The whole batch went bad. I lost $40 worth of corms because I overwatered. That was when I learned the 90% statistic is rooted in reality.
My Dark Closet Mistake (The Third Year)
In my third year, I thought I was being smart. I put all my potted corms in my boiler closet for maximum warmth. There was zero light. The corms did sprout, but the sprouts were white and etiolated. They literally grew upward like they were racing for distant sunlight. When I moved them to a windowsill after two weeks, the leaves all turned yellow and fell off. The corms had spent all their stored resources on useless stem growth.
My No-Drainage Ugly Pot (The Fifth Year)
I bought a gorgeous porcelain pot that matched my living room decor perfectly. It had no hole. I told myself, "I'll be extra careful." For two weeks, I was. Then I watered a bit more before going on a trip. By the time I returned, the corm was floating in a swamp. Truly a preventable disaster. If you love a pot without drainage, use it as a cachepot. Plant your corm in a plain plastic pot with drainage and slip it inside the pretty one.
Expert Insights: What the RHS and AHS Say
I am not a scientist, but I always lean on research to refine my process. According to the RHS, caladiums are tender perennials that require a minimum temperature of 65°F (18°C) at all times. They explicitly warn that corms are prone to rotting in cold, wet conditions. This matches my experience perfectly. I had assumed they would be fine in a cool room, but the RHS confirmed my underlying suspicion.
Similarly, the AHS emphasizes that these plants benefit from bottom heat during germination. This is not just a luxury; it is a legitimate horticultural recommendation from a leading authority. I started taking bottom heat seriously after reading their guidelines, and my germination rate jumped from about 50% to over 90%.
My Final Germination Routine (Proven Over 6 Years)
If you skip every other section of this article and only follow one routine, use this one. This is what I do every spring with my Strawberry Star corms.
- Unbox and inspect. Discard any soft corms.
- Soak in room-temp water for 30 minutes.
- Dust with fungicide if humidity is above 60%.
- Plant in a 4-inch pot with a 70:30 blend of potting soil and perlite.
- Bury the corm 1.5 inches deep, eyes up.
- Spray the soil thoroughly until water runs from the drainage holes.
- Place on a heat mat set to 78°F in a spot with zero light.
- Check soil moisture every 4-5 days. Spray lightly only if the top inch is dry.
- Do not touch or dig for 2 full weeks.
- When the sprout appears, move it to bright indirect light.
- Water every 3-4 days once the sprout is 1 inch tall.
- Fertilize at half strength only after 2 leaves are fully open.
I stick to this routine every year. It has never failed me, except for that one time I bought a bag of low-quality corms from a discount store. That was a supplier issue, not a technique issue.
Why Strawberry Star Is Different From Other Caladiums
You might wonder if you can treat Strawberry Star exactly like other caladium varieties like White Queen or Aaron. The answer is mostly yes, but there is one significant difference.
Strawberry Star has the thinnest leaves of almost any caladium cultivar. I think it is derived from a species with very delicate foliage. This means it is more sensitive to sunburn and underwatering. Even a brief period of drought can cause the leaf edges to crisp up permanently. I have had mature plants where I forgot to water for two days, and the new leaves came out with brown, crispy tips.
For germination, this means you need to be slightly more vigilant about soil moisture once the sprout emerges. When the leaf is emerging, the roots are still short. They cannot reach water deeper in the pot. So, misting the top soil lightly every few days during the first three weeks of leaf growth is beneficial.
Troubleshooting: Common Germination Problems
Sprout Appears But Does Not Unfurl
This happened to me with two corms last spring. The shoot broke the soil, but the leaf remained tightly furled for over a week. The issue was low humidity. The leaf was sticking to itself. I fixed this by placing a clear plastic bag over the pot and securing it with a rubber band. This created 80% humidity, and the leaf unfurled within 48 hours. Remove the bag after a day or two once the leaf is open.
Soil Has White Mold
If you see fuzzy white mold on the soil surface, you are overwatering, or the air circulation is too poor. Scrape off the mold gently and water less frequently. This white mold is usually not fatal to the corm, but it indicates conditions are too wet. I also place a small fan in the room at a low setting to improve air circulation.
Corm Sits for 6 Weeks with No Sprout
I have been there. I waited. My patience paid off sometimes, but other times I dug up a shriveled, dead corm. Here is my diagnostic method. Gently brush away the topsoil until you feel the corm. If it feels hard and firm, it is alive. Just cover it back up and wait two more weeks. If it feels mushy or soft, it is rotting. Remove it immediately and throw it away before it contaminates the soil for any other corms in the pot.
Sprout Changes Color to Pale Yellow
This is a light deficiency. Move the pot closer to a window or increase the intensity of your grow light. The plant desperately needs more light energy.
Common FAQ
Should I soak my caladium corms before planting?
Yes, I recommend a 30-minute soak in room-temperature water if your corms appear shriveled. This rehydrates them and kickstarts the germination process. However, do not exceed an hour. Soaking for too long can cause the corm to split or crack, leaving it open to infection.
Do caladium corms need light to germinate?
No. The corms do not need light until the sprout breaks the soil surface. However, they absolutely need warmth. I keep my pots in a dark cupboard with the heat mat, and as soon as I see the pinkish sprout, I move them into bright indirect light. If you keep them in the dark for too long after sprouting, they become weak and leggy.
How long does it take for caladium corms to sprout?
With a heat mat set to 75-80°F, you should see sprouts in 2-3 weeks. Without bottom heat, germination takes 4-6 weeks. Some stragglers can take up to 8 weeks if the ambient temperature is cool. Be patient, and do not give up before the 6-week mark.
My Final Thoughts
Growing Caladium Strawberry Star from corms is not a weekend project. It requires a precise blend of warmth, restraint with water, and genuine patience. I lost about 35% of my corms in my first two years. That number is down to under 5% now.
The most profound lesson I have learned is that these plants are not forgiving of our enthusiasm. The more you hover, the more you water, the more you dig up and check, the worse they perform. Step back. Give them warmth. Give them time. They will reward you with the most gorgeous leaves in your entire plant collection.
I hope this guide gives you the confidence to try again if your previous attempts failed. I genuinely believe that anyone can grow Strawberry Star. You just have to respect the corm and stop trying so hard.





