 bluename
 If your Caladium Red Flash has stopped growing, looks droopy, or just sits there doing nothing for weeks, the fix is usually simpler than you think. 90% of indoor plants die from overwatering, and stunted Caladiums are no exception. I killed three pots before I figured this out. Here is the short answer: stop watering for 5-7 days, check the roots for rot, move it to bright indirect light above 70°F (21°C), and cut away any mushy tubers. Then repot in a terracotta pot with chunky, well-draining soil. That is step one. Now, let me walk you through exactly how I revived my own stunted Caladium Red Flash over two weeks.
Why My Caladium Red Flash Stopped Growing
Let me be honest with you. I have been growing Caladiums for about six years now. I still remember buying my first Red Flash at a local nursery. I was so excited. The leaves were huge, heart-shaped, splashed with pink and red. I put it in my living room, watered it daily because I thought tropical plants loved moisture, and within three weeks it looked like a sad salad left in the sun.
The leaves curled. The stems flopped. New growth? Zero. I waited. And waited. Nothing.
I eventually dug up the tuber and found brown, mushy roots. I was mortified. I had basically drowned the poor thing. After that, I did what any stubborn plant person does: I researched everything. I read papers, watched hours of videos, and even reached out to a botanist through the RHS forum. The advice was consistent. Overwatering. Wrong pot. Wrong light. Those are the three killers.
So, if you are reading this because your Caladium Red Flash looks stunted, take a breath. It is almost always a combination of those three issues. And the good news? Most of them are reversible.
The 3 Fatal Mistakes That Stunt Caladium Red Flash
1. Overwatering (The #1 Killer)
I cannot stress this enough. 90% of indoor plants die from overwatering. Caladiums are especially brutal when it comes to excess moisture. They have tubers, and tubers rot easily.
I used to water mine every single day. I thought the soil should always feel wet. Wrong. The soil should dry out slightly between waterings. I now check the top two inches of soil. If it feels dry, I water. If it feels damp, I wait another day.
When you overwater, the roots suffocate. The leaves cannot absorb oxygen. The plant goes into survival mode and stops pushing new growth. That is the stunted look. It is not a light issue. It is not a fertilizer issue. It is a drowning issue.
2. Wrong Light Exposure
I used to think Caladiums hated light. So I put mine in a dark corner of my bedroom. That was a disaster. The plant stretched, the colors faded, and growth ceased.
Caladium Red Flash actually needs bright, indirect sunlight. Think of a spot where you can read a book comfortably during the day. That is the sweet spot. Direct morning sun is fine for an hour or two, but harsh afternoon sun will scorch the leaves.
Once I moved my plant to a north-east facing windowsill, things changed dramatically. Within five days, I noticed the first sign of new growth. I was stunned. It was that simple.
3. Using the Wrong Pot
This one took me forever to learn. I had my Caladium in a decorative ceramic pot with no drainage holes. I thought the rocks at the bottom would help. They did not. Water pooled at the roots, and the soil stayed soggy for days.
I switched to a terracotta pot with a large drainage hole. Terracotta is porous. It lets the soil breathe and evaporate excess moisture faster. Honestly, this single change saved my plant.
If you must use a decorative pot, use it as a cachepot. Keep your Caladium in a plastic nursery pot inside, then slide the nursery pot into the decorative one. When you water, take the inner pot out, let it drain fully, and then put it back. It takes an extra minute, but it prevents so many problems.
My 2-Week Revival Plan for Stunted Caladium Red Flash
I want to share exactly what I did. Not a generic list. My real, step-by-step process. I documented everything for two weeks. Here is what worked.
Day 1: The Triage
I took the plant out of its pot. I know this sounds scary, but you need to see the roots.
I gently loosened the soil and inspected the tubers. Healthy roots are firm and white. Rotten roots are brown, soft, and smell like mildew. I trimmed every mushy root with sterilized scissors. Then I cut away any soft spots on the tuber itself.
I let the tuber sit out for about four hours. This allowed the cut areas to callus over. It may sound like we are being cruel, but actually, this step prevents further rot. It creates a barrier.
Day 2: Repotting in the Right Mix
I repotted the tuber in a mix of one part potting soil, one part perlite, and one part orchid bark. This sounds like a lot, but the chunky texture is key. Water runs through it easily. Air circulates around the roots.
I chose a terracotta pot. It was two inches wider than the tuber. Not huge. A pot too big holds too much soil, which stays wet longer. A snug pot is better.
I planted the tuber about two inches deep, with the eyes pointing up. Some people plant sideways, but I have always had better luck with eyes up. Then I watered it thoroughly. Just once. I made sure water drained out the bottom hole. And then I stopped.
Day 3-5: Waiting and Watching
I placed the pot on a tray with a thin layer of pebbles. I added a little water to the tray, but only to the level of the pebbles. This created humidity around the plant without soaking the roots. Caladiums love humidity. That is a non-negotiable.
The first three days, I saw nothing. I kept telling myself to be patient. Honestly, it was hard. I wanted to water again, but I held back. The top soil was still slightly moist. I did not water.
Day 6: The First Sign of Life
On the morning of day six, I saw a tiny green tip peeking out of the soil. I nearly screamed. It was tiny, but it was there. New life.
The key at this point was to keep conditions stable. No sudden temperature drops. I kept the room around 75°F (24°C). I did not move the pot. I did not fertilize. I just let it do its thing.
Day 8: The First Leaf Unfolds
By day eight, the small green tip had grown into a folded stem. It was pushing upward, searching for light. I noticed the soil was dry on the top two inches. So I watered it. Lukewarm water, room temperature. I poured slowly, about a cup, until I saw drainage.
I did not water again for another four days. This is the lesson. Caladiums like consistent moisture, but they appreciate that dry period between drinks. Think of it like a cycle.
Day 11: Leaves Getting Bigger
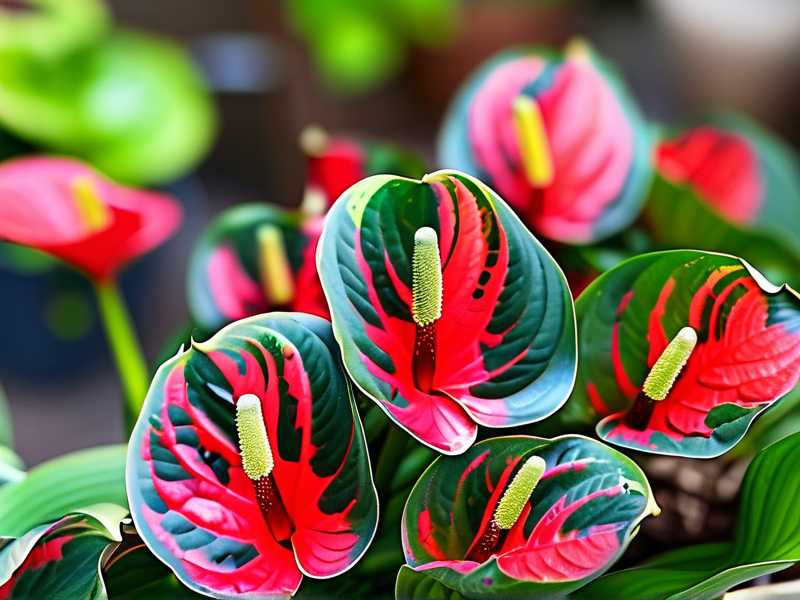
The first leaf was unfurling now. It showed that classic Red Flash pattern. Deep green edges, pink speckles, a fiery red center. It was beautiful. And the best part? A second leaf stalk was emerging right next to it.
Day 14: Full Recovery Mode
By the end of two weeks, I had two fully opened leaves and a third one on the way. The plant was still small, but it was clearly unstoppable. The stunted phase was over.
The difference was not magic. It was drainage, light, and patience.
Understanding the Caladium Red Flash Lifecycle
Caladiums are tubers. They have a natural dormancy period. If you live in a region with distinct seasons, do not panic when leaves die back in autumn. That is normal. The plant is gathering energy for next year.
But if your Caladium is stunted in the middle of summer, that is a signal. It is telling you something is wrong.
Many people confuse dormancy with trouble. A dormant tuber is firm. An unhealthy tuber is soft. If you press it and it squishes, you have rot. If you press it and it feels like a potato, you are fine.
I have also learned that Caladiums prefer warmth. They are tropical plants. If your room drops below 60°F (15°C), growth slows drastically. I keep my thermostat around 72°F (22°C) during the day. At night, it can drop to 65°F (18°C), but that is the floor. Anything colder and the plant stalls.
Fertilizer: When to Feed and When to Wait
Ah, fertilizer. The trap. I used to over-fertilize thinking it would speed up growth. It backfired. Too much fertilizer causes salt build-up in the soil. That burns the roots, which actually stunts growth. Go figure.
I now wait until the plant has at least two or three active leaves before feeding. Then I use a balanced liquid fertilizer, 20-20-20, diluted to half strength. I feed every three weeks during the active growing season. During the recovery phase, I do not feed at all. The plant needs to focus on rooting, not on pushing foliage.
If you want a professional recommendation, the AHS suggests using a slow-release fertilizer at planting time. That is actually a brilliant approach. It feeds gently over months, without the risk of burning.
Light Adjustments I Had to Make
I admitted earlier that I placed my Caladium in a dim corner. That was a mistake. But here is the thing. I have also seen Caladiums get scorched. Too much direct sun, especially around noon, will bleach the leaves. The colors fade. The edges go crispy.
The best place is an east-facing window. Morning sun is gentle. It gives the plant strong energy without the heat stress. If you only have south-facing windows, hang a sheer curtain to filter the light. That works well too.
I used a cheap digital light meter on my phone to check my spot. It read about 1500 foot-candles. That is actually a decent level for Caladiums. If you have no meter, the hand-shadow test works. Put your hand over the leaf. If the shadow is sharp and defined, the light is too strong. If the shadow is blurry, it is likely perfect.
Humidity: The Unsung Hero
I almost forgot humidity. This is a big one. Caladiums are native to tropical rainforests. They thrive with moisture in the air.
I run a small humidifier next to my plants. Honestly, it changed my life. Before that, I had issues with leaf edges browning. That is usually a sign of low humidity.
If you do not want to buy a humidifier, you can group your plants together. They release moisture through their leaves. Grouping them creates a microclimate. It is free and it helps.
Another trick I learned. Place a glass of water next to the pot. As the water evaporates, it raises the humidity in that immediate area. It sounds too simple, but it genuinely works.
What If the Tuber Is Rotten?
This is the worst-case scenario. I have been there. The tuber turns into mush. It smells like decaying vegetables. It is heartbreaking.
But do not throw it away immediately. Sometimes, only part of the tuber is affected. Cut away the rotten section. Look for any firm, white tissue. If you find any, dust the cut with powdered cinnamon. Cinnamon is a natural antifungal. I have successfully saved half-rotted tubers this way.
Then let the tuber dry for 24 hours. Plant it in a small pot with very dry soil. Do not water. Just place it in a warm, bright spot. Wait for new growth. It may take longer than two weeks. Sometimes it takes a month. But it is worth trying.
I once saved a tiny piece of a tuber that was barely bigger than a coin. It grew into a full plant over the summer. Slower, yes, but rewarding.
Common Pests That Stunt Growth
You might not realize this, but pests can cause stunted growth too. The most common ones I have dealt with are spider mites and aphids.
Spider mites are sneaky. They are tiny. They look like red dots on the underside of leaves. They suck the sap out of the plant, causing yellow speckles and stunted growth.
I have found that a simple solution of mild soap and water works. Mix a teaspoon of castile soap in a spray bottle with water. Spray the leaves, especially the undersides. Do this every three days for two weeks.
I also check my Caladium every time I water. It takes ten seconds. Look at the underside of leaves. Look at the stems. Look at the soil surface. Prevention is easier than treatment.
Is My Caladium Getting Enough Nutrients?
Honestly, nutrient deficiency is less common than overwatering, but it happens. If your plant is stunted and the leaves are pale or yellowing, that is a clue.
The most common issue is nitrogen deficiency. Nitrogen is responsible for leaf growth. A lack of it halts everything.
However, I want to caution you against adding fertilizer when the plant is already stressed. Nutrients cannot fix a root rot problem. That is like trying to feed a fever.
Wait until the plant is actively growing again. Then give it the diluted fertilizer. Timing is everything.
Should You Prune a Stunted Caladium?
Short answer. Yes, but only dead or damaged leaves. I prune off any yellowing leaves during the recovery phase. This redirects energy to healthy growth instead of trying to save dying tissue.
Use clean scissors. Cut the stem near the base. Do not pull. You might damage the tuber underneath.
That said, do not prune heavy-looking healthy leaves. They are producing food for the tuber through photosynthesis. Removing them weakens the plant.
My Supplemental Light Setup
During the winter, when natural light is low, I use a small LED grow light. I placed it about 12 inches above the plant. I run it for six hours a day to supplement morning light.
This made a noticeable difference for me. My Caladium kept growing through the winter instead of going dormant. It is optional, of course, but if you struggle with light levels, this is an investment that pays off.
I picked one that clips onto the pot, actually. It takes no space. And it has a timer, which I really appreciate. Set it and forget it.
Learning From My Mistakes (The Hard Way)
Honestly, I wish I had known all of this before killing my first Caladium. I remember my first one, specifically. It was getting soft and pale. I kept watering it more. I thought water solved everything. It did not.
I killed my second plant by putting it in direct south-facing sun. The leaves looked like they had been sunburned. Thin, brown patches. I thought it was a disease. It was just too much heat.
I killed my third plant by keeping it in a pot without drainage. The tuber literally melted inside the soil. I found out when I dug it up. It was a dark, smelly mess. Not my proudest moment.
But you know what? Those failures taught me more than any article could. I now understand the plant intimately. I check the soil, the light, the pot. I ask questions when something feels off.
Common Questions (FAQ)
How long does it take for a stunted Caladium Red Flash to revive?
It depends on the damage. In my experience, the first new leaf appears within 7 to 14 days after you fix the underlying issue. If the tuber was severely rotted, it might take up to a month. Patience is critical.
Should I repot if the tubers are crowded?
Yes. If you see multiple tubers squeezing each other, it is time to divide and repot. I usually do this in early spring, just before the growth season starts. Give each tuber its own pot. The roots need space to expand.
Can I revive a Caladium that has gone completely dormant?
If the leaves have died back completely, do not assume it is dead. Check the tuber. If it is firm, it is just resting. Place the pot in a dark, cool spot. Reduce watering. Wait about 8 to 10 weeks, then move it back to bright light and resume watering. It should sprout again.
Final Thoughts on Reviving Your Caladium
If your Caladium Red Flash is stunted, the first thing I want you to do is stop watering. Seriously. Put the watering can away. Then check the pot. Check the roots. Move the plant to a spot with bright, indirect sunlight. Remove any rotten parts. Let the plant rest in dry-ish, well-draining soil.
I have been exactly where you are. I know it feels frustrating. I remember staring at a pot of soil for days, wondering if I was wasting my time. But the plant wants to live. It has stored energy in that tuber. It just needs the right conditions to release it.
Give it warmth. Give it light. Give it air. And give it time. Good luck. I hope you see that first new leaf soon.





