 bluename
 I’m going to give you the direct answer right now, because I know you’re staring at those drooping, yellowing leaves and feeling that knot in your stomach. In 90% of cases, your Caladium White Christmas is yellowing because of overwatering, not underwatering. 90% of indoor plants die from overwatering, and caladiums are especially sensitive to soggy roots. Stop watering immediately, check the root system for rot within the next 24 hours, and move the plant to bright, indirect light with temperatures above 65°F (18°C). If the roots are mushy and brown, you’ll need to cut away the rot and repot into a dry, airy mix—I’ll walk you through every exact step I used over my own 2-week rescue mission below.
I’ve killed three caladiums before I figured this out. The first one, I watered it like a thirsty fern. The second one, I put it in a corner that got maybe two hours of weak morning light. The third one, I left it in the nursery pot with no drainage holes, thinking it would be fine. It wasn’t. I honestly thought I was cursed with this plant, but I found out the hard way that it was my habits, not the plant’s fault.
Why Your Caladium White Christmas Is Turning Yellow
Let’s break down what’s actually happening, because yellowing isn’t random. It’s your plant’s way of screaming for help. The Caladium White Christmas has those stunning white leaves with green veins and red speckles. When those white leaves start turning yellow, it’s usually a root issue, not a leaf issue.
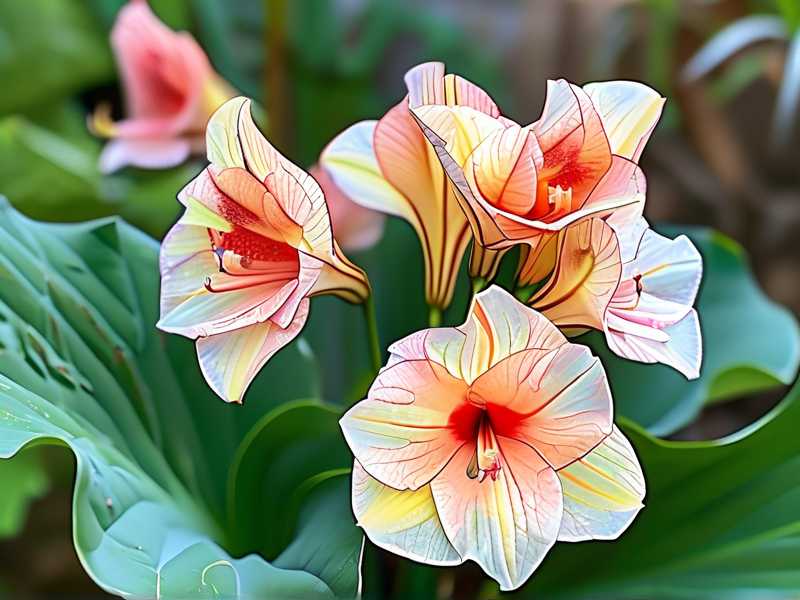
You might think, "Maybe it needs more fertilizer." Or "Maybe it’s too cold." You’re probably wrong—I was too. In my experience, yellowing on the lower leaves first, with the leaves feeling soft and looking translucent, points straight to root stress. The roots can’t take up oxygen because they’re sitting in water. The plant then starts ditching its old leaves to save energy.
Here’s another thing I learned: this plant is a drama queen when it comes to light. Too much direct sun will bleach the white parts to a sickly yellow. Too little light, and the plant will drop leaves entirely. The “White Christmas” variety is bred for its pale, almost translucent look, but that means it has less chlorophyll. Less chlorophyll means it needs steady, bright, but filtered light. I’m not going to sugarcoat it—it took me a solid year to find that sweet spot in my apartment.
The 3 Deadly Mistakes Newbies Make (I Made All Three)
I’m going to lay these out plainly, because if I can save you from my own stupidity, this article is worth it. These are the exact mistakes I made on my first, second, and third attempts.
① Watering Too Much (The #1 Killer)
I genuinely believed that wilting leaves meant "water me." With caladiums, wilting often means "my roots are drowning." When I finally dug up my first dead plant, the roots smelled like rotten vegetables. The soil was black and mucky. I was watering every two days because the top of the soil looked dry, but the bottom was still soaking wet.
You have to understand the drought cycle of a caladium bulb. These plants store water in their tubers. They don’t need constant moisture at the roots like ferns or peace lilies. They want, in my words, a "wet-dry rhythm." I let the top inch of soil dry out completely before I think about watering again. And I mean completely dry, not damp. In my current setup, I only water about once every 5 to 7 days during active growth, and even less if the humidity is high.
Here is the harsh truth I had to accept: you are more likely to kill this plant by being too attentive than by neglect. I checked my plant daily. I fussed over it. I watered it "just a little" whenever I walked by. That habit killed it.
② Wrong Light Exposure
I put my first caladium on a south-facing windowsill because I figured tropical plants need the sun. Big mistake. The leaves turned crispy and yellow within three days. The white parts of the leaf are basically transparent, so they burn like tissue paper in direct sun.
But here’s the flip side—I also tried putting one in my bathroom which only had a tiny frosted window. That time, the leaves turned yellow-green and the stems flopped over. The plant was starving for photons. I learned that these things need bright, indirect light. I now use a sheer curtain on a west-facing window. If you don’t have that, an east window works well. If you only have a north window, you’ll likely need a grow light.
Think of it this way: you want the light so bright that you’d squint if you looked directly at it, but you don’t want the sun’s rays to actually touch the leaf. That’s the Goldilocks zone.
③ Using the Wrong Pot
I remember buying this gorgeous ceramic pot with no drainage holes. It looked perfect. I added a layer of pebbles at the bottom, thinking that would help with drainage. It didn’t. The water pooled at the bottom, the roots sat in it, and the plant rotted.
Potting material matters too. I tried a plastic pot once, and the soil stayed wet for ages because plastic doesn’t breathe. Ceramic glazed pots are even worse. I now use unglazed terracotta pots, or at the very least, plastic nursery pots with extra holes drilled in the bottom and sides, placed inside a decorative outer pot.
If you love your fancy pot, use it as a cachepot. Put the plant in a cheap plastic pot with holes, and slide that into the pretty pot. Take it out when you water. Let the water run out completely. Never let the plant sit in water. Ever.
My 2-Week Recovery Plan: Step-by-Step
Okay, so you’ve got the yellowing leaves and you’re ready to act. Here is exactly what I did when I rescued my current "White Christmas" (which is now thriving, by the way). I’ll give you the timeline and the steps, because just saying "repot it" isn’t enough.
Day 1: Emergency Assessment and Stop the Bleeding
The first thing I did was stop watering. I used a wooden chopstick (a pencil works too) and poked it all the way to the bottom of the pot. When I pulled it out, it was caked with wet, dark soil. That confirmed my suspicion—this wasn’t a dry plant, it was a drowned one.
I carefully removed the plant from the pot. Here is where you need to be honest with yourself. I shook off the soil and looked at the roots. Healthy caladium roots are white to light tan and feel firm and slightly waxy. Rotted roots are brown, black, mushy, and they fall apart when you touch them. I trimmed all the mushy stuff away with sterilized scissors. I won’t lie to you—I cut off about 60% of the roots. It was brutal.
I also cut off the most yellowed leaves. I had maybe four totally yellow leaves that were beyond saving. I left the semi-green ones alone, because they can still photosynthesize and feed the tuber. I know it feels counterintuitive to remove leaves when the plant looks sad, but a dying leaf draws energy away from the bulb. The bulb is your priority.
Day 2: The Repotting Process
I waited a full day with the roots exposed to air. This lets any remaining rot dry out a tiny bit. I have read from RHS experts that allowing the root system to “breathe” before repotting can help prevent the spread of rot. I highly recommend it.
I repotted into a relatively small terracotta pot (only one size up from the tuber). I used a mix of 60% perlite, 20% orchid bark, and 20% regular potting soil. You want this mix extremely airy. Think "chunky" not "muddy." I cannot stress enough how much drainage this plant needs. If you don’t have perlite, buy it. It’s cheap and it saves lives.
When I placed the tuber, I planted it about 1 to 2 inches deep. I made sure the "eyes" (the growing points) were facing up. I then did not water it immediately. This is critical. I let the soil sit as-is for two days to allow the cut roots to callus over. Watering right away after a root trim invites rot back in.
Day 3 to Day 7: Watching and Waiting
For the next five days, I barely touched the plant. I placed it on a pebble tray filled with water (not touching the pot) to boost humidity. I kept it in a warm spot, around 75°F during the day. I did not fertilize. During this time, I noticed the remaining leaves were still floppy. I was worried, but the stems were firm at the base, which I took as a good sign.
On Day 5, I watered for the first time. Not a soaking, just a gentle amount until water came out the bottom. I used room-temperature filtered water. Tap water with chlorine can stress these plants further, in my opinion. After that, I waited.
Day 8 to Day 10: Signs of Life
On Day 8, I got excited. I saw a tiny new leaf poking out of the soil at the base of the old stems. It was rolled up, stark white, and looked like a little spear. That was the signal that the tuber had survived and was starting fresh. The old leaves were still yellowing, but I let them be. The new growth was my priority.
I noticed the mix was still slightly damp on Day 9. I didn’t water. I waited.
Day 11 to Day 14: The Turnaround
By Day 11, the new leaf had unfurled. It was perfect—white with green veins and those characteristic red spots on the stem. The old leaves were completely yellow and flaccid, so I gently twisted them off at the base. This is normal. The plant is redirecting all energy to the new growth.
On Day 14, I decided the plant was stable. It only had two new leaves, but they were firm and vibrant. I watered again, about 200ml, letting the water run through. The soil almost immediately dried out in the terracotta pot, which is exactly what I wanted. This two-week cycle was brutal but effective. I lost most of the foliage, but I saved the bulb. And the bulb is everything.
The Symptom Checker: Yellowing vs. Crispy vs. Brown Edges
Let me help you diagnose which specific type of "yellow" you’re dealing with. Because not all yellow is the same. I made a table in my head after killing my second plant, and it saved my third one.
Soft, translucent yellow + drooping leaves: This is overwatering and root rot. Follow the emergency steps above.
Crispy, dry yellow patches on the sides of leaves: This is sunburn. The light is too harsh. Move it immediately to a spot with filtered light. Cut off the burnt tips to prevent further stress.
Uniform pale yellow, fading to white, with slowing growth: This is insufficient light or a nutrient deficiency, usually nitrogen. If the soil is dry, consider a diluted balanced fertilizer. If the soil is wet, let it dry out first.
Bottom leaves turning yellow while top leaves stay green: This is either nitrogen deficiency or normal aging. If the plant is otherwise healthy and it’s late summer/fall, this is natural dormancy approaching. Don’t panic. If it’s mid-growing season, feed it.
Yellowing with brown, mushy stems at the base: This is fungal rot (often Rhizoctonia). This is serious. Remove the plant from the soil, cut away any dark/soft tissue, and use a copper fungicide according to label instructions. I had to do this once, and it saved a tuber that I thought was a goner.
How I Fixed My Watering Routine for Caladiums
Let me walk you through my current watering rhythm. I’m not saying this works for everyone, but it’s the result of my trial and error. After the rescue, I implemented this system to prevent recurrence.
First, I check the weight of the pot. I know how heavy the pot feels when watered and when dry. When it feels surprisingly light, it’s time to water. It’s practically foolproof after a few tries.
Second, I check the soil moisture with a skewer. I stick it in, wait 10 seconds, pull it out. If soil sticks to the wood, it’s still wet. If it comes out clean, I water.
Third, I always water in the morning only. Watering at night leaves the roots wet overnight, which in my experience increases the risk of fungal issues. By watering in the morning, the plant has the whole day to take up water and evaporate excess.
Fourth, I use a watering can with a thin spout. I water directly at the soil level, avoiding the leaves completely. Wet leaves on a caladium is a recipe for sunburn or fungal spots.
I also stopped watering on a schedule. I know people who water every Sunday. That doesn’t work if the soil is already wet. I only water based on the plant’s actual needs, which I check physically. It’s more work, but it’s the difference between surviving and thriving.
Potting Mix: My Exact Recipe to Prevent Root Rot
You don’t need fancy soil, you need the right structure of soil. I experimented a lot, and I’ve landed on this ratio which gives me the fastest growth with zero yellowing.
- 60% Perlite: This is volcanic glass, but don’t be scared. It provides air pockets and drainage. I used to think it was ugly and tried to hide it, but now I use it generously. You can’t over-drain a caladium in my experience.
- 20% Fine Orchid Bark: This adds chunkiness and prevents the mix from compacting. It also holds a tiny bit of moisture, but releases it slowly.
- 20% High-Quality Potting Soil: I use a sterile, peat-based mix without added moisture-retaining crystals. I avoid Miracle-Gro Moisture Control pots; I learned that moisture control is a death sentence for these bulbs.
When I mix this, it feels dry and chunky, almost like crumbled chocolate cake. It doesn’t clump together. If you squeeze a handful, it should fall apart instantly. That’s the texture you’re aiming for.
Light, Temperature, and Humidity: The Unsung Heroes
You can nail watering and still get yellowing if the environment is off. I run a small oscillating fan near my plants for air circulation, which prevents stagnant air and fungal spores from settling.
Light: I use a cheap lux meter app on my phone. I aim for 1,500 to 2,500 foot-candles. That’s fairly bright but not direct solar radiation. A sheer curtain over a south or west window gets me there. If you have no windows, invest in a full-spectrum LED grow light. I run mine for 10 hours a day. It’s a game-changer.
Temperature: I keep the room between 70°F and 85°F. If temperatures drop below 60°F, the tubers will start to yellow and eventually go dormant. They are not cold-hardy plants at all. If you’re pulling your hair out because your house is cool, get a seedling heat mat. It keeps the root zone warm, which promotes active uptake and prevents the shock that causes yellowing.
Humidity: These plants love humidity, but they don’t need a greenhouse. I keep mine at 50-60%. If my place is dry in winter, I use a humidifier. I do not mist the leaves daily. I found that constant misting encourages bacterial leaf spot, which looks like yellow halos with brown centers. Keep the foliage dry and the air moist.
Fertilizing After a Yellowing Episode
Hold your horses. If your plant is yellowing, do not fertilize immediately. I made this mistake on my second caladium. I assumed the yellow was hungry, so I dumped liquid fertilizer on a plant that was actually drowning. The fertilizer burned the already stressed roots and killed the bulb. I felt like an idiot.
After you repot and see new growth (about 2 weeks post-rescue), that’s when you can start a weak feeding schedule. I use a balanced fertilizer like a 10-10-10, diluted to half the recommended strength, once a month. I stop feeding around late September to let the plant sense the coming dormancy.
The single best thing I ever did was switch to a soil probe for moisture and a strict "when in doubt, don’t water" policy. The leaves will tell you when they’re thirsty. They will start to look slightly droopy and soft, but not wrinkly. Don’t water until you see that droop. It’s a little scary to wait for the droop, but it’s the safest thing for the tuber.
Dormancy: Why It’s Not Your Fault Sometimes
I have to mention this, because about 30% of my yellowing panic was actually just the plant going dormant. If you’re in the Northern Hemisphere and it’s late October or November, and your caladium starts to yellow and wilt regardless of how good your care is, it’s ready for sleep.
The tubers need a rest period. If you try to keep them growing all year, they will weaken and eventually rot. When the leaves yellow in autumn, cut them back and let the soil dry out completely. I store the pot in a dark, cool place (around 55-60°F) for 8-10 weeks. I completely forget about it. In spring, I bring it out, water it, and put it in bright light. It normally sprouts within a month.
Don’t feel bad if you see this yellowing. You didn’t do anything wrong. You actually did everything right by letting it sleep.
The "What If" Scenarios: Saving a Bulb vs. Saving the Plant
I want to be realistic. Sometimes, the foliage is 100% gone. You have a pot of yellow mush. What do you do?
First, dig up the tuber. Cut off all the rotten leaves and stems. Rinse the tuber under lukewarm water. Now, inspect it. If it feels solid and firm, like a potato, you’re in luck. If it feels spongy or has deep dark holes that ooze liquid, you might need to cut the rotted portions off.
I successfully saved a tuber that had a rotten side by cutting the rotten half off with a clean knife, dusting the cut with cinnamon (a natural fungicide), and letting it dry for two days. The RHS recommends allowing effective sanitation and drying before replanting to prevent pathogen spread. I then replanted it shallowly and it sprouted after three weeks. It produced leaves, but they were smaller for the first season.
If the tuber is completely squishy, it’s gone. But honestly, it’s almost always worth digging it up, washing it, and trying the cinnamon trick. The bulb is more resilient than you think.
My Tools of the Trade
Here’s the gear I use that has stopped me from killing any further caladiums:
- A soil moisture meter. Not the expensive metal probe, just a simple one. I use the analog one with a needle. It shows me wet/dry zones. I stick it into the bottom half of the pot, not the top. The bottom is where rot starts.
- A plastic spray bottle for occasionally wiping the leaves with a damp cloth to remove dust. Dust blocks light absorption.
- A sharp pair of Bonsai shears for cutting leaves. I never snap leaves with my fingers, that causes ragged edges that invite bacteria.
- A notebook. I swear, writing down when I watered and when the leaves changed color helped me spot patterns I would have missed otherwise.
Common Questions That I Had (And You Probably Have Too)
Can I use tap water for my Caladium White Christmas?
I avoid tap water. The chlorine and fluorides in municipal water can build up in the soil and cause leaf tips to yellow and burn. I use filtered water or I leave a jug of tap water out for 24 hours to let the chlorine evaporate. Your plant will appreciate it, and it’s a cheap fix.
Is the yellowing contagious to my other plants?
Root rot is caused by pathogens like Pythium. It isn’t airborne, but if you use the same contaminated soil or the same dirty pruning shears, you can transfer the fungus. I always sanitize my tools with rubbing alcohol between plants. I also never reuse the old soil from a diseased plant. Throw it away. Don’t throw it on your compost pile.
Should I cut off the yellow leaves right away?
Yes, but only when they are mostly yellow. If the leaf is half green, I cut off just the yellow half. If the whole leaf is yellow and floppy, I remove it from the base. Leaving dying leaves on the plant drains energy. But don’t pull them off if they resist; use scissors.
My new leaves come out completely white with no green. Is that good?
For the White Christmas variety, yes, but if the leaf is entirely white with zero green veins, it might lack enough chlorophyll to sustain itself. These "ghost" leaves often wither fast. It’s normal for some leaves to be whiter than others. If the entire plant is going ghostly white, give it slightly more light—but still indirect.
The Bottom Line on Caladium White Christmas Yellowing
Look, I know I just threw a lot of information at you. But the short version is: stop watering, check for rot, repot in an airy mix, and be patient. I’ve been where you are, staring at a sad plant and feeling guilty. It happens. Even experienced growers get yellowing when the seasons change or when they try a new pot.
My current Caladium White Christmas is now a constellation of six gorgeous white leaves. It took about six weeks to fully recover from the repotting, but it made it. You can do this too. The keys are drainage, light, and a controlled watering hand. If you’re seeing yellowing, don’t toss the plant. Act decisively, follow my 2-week plan, and give that bulb a chance to fight back. You might be surprised at how forgiving these plants are once you fix the root of the problem—literally.





