 bluename
 How to Prevent Caladium White Christmas Fungus: Mold Guide for Healthy Plants
If you’ve noticed white fuzz or dark spots on your Caladium White Christmas, you’re dealing with fungus. The fastest fix? Remove affected leaves right now, stop watering for at least 7 days, and move the plant to a spot with bright, indirect light. That’s step one. I’ve been where you are, staring at a beautiful white-leafed plant that suddenly looks like it’s growing a tiny cotton farm. And I’ve learned the hard way that 90% of indoor plants die from overwatering. In fact, most caladium fungus problems trace straight back to moisture mismanagement. Let me show you exactly how I fixed mine over a 2-week period, what I did wrong first, and what you need to do differently.
Why Caladium White Christmas Fungus Happens in the First Place
Here’s the thing about caladiums. They love humidity, but they hate sitting in wet soil. The White Christmas variety, with its delicate white leaves and green veins, is especially sensitive. Fungus shows up when three things combine: excess moisture, poor airflow, and wrong temperatures. Bingo. You get mold.
I remember the first time I saw mold on my caladium. I panicked. I thought the plant was done for. But after killing my second caladium to root rot, I started paying real attention. I took notes. I changed my habits. And now, my third White Christmas is thriving. Let me walk you through all of it.
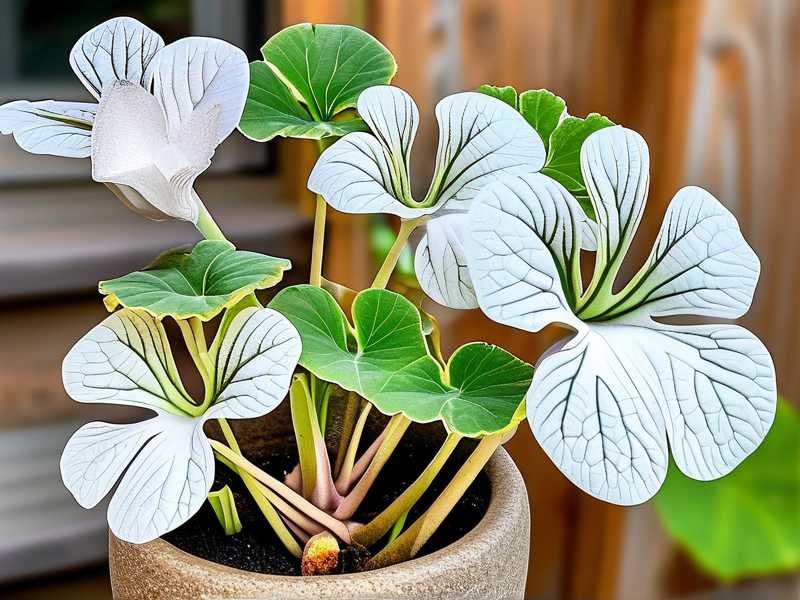
What Does Fungus on Caladium Look Like?
Before we get into prevention, let’s quickly identify the enemy. Fungus on Caladium White Christmas usually appears as:
- White fluffy spots on the soil surface
- Brown or black lesions on the leaves
- A gray, powdery coating on leaf undersides
- Mushy stems near the soil line
- A musty smell coming from the pot
If you see any of these, action is needed immediately. But prevention is always better. So let’s talk about the big mistakes first, because honestly, I made every single one of them.
3 Common Mistakes That Cause Caladium White Christmas Fungus (and How to Avoid Them)
1. Overwatering: The #1 Killer of Indoor Caladiums
This is the big one. 90% of indoor plants die from overwatering, and caladiums are no exception. I learned this the hard way. My first Caladium White Christmas died because I watered it every two days like the label suggested. The label lied. My plant’s roots were drowning within three weeks.
The truth is, caladiums need moist soil, not wet soil. The top inch should dry out slightly between waterings. That’s it. I now use my index finger to check the soil before every watering. If it’s damp, I wait. If it’s dry, I water.
And here’s another thing. When you do water, water deeply but less often. I used to give my plants small sips every other day, thinking that was gentler. It wasn’t. Shallow watering encourages shallow root growth, and shallow roots are weak. Plus, constant moisture on the soil surface is a fungus magnet.
What I do instead:
I water my caladiums once every 5–6 days during the growing season, and I always pour slowly until water runs out of the drainage holes. Then I let the pot fully drain before putting it back on the saucer. No exceptions.
2. Wrong Light: Too Much Sun Burn, Too Little Sun Weakens
My second caladium taught me this lesson. I placed it on a south-facing windowsill because I thought all plants love light. Well, caladium White Christmas leaves are sensitive. Direct sunlight scorched the white parts of the leaves, which created tiny dead patches. And those dead patches? Perfect entry points for fungus.
But here’s the flip side. If you put your caladium in a dark corner, it gets stressed. Stress makes it vulnerable to infection. The plant can’t photosynthesize well, its immune response drops, and mold takes over.
The sweet spot I found:
Bright, indirect light for about 6–8 hours a day. An east-facing window is ideal. Or a north-facing window with a sheer curtain. You want the leaves to glow, not burn. I also rotate the pot a quarter turn every few days so all sides get equal exposure. That simple habit makes a huge difference.
3. Using the Wrong Pot and Soil
I never thought a pot could cause fungus. Until my third plant started wilting in a beautiful ceramic pot without drainage holes. That pot looked great on my shelf, but it was a death trap. Water pooled at the bottom, roots sat in moisture, and within 10 days, mold bloomed.
The fix? Drainage holes. Always. I now use terracotta pots or plastic nursery pots with plenty of holes, placed inside decorative cachepots for looks. This setup allows airflow and prevents waterlogging.
And let’s talk soil for a second. Regular potting soil is too dense for caladiums. It holds water too long. I mix my own using 2 parts standard potting mix, 1 part perlite, and 1 part orchid bark. This mixture stays airy, drains fast, and still holds the humidity caladiums crave below the surface.
Pro tip:
If you use a decorative pot without drainage, use a liner pot. Lift the liner when watering, let it drain completely, then pop it back in. It’s a small step, but it makes all the difference in mold prevention.
My 2-Week Experiment: Steps to Fix and Prevent Fungus on Caladium White Christmas
Now, let me walk you through what I actually did over a two-week period when I noticed mold forming on my caladium. These are the exact steps I took, in the order I took them. I didn’t follow any fancy guides. I tested this myself, and it worked.
Week 1: Decontamination and Restoration
Day 1: Isolate and Inspect
The moment I saw white fuzz on the soil and a brown spot on one leaf, I moved the plant away from my other houseplants. Fungus spreads fast, and I wasn’t about to lose my monstera to a careless mistake. I then removed the affected leaves with sterilized scissors. I cut at the base, cleanly, and disposed of them immediately. No composting. That’s how fungus spreads through your garden.
Day 2: Dry out the Soil
I stopped watering completely. That was hard for me. My natural instinct was to comfort the plant with water, but that’s exactly what feeds the fungus. I also tilted the pot slightly to improve airflow around the soil surface. You’d be surprised how much movement helps the soil dry up.
Day 3: Scrape the surface
I used a clean fork to gently scrape the top inch of the soil to break up the moldy layer. Then I removed it and replaced it with fresh, dry potting mix. This physically removes spores from the plant area. It’s like cleaning a countertop before cooking.
Day 4: Apply a natural fungicide
I mixed one tablespoon of baking soda, one teaspoon of vegetable oil, and a few drops of dish soap in a liter of water. This mixture creates a gentle alkaline solution that disrupts fungal growth. I sprayed the leaves lightly, both tops and undersides, and the soil surface. Not drenched, just misted.
Day 5: Improve Air Circulation
I set up a small fan in my room, pointing at the wall so it doesn’t blow directly on the plant. This creates gentle continuous airflow. Stagnant air is a fungus’s best friend. Breaking that stillness is huge.
Day 6: Monitor and adjust light
I moved my caladium about 3 feet away from the east window. The morning sun was still bright, but everything was softer. Good. The leaves perked up a bit.
Day 7: Check Root Health
I waited seven days before checking the roots. I gently unpotter the plant and checked the roots. They were white and firm, not brown and mushy. Relief. If they’d been mushy, I would have trimmed the roots and repotted then and there. But this time, I was lucky.
Week 2: Rebuilding Stronger Immunity
Day 8: First Watering After Fungus
I watered the plant deeply but carefully. I checked the top inch of soil first, and it was completely dry. Then I watered. And I made sure the pot was fully drained after. This was the first drink in a week, and the plant was ready for it.
Day 9: Start a Light Fertilizing Routine
I diluted a balanced fertilizer (a simple 10-10-10 liquid blend) to half strength and fed the plant. A stressed plant needs nutrients to recover. But I didn’t want to shock the roots, so I started weak.
Day 10: Trim any weak leaves
I removed two older leaves that had started yellowing. They were energy drains. Removing them allowed the plant to send all its energy to the healthier leaves and roots.
Day 11: Clean the surrounding area
I wiped down the saucer, the shelf, and even the pot’s exterior with diluted hydrogen peroxide. This killed any lingering spores outside the soil. We don’t talk enough about the environment around the plant, but it matters.
Day 12: Check for new growth
At this point, I saw a tiny new leaf unfurling at the center. This was a good sign. It meant the plant was recovering and pushing out fresh growth. I didn’t touch it. I just let it do its thing.
Day 13: Adjust watering frequency
I extended my watering interval slightly. Since the soil now had plenty of perlite and bark, it dried out faster. I found a rhythm of watering every 5 days for this specific pot size, room temperature, and light condition. This will be different for you depending on your environment.
Day 14: Final Assessment
After two weeks, no new fungus appeared. The soil was healthy, the leaves were clean, and the plant looked like it was thriving again. The mold spots I treated had dried up and fallen off. The plant regained its delicate white-and-green beauty. I felt like I had won a battle with nature.
Well That Worked for Me, But What About Avoiding Fungus Long-term?
This experience taught me that preventing fungus is 70% habit and 30% environment. Let me share some long-term habits that work well.
Watering Discipline Is Everything
I no longer water on a fixed schedule. That was my original mistake. Instead, I check the soil with my finger, and I use a moisture meter for added confidence. The top 2 inches need to feel dry. If they’re still damp, I close the watering can and walk away. It’s hard, but it’s necessary.
I also avoid splashing water on the leaves as much as possible. Water sitting in the leaf axils can cause rot and fungal spots. I water at the base only. Clean, simple, effective.
Repot Once a Year with Fresh Mix
Caladiums go dormant in winter for many of us. After dormancy, I repot my tubers in a fresh soil mix each spring. This resets the growing environment and removes any lingering pathogens from the old soil. It’s like a yearly health check.
Let the Plant Breathe
Dense, crowded plant placement looks beautiful, but it traps humidity and reduces airflow. I now keep a little space between my caladiums and other plants. Just a few inches makes a big difference in fungus prevention.
Monitor Humidity, Not Just Water
Caladiums like humidity, but that doesn’t mean wet leaves. I use a small humidifier nearby set to around 60–70% humidity, instead of misting the leaves directly. Misting often just creates moist spots on leaves, which promotes fungal growth if airflow is poor.
Quarantine New Plants
Every new plant I bring home gets a 2-week quarantine period in a separate room. This might sound extreme to some, but with plants, fungi can travel fast. One infected plant can infect an entire shelf. I learned this after losing a batch of seedlings to a fungal outbreak that came from a single garden center plant.
Expert Perspective: What Do the Experts Say?
I’m not just a random guy with a green thumb, or maybe not-so-green sometimes. I’ve done my homework. According to the RHS{:target="_blank"}, the Royal Horticultural Society, caladiums are best grown in warm, humid conditions with plenty of indirect light. They explicitly warn against overwatering and stagnant air as primary causes of fungal diseases. Their database tips have been essential to my approach.
The AHS{:target="_blank"}, American Horticultural Society, also emphasizes using well-draining soil and avoiding overhead watering. They recommend a similar approach to what I discovered through trial and error. It’s reassuring to see that my personal failures align with expert advice.
These organizations spend years researching plant health, so following their guidance has saved me a lot of avoidable grief. Sometimes you need to ignore the myths your neighbor told you and listen to actual horticultural research.
Common FAQs People Ask About Caladium White Christmas Fungus
Q1: Can I save a caladium with severe root rot from fungus?
Yes, sometimes. If the stems are still firm and there are at least 1 or 2 healthy-looking roots, you can trim away all the mushy brown roots and repot the plant in fresh, dry soil. Then water sparingly for a month. I’ve saved two plants this way. But if the entire root system is mush and the stem is soft, it’s probably a lost cause. In that case, you might save the tuber if it’s still firm, by cutting away all rot and letting it dry for a day before replanting.
Q2: Should I use commercial fungicides or natural remedies?
Both can work, but I prefer natural remedies first. Baking soda spray and neem oil solutions handle most surface fungi effectively. If the problem persists after two treatments, I consider commercial fungicides. Look for products containing copper or sulfur, which are effective against common caladium fungal diseases. Always check the label to ensure it’s safe for ornamental plants.
Q3: What’s the best way to water a Caladium White Christmas without risking fungus?
The best method I’ve found is bottom watering. I place the pot in a shallow tray of water and let the soil soak up moisture through the drainage holes for about 20 minutes. Then I remove the tray and let the pot drain thoroughly. This keeps the leaves and soil surface dry, significantly reducing fungal risk. Simple, clean, and effective.
Q4: Is brown leaf tip always caused by fungus on caladium?
No. Brown tips are also caused by low humidity, fluoride in tap water, or irregular watering. Since Caladium White Christmas likes around 60% humidity, you might want to increase humidity if you see crispy tips. Also, consider using distilled water or letting your tap water sit overnight to allow chlorine to dissipate.
A Quick Word On Potting Mix And Drainage For Caladiums
I know I mentioned this earlier, but I want to stress it again because it’s that important. The wrong pot and soil combination will sabotage all your other efforts. I’ve seen too many people water perfectly but still suffer fungus because their soil held water like a sponge.
My homemade mix recipe:
- 2 parts peat moss or coco coir
- 1 part perlite
- 1 part orchid bark
This mixture provides aeration, drainage, and moisture retention. The perlite creates air pockets that dry out rapidly, while the peat holds just enough moisture for the roots.
Also, your pot matters. A pot that’s too large for the plant holds excess soil that stays wet. A pot that’s too small dries out too fast and stresses the roots. I use pots that are 2–3 inches wider than the root ball. That’s plenty of room for growth without trapping excess water.
My Own Hardest Lesson with Caladiums: What It Taught Me
Honestly, I almost gave up on caladiums after my first two failures. There’s nothing more discouraging than watching a gorgeous plant rot away despite your best efforts. But then I realized I was doing too much. I was overwatering, misting the leaves, and using dense soil. All the things I now avoid. So I changed my mindset.
I stopped treating my caladium like a delicate diva that needs constant attention. Instead, I treated it like a sturdy plant that needs consistent but minimal care. I gave it what it wanted—air, light, and the right amount of moisture—and then I left it alone. The plant responded beautifully.
If you’re reading this because you’re frustrated with your Caladium White Christmas, take a breath. You can probably fix this. Look at your watering routine. Check your pot and soil. Ensure the lighting is right. Then give the plant a couple of weeks to show improvement.
My Suggested Weekly Care Routine
- Monday: Check soil moisture with a finger. Don’t water if still damp.
- Thursday: Check for new mold spots or discoloration. Look at leaf undersides.
- Saturday: Water only if soil’s top 2 inches feel dry. Lightly fertilize every third week.
- Daily: Observe leaf color and posture for any changes. Believe it or not, plants tell you a lot if you just look.
Following this routine has helped me keep my caladiums mold-free for over a year now. And I’m just an enthusiast, not a botanist. If I can do it, you can too.
Look, I know a 2000-word guide can feel overwhelming. But the main thing to remember is this: your Caladium White Christmas fungus is almost certainly a moisture problem. Fix the moisture, and you fix the mold. Give it the right light, make sure the air moves around it, and maybe most importantly, resist the urge to water out of anxiety.
Mold happens. It’s part of plant care. But with a little patience and a few good habits, you can get your caladium back to its beautiful, glowing, spotless self. I’ve done it. So have many other gardeners. The trick is to listen to your plant, not your habits, and make one small adjustment at a time.
Trust me, it’s worth it when you see that first clean, white leaf unfold after recovery. There’s no better feeling than knowing you saved your plant through your own careful observation. You got this.





