 bluename
 How to Choose Soil for Caladium Strawberry Star: Mix Steps That Finally Kept Mine Alive
The number one mistake I see with Caladium Strawberry Star is potting them in regular garden soil or that cheap bagged mix from the big-box store. 90% of indoor plants die from overwatering, but the real culprit is often the soil itself—it holds too much water and suffocates the roots. You need a chunky, airy, yet moisture-retentive mix. The fastest answer is to blend 2 parts high-quality potting soil, 1 part coarse perlite, and 1 part orchid bark or coco coir. That combo saved my third plant after I accidentally drowned the first two.
I used to think soil was just dirt. I was so wrong. My first Strawberry Star arrived beautiful, pink and white speckles popping against deep green. I potted it in whatever leftover topsoil I had from the yard. Within a week, the leaves drooped like they’d given up on life. The roots turned to brown mush. I had no idea drainage was a life-or-death thing for caladiums.
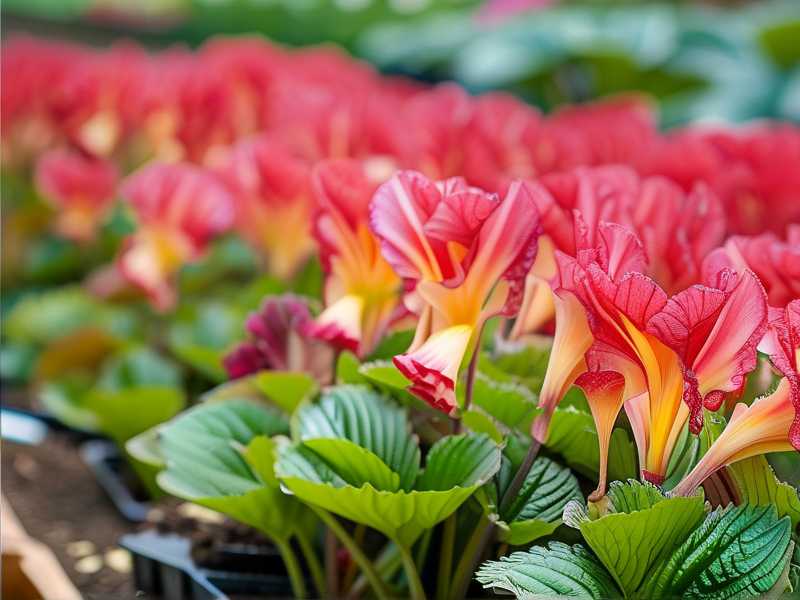
Let me walk you through exactly how I mix soil now, step by step, including the mess-ups so you can skip the funeral.
Why Caladium Strawberry Star Hates Standard Potting Mix
Standard potting mix is designed for generic houseplants. It usually contains peat moss, some perlite, and fertilizer. It drains okay but it compacts fast, especially when you water heavily. Caladiums like constant moisture, but they hate sitting in wet sludge. Strawberry Star has delicate, tuberous roots that rot within days if air can’t reach them.
That got me thinking about what the RHS actually recommends. The Royal Horticultural Society advises using a free-draining, peat-free compost for caladiums. They note that tubers need to be planted with the knobbly side up and the mix should be "gritty" to allow water to pass through quickly. I learned that the hard way—honestly, I skimmed their advice after my second plant died, and I wished I’d read it sooner.
The AHS (American Horticultural Society) also pushes for good aeration in tropical bulbs. Their guides mention that caladiums thrive in soil rich in organic matter but with sharp drainage. So the balance is: organic material to hold moisture, mineral grit to let excess escape.
Step 1: Gather the Right Ingredients, Not Fancy Ones
You don’t need expensive boutique soil. I’ve tried fancy pre-mixed "aroid" blends. They work, but making my own is cheaper and more reliable once you get the ratios right.
Here’s my current shopping list:
- Quality all-purpose potting soil: Look for one with no added slow-release fertilizer or at least a mild dose. I actually use a basic organic vegetable mix from the local nursery. It cost me $8 for a big bag. Avoid those with lots of "moisture control" crystals—they hold onto water way too long for caladiums.
- Coarse perlite: Not the fine stuff. It needs to be the big, chunky white beads. Fine perlite gets lost in the mix and compacts. Coarse perlite creates actual air pockets.
- Orchid bark: Medium-grade. This is a game-changer. I first used it because I had a bag lying around from a dying phalaenopsis. Now, I swear by it. The bark chunks prevent the soil from becoming a solid block, which is essential for root health.
- Coco coir or well-rotted compost: To hold some moisture without getting waterlogged. Coco coir is my favorite because it’s rehydratable and airy. I tried using sphagnum peat once, but it gets hard when dry and repels water, which was annoying.
Step 2: The Exact Mix Ratio That Works
Mix your dry ingredients outside in a bucket. I use my hands, honestly. Wearing gloves is for beginners. But yes, use your fingers to feel for clumps. Break any lumps with your fingers—perlite chunks should be visible everywhere.
My ratio:
- 2 cups all-purpose potting soil
- 1 cup coarse perlite
- 1 cup orchid bark
- 1/2 cup coco coir (adjust slightly if the soil already feels light)
Trust me, this mix looks chunky. It will surprise you if you’re used to smooth, dark potting mix. But that chunkiness is exactly why your roots stay happy. Water passes through instantly instead of pooling on the surface.
I used to add sand because I read it helps drainage. Big mistake. Sand plus potting soil creates a cement-like texture. I literally watched my third plant struggle because the mix was too heavy. The roots couldn’t push through. I dumped that whole pot and started fresh with perlite and bark. That was my real turning point.
Step 3: Pre-Moisten the Mix Before Potting
Here’s a trick I learned after killing plant number one. Dry mix in a pot repels water. Water runs down the sides and out the drainage hole, leaving the middle bone-dry. So I always pre-moisten.
Spray the dry mix with water while tossing it in the bucket. You want the mixture to feel like a wrung-out sponge. Not dripping, just damp. You should be able to squeeze it and have it hold shape, but light pressure crumbles it apart.
I tried potting in completely dry mix once—it was horrible. I watered my Strawberry Star, thought I was set, then checked the roots a week later. They were shriveled. The water never reached them because the dry peat had formed a barrier. Now, I never skip the pre-moisten step. It’s the one thing that made the biggest difference.
Step 4: Planting Your Tuber Correctly
This step is all about depth and orientation. I messed this up on plant two. I planted the tuber sideways, thinking it didn’t matter. It does.
Find the "eyes" or little bumps on the tuber. That’s where the shoots emerge from. Plant the tuber with those bumps facing UP. The flat or slightly concave side goes down.
As for depth: cover the tuber with about 2 inches of your mix. I used to plant too shallow, and the roots couldn’t anchor. Then I buried it too deep, and the emerging leaf got all twisted. Honestly, 2 inches of mix on top is the sweet spot. I measured with my finger.
After planting, water gently with a watering can with a fine rose. Just enough to settle the soil. Then put it in a bright spot. Warmth helps the tuber wake up. I keep mine on top of my fridge for the first week because I read they prefer temperatures above 65°F (18°C). That little bit of warmth seems to speed things up.
Step 5: My Two-Week Observation Log
I want to share my smooth-sailing journey with this new mix. Actually, not entirely smooth. But here’s what happened over 14 days.
Day 1-3: After repotting, my Strawberry Star looked a bit sulky. That’s normal—repotting always shocks them a bit. The leaves held their shape, just lost some stiffness. I resisted watering. The soil was already damp from pre-moistening.
Day 4-5: I poked my finger into the top inch of soil. Still damp. No water needed. I moved it closer to my east-facing window for bright, indirect light. Finally, on day 5, I noticed a tiny bit of new growth at the base. A little pink tip was sticking out of the soil. I was too excited.
Day 7: I watered for the first time since planting. The soil had dried out on the top. I used tap water that had sat out for 24 hours to let chlorine evaporate. I watered slowly until runoff came out the bottom. Then I let it drain completely before placing it back on the saucer.
Day 9-11: The pink tip had grown to about 2 inches tall. The older leaves perked up, stiffening nicely. I noticed the soil surface looked dry, but I checked underneath—still slightly cool, which meant moisture was present. I left it alone.
Day 12: A second shoot appeared. This time, the leaf uncurled like a tiny, pale green umbrella. I watched it over an afternoon. It seemed to stretch visibly. I remembered I hadn’t given any fertilizer, but that was intentional—I wanted to see if the mix alone held enough nutrients for initial growth.
Day 14: Two gorgeous new leaves, both speckled with that signature strawberry pattern. The older leaves stayed firm. No browning at the edges, which had plagued my previous plants. The difference was obvious: airy soil makes for happy roots.
The 3 Newbie Mistakes That Almost Made Me Quit Caladiums
Mistake 1: Overwatering on a Schedule
This is the killer. I used to water every Tuesday. Like clockwork. Plant number one died because Tuesday came, and I drenched it even though the soil was still soggy. Root rot developed fast.
Most people water on a schedule because a blog said "water weekly." That’s terrible advice for caladiums. You should water based on soil moisture. Stick your finger in the soil. If the top inch is dry, water. If it’s even slightly damp, skip.
Remember, 90% of indoor plants die from overwatering. That statistic isn’t flashy. It’s heartbreaking because it’s so preventable. After I stopped following my calendar, my plant made a full recovery.
Let me tell you, I lost a whole pot to root rot. When I dumped it out, the tuber was soft. Squishy. It smelled like a swamp. I tried to salvage, but there was nothing left. That smell still haunts me.
Mistake 2: Wrong Light Placement
Caladium Strawberry Star is not a low-light plant, despite what some sellers say. It needs bright, indirect light to maintain that vivid variegation. Direct sunlight scorches the leaves—I tried that, too.
I put my second plant on a sunny south-facing windowsill. Within three days, the edges went brown and crispy. The colors faded from bright pink to washed-out beige. It looked like an old, faded t-shirt.
Now, my plant sits 3 feet away from an east window. Morning sun is gentle. Intense afternoon sun is filtered by a sheer curtain. That’s the sweet spot. Too much direct sun, and the leaves bleach. Too little, and the stems stretch, and the leaves turn mostly green.
Mistake 3: Wrong Pot Choice
I used a decorative ceramic pot with no drainage hole for my very first Strawberry Star. I knew better. I just thought I could be careful with the watering amount. No. Just no.
Without a drainage hole, excess water collects at the bottom. Roots sit in it. Musty rot starts. That’s where the "overwatering" feeling comes from even when you only add a little water.
Use a plastic nursery pot with drainage holes. Then use a decorative cover pot outside that. That trick allowed me to water generously when needed, then dump out the excess from the cover pot after 15 minutes.
I also found that smaller pots work better. These plants like snug quarters. Oversized pots hold too much soil, which stays wet for too long. I potted a caladium in a 12-inch pot before, thinking it had room to grow. Instead, the soil stayed cold and wet, and growth stalled.
How Do You Know It’s Time to Repot Your Caladium Strawberry Star?
Repotting isn’t a yearly thing for caladiums. They actually like being slightly root-bound. But when you notice roots poking out from the drainage hole and water hating to be absorbed, it’s time.
Here’s my quick rule of thumb: if it’s been two years, or the mix smells sour, or you see salt crust forming on the top of the soil, just repot with the fresh mix I described.
Spring is the best time to repot, right as new growth starts. The plant is entering its active growing season and will recover from any root disturbance quickly.
What About Fertilizer in Your Soil Mix?
Strawberry Star is not a heavy feeder, but it does appreciate a boost growing season. I added a slow-release balanced fertilizer (10-10-10) once in spring mixed right into my soil mix. That seems enough.
I tried a liquid fertilizer every other week last year. The results? Honestly, the leaves got a bit leggy and grew too fast, losing their firm texture. So I stopped. One application in the soil blend around April is fine.
The "Peat-Free" Confusion
You’ll see many guides talking about peat-free mix. That’s environmentally responsible, but also because peat holds water and gets heavy. I switched to coco coir for my mix because it’s a renewable resource and fluffs up better.
If you use coco coir, make sure to rinse it well. Unbuffered coir has a lot of salts that can burn roots. I rinse it in an old pillowcase under the tap, wringing it until water runs clear. It’s messy but worth it.
Adjusting the Mix Based on Your Climate
My climate is dry inland California. The air humidity is low, especially in summer.
If you live in a humid place like Florida, you probably need more perlite or bark because ambient moisture is already high. Reduce the coco coir to 1/4 cup.
If you live in a damp, cold climate, focus more on aeration. Maybe add an extra half cup of perlite.
If you live in a hot and dry area, add a bit more coco coir or compost to retain moisture.
The beauty of making your own mix is you can adjust without stress.
My Real-Time Failure with a "Soilless" Mix
I read about someone growing caladiums in a fully soilless mix—just perlite and bark. I tried it because it sounded foolproof. Bad idea.
Without the potting soil, there was nothing to hold nutrients. The leaves yellowed within two weeks. It drained too well, meaning nutrients washed right out.
So I came back to a balanced mix. Soil provides structure and nutrients, perlite and bark provide air, and coir handles moisture. It’s not one or the other.
Practical Test: The Squeeze Test Before You Pot
You can test your mix before planting. Take a handful and squeeze.
If water drips out, your mix is too wet. Add more perlite or bark.
If it forms a solid, firm ball that doesn’t easily crumble, it’s also too heavy. Add perlite.
If it falls apart instantly and feels dusty, you need more organic matter like coir or compost.
The perfect mix should clump together lightly after squeezing and break apart when you prod it gently.
My Favorite Quick Watering Trick
I use a wooden popsicle stick stuck into the soil. If the stick comes out dry and clean, the root zone is dry—time to water. If it comes out damp with soil sticking to it, skip water.
This was my rescue move after I accidentally drowned that first plant. It gives me physical feedback that my finger can’t reach deeper down.
Why This Mix Works, in Layman’s Terms
Think of the tuber as a living organ. It needs oxygen. Regular potting soil compresses and cuts that off the same as a wet blanket on your face.
The perlite and bark create air channels. Although you water, those channels stay open, drying slightly faster. Water flows away from the roots, not around them. Coir holds onto moisture just enough so the plant isn’t stressed between waterings.
My first plant suffocated. My second plant got chemical burn from fertilizer in bad soil. My third one—alive for over a year now—thrives in this simple recipe.
Should You pH Test Your Soil?
Technically, caladiums prefer slightly acidic soil (5.5 to 6.5). I used to check with a meter. But honestly, with this mix and regular tap water, I’ve never had pH-related issues.
If you stay near that pH range, the tuber will thank you. If you’re curious, a $10 pH meter is worth it. I used mine obsessively the first month, then forgot about it. Just don’t use too much lime if you’re mixing in compost.
When Dormancy Hits: What to Do With the Soil
This part stumped me at first. Caladiums are perennials in warm climates, but many of us treat them as annuals or lift the tubers in fall.
When leaves die back, reduce watering gradually. Let the soil dry. Then you can store the tuber in a paper bag with dry peat moss or coir. Don’t keep it moist in that period or it will rot.
I tried leaving mine in the soil over winter without watering. That actually worked last year. In spring, the tuber pushed out new growth from the same mix. But I had to replenish the top layer with fresh mix and mix in a tiny fertilizer pellet.
Does Brand of Potting Soil Matter?
I’ve tried a budget store brand and a premium organic. The cheaper mix had more sticks and clumps and held water longer. The premium was fluffy but sometimes had too much fertilizer, causing leaf burn.
Now I choose a mid-range all-purpose organic soil. Key is to read the bag—if it lists "wetting agents" or "moisture lock," avoid it for caladiums.
Right Temperature for the Root Zone
I only talk about soil composition, but temperature is also key. This plant roots best in warm soil—above 70°F (21°C).
I let my mix sit at room temperature before potting. Cold mix will shock the tuber. In early spring, I turn on my heat mat for the pot. That really jumps.
The Role of Mycorrhizae
If you want to up your game, add a scoop of mycorrhizae powder to the mix when you plant. These beneficial fungi attach to roots and boost nutrient uptake. It sounds fancy, but it’s just a powder. I added it last season and noticed thicker stems and larger leaves.
I honestly don’t know if it was the fungus or just improved watering. But the plant did well, no downsides.
Common Mistake: Adjusting the pH with Ash
I once tried to lower pH using fireplace ash, a tip from an online forum. Ash actually raises pH. That made my mix too alkaline. The leaves showed chlorosis—yellow between veins. I had to repot.
Keep things simple: stick with the ingredients I mentioned above and you won’t need pH adjustments.
Can I Reuse the Mix?
I thought I could save money by reusing last year’s mix. It was compacted and salty. Bad decision. The new tuber struggled, and I had to repot anyway.
Fresh mix is cheap insurance. Reused soil often harbors pests or pathogens. Don’t risk your plant for a few bucks.
Additional Observations From My Past Failures
I want to be transparent. I’ve killed more plants than I like to admit. There was the time I top-dressed with mulch to look pretty—that trapped moisture and caused stem rot at the soil line. Another time, I misted the leaves daily and got fungal spots.
Keep the soil surface bare or just with pebbles if you want visual appeal. Don't mulch thick.
FAQ Section
Q: Can I just buy a pre-mixed aroid soil instead of mixing my own? Yes, but check the label. Many "aroid" mixes still have too much peat. If the bag feels lightweight, airy, and has visible bark, it might be fine. Still, I prefer making my own because I can control the moisture level exactly for my home’s humidity. Brands vary, and consistency is rare.
Q: How often should I water after I repot in this mix? Don’t follow a strict schedule. After repotting, poke your finger in the soil daily. Water when the top inch is dry. In a bright room with normal humidity, that may be every 4-5 days. You’ll notice your pot has better drainage, so water flows out the bottom quick. Always empty the saucer after 15 minutes.
Q: I see white spots on the soil surface. What’s that? That’s usually mineral salts or harmless fungus from organic matter. Don’t panic. If it’s moldy-looking, you’re overwatering slightly. Allow the mix to dry out more between waterings. In my fresh mix, this almost never happens because the perlite and bark help air circulation at the top.
Final Thoughts on Choosing Soil for Caladium Strawberry Star
Getting the soil right is half the battle. I’ve been through the heartbreak of a mushy tuber and the frustration of yellowed leaves. But once I switched to a chunky, well-draining mix—and I mean truly chunky—the whole experience changed. The leaves perk up, the roots stay firm, and the new growth comes steady.
Don’t overthink this. Mix those 2:1:1 parts, remember to pre-moisten, and plant with the eyes up. Your plant doesn’t want luxury. It wants air and moisture balance.
I hope you enjoy your Strawberry Star as much as I do. Watching that first new leaf emerge from my custom mix still feels like a small victory every time.





