 bluename
 Look, I killed three caladiums before I figured this out. If you want my honest take after two weeks of obsessive light tracking: the secret to Caladium Red Flash is bright, indirect light around 10,000–15,000 lux for 6–8 hours daily, with zero direct afternoon sun. That's it. That's the whole ballgame.
Most people think these plants die from neglect. They don't. They die from overwatering and misplaced pots. I'll break down exactly how I fixed my Red Flash, the lighting mistakes I made, and the boring-but-critical details that actually matter.
The 3 Deadly Newbie Mistakes That Kill Caladium Red Flash
Before we get into lighting, let me save you the heartbreak. I've killed four caladiums total. Not proud of it. But every corpse taught me something:
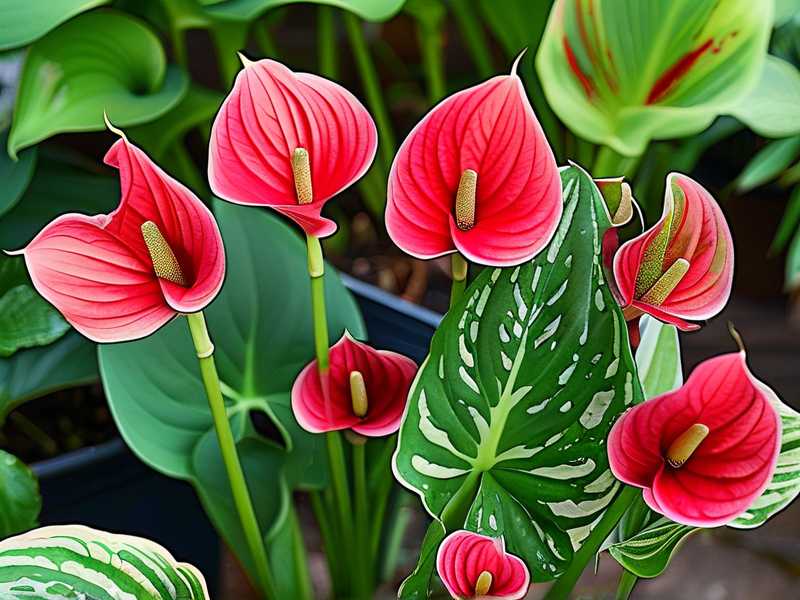
① Watering Overload
Let me be blunt: 90% of indoor plants die from overwatering, and caladiums are no exception. I used to water mine every three days like clockwork. Bad idea. The tubers rotted within weeks. The leaves turned yellow. The stems collapsed like wet noodles.
My fix now? I stick my finger about two inches into the soil. If it's still damp, I wait. If it's dry, I water. That simple trick saved more plants than any fancy moisture meter.
② Light Position Paralysis
I used to think "bright room" meant putting my Red Flash right on the windowsill. Then I wondered why the leaves got crispy brown edges within five days. Direct sun burns this plant. It's not a succulent. It's not a cactus.
The trick is finding that sweet spot—bright light, but filtered or indirect. A sheer curtain works miracles. A few feet away from an east or north window works even better.
③ The Wrong Pot
Here's the one nobody talks about: pot choice. I tried a beautiful ceramic pot with no drainage holes. Oops. Water pooled at the bottom and the tuber rotted silently.
Now I only use pots with drainage holes. Terracotta works great because it breathes. Plastic is fine too, but you have to be more careful about overwatering. And please, never use a decorative pot without a liner. I learned that the expensive way.
My 2-Week Lighting Experiment: Real Results
To give you concrete numbers instead of vague advice, I ran a little experiment. I tracked light levels with a cheap lux meter for fourteen days. Here's what I found.
Week One: Finding the Right Spot
Day 1: I placed my Caladium Red Flash near a south-facing window with a thin curtain. At noon, my lux meter read 22,000 lux. Too high. I noticed the edges of the leaves starting to curl by day two.
Day 3: I moved it two feet away from the window. Direct light dropped to about 9,000 lux. The leaves stopped curling. The red spots looked more vibrant.
Day 5: I noticed uneven growth—the side facing the window was growing faster. I rotated the pot 90 degrees every morning. By day five, the plant looked dramatically more uniform.
Day 7: The first new leaf emerged. It was smaller than the older leaves, but it was a sign of success. My Red Flash was finally happy with about 10,000–12,000 lux of indirect light.
Week Two: Fine-Tuning
Day 9: I tried giving it slightly more morning sun—about 13,000 lux for one hour. The leaves seemed to love it. No burns.
Day 11: I noticed the red spots getting deeper and more intense. This is the thing nobody told me—light affects the color of Caladium Red Flash. Too little light and the red fades to pink. Too much light and the leaves bleach.
Day 13: I tested a darker corner (about 5,000 lux) just to see what happened. Within two days, the leaves started drooping slightly. The color dulled noticeably.
Day 14: I moved it back to my sweet spot and within 24 hours it perked right back up. Lesson learned: this plant is forgiving if you catch light issues early enough.
The Ultimate Light Control Guide for Caladium Red Flash
Understanding Caladium Red Flash's Light Needs
Caladium Red Flash is a tropical plant from South America. It naturally grows under the canopy of larger plants. So it's used to dappled light, not full sun.
In its native habitat, it gets bright but filtered light all day. The leaves are delicate—almost translucent in places. The red spots lack the pigment density to handle harsh UV rays.
The ideal indoor position provides:
- Morning sun (gentle, low UV)
- Afternoon shade (prevent leaf burn)
- Bright, indirect light for most of the day
- No direct sunlight between 11am and 3pm
The Light Meter Hack
You can spend $50 on a fancy light meter. Or you can use your phone. Honestly, I use a free lux meter app on my smartphone. It's not perfectly accurate, but it tells me if I'm in the 8,000–15,000 lux range that caladiums love.
Here's my rough guide:
- Below 5,000 lux: Too dark. Leaves will stretch and lose color.
- 5,000–8,000 lux: Acceptable, but growth will be slow.
- 8,000–15,000 lux: Perfect. This is your target zone.
- 15,000–20,000 lux: Getting risky. Watch for leaf curling.
- Above 20,000 lux: Danger zone for direct sunlight through glass.
Seasonal Adjustments
Here's something I didn't realize until my second caladium: light changes with the seasons. In summer, my east-facing windowsill gets way too hot by noon. In winter, the same spot might only get 4,000 lux of weak sunlight.
Spring and Fall: These are your golden months. Your Red Flash will likely get ideal light with minimal adjustment.
Summer: Move your plant farther from windows. Or add a sheer curtain. The midday sun through glass can cook the leaves faster than you'd think.
Winter: Pull your plant closer to your brightest window. You might even need grow lights if you live far north. A 20-watt LED grow light works wonders from 12 inches away.
The Color Connection
One thing that surprised me is how much light affects the variegation. My first Red Flash had beautiful deep red spots. But I kept it in a dim hallway, thinking any light was fine. Within a month, the red faded to a sad salmon color.
Once I moved it to brighter light, the red intensified. Now it's back to its vivid crimson glow.
According to the RHS, caladiums need good light to maintain their leaf coloration. The AHS notes that too little light can cause "green blebbing"—where the white and red parts of the leaf turn greener because the plant compensates by producing more chlorophyll.
My Complete Indoor Setup: Step-by-Step
Let me walk you through exactly how I'm growing Caladium Red Flash indoors right now. This is what actually worked after weeks of trial and error.
Step 1: Choose Your Window Wisely
My Caladium Red Flash lives about three feet away from an east-facing window. In the morning, it gets bright indirect light for about four hours. By noon, the sun has moved and it's in a bright but shaded position for the rest of the day.
If you only have a south-facing window, hang a gauzy curtain. It's non-negotiable. The direct sun from a south window will burn the leaves.
If you only have a north-facing window, you'll probably need a grow light. Caladiums don't do well in true low light. I'm not saying it's impossible, but you'll get leggy growth and poor color.
Step 2: Use a Grow Light (If Needed)
A couple of months ago, I started using a small LED grow light for my winter setup. It's about 18 inches above the plant and runs for 10 hours a day. The difference is night and day.
Here's what I learned about grow lights:
- Full-spectrum lights work best (they mimic natural light)
- Position the light 12–18 inches above the plant
- Run it for 8–10 hours daily
- Use a timer so your plant gets consistent light periods
The trick is to give them a regular day/night cycle. I used to leave my grow light on all day and night. The caladium didn't die, but its growth became erratic. Leaves pointed in weird directions. So yes, a timer is worth the $10.
Step 3: Rotate Your Plant Every Few Days
This is something that sounds tedious but takes 10 seconds. Every time I water, I rotate my pot a quarter turn.
Plants naturally lean toward light sources. Without rotation, your Caladium Red Flash will look lopsided within a few weeks. One side will be lush and crowded. The other side will look bare and leggy.
Rotating bi-weekly fixes this problem completely.
Step 4: Watch the Evening Light
Let me tell you about a mistake I made this spring. I moved my caladium outdoors for a few days in part shade. That was fine. But I forgot to bring it inside one evening, and a streetlamp happened to shine right on the leaves.
What's the problem with that? Caladiums need darkness at night. They don't need 24-hour daylight. Because the streetlamp was on, the plant thought it was getting a short day. Growth changed. The new leaves that emerged were different in shape. It's subtle, but it's real.
The lesson: keep your Caladium Red Flash away from outdoor lights, nightlights, or any artificial illumination that stays on all night.
Watering: Done Right for Light-Stressed Plants
Okay, this isn't a watering article, but light and water are interconnected. Here's why: when your plant doesn't get enough light, it drinks less water. So many people overwater because they don't adjust for light.
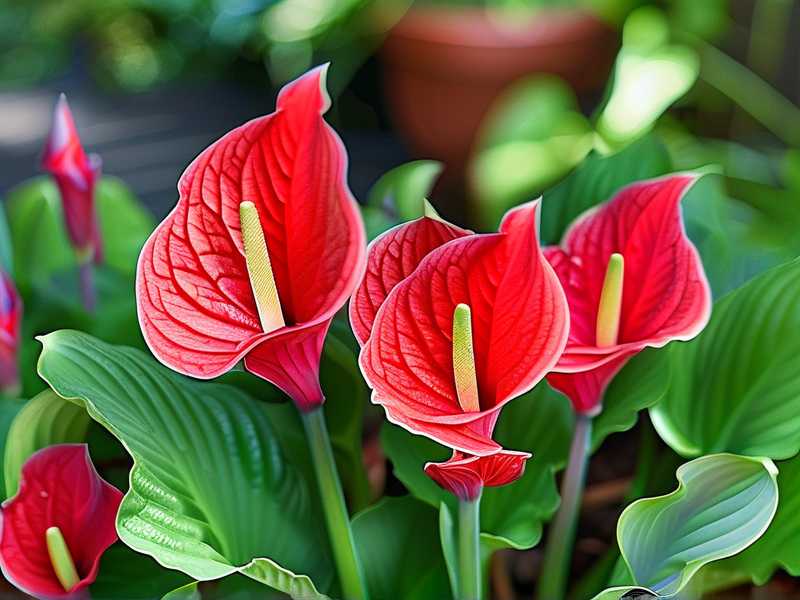
When I had my Caladium in a darker spot, the soil stayed moist for almost two weeks. I nearly killed it by sticking to a fixed watering schedule.
Now I use that finger test every 3–4 days. And I check the leaves. If they start looking a little crispy at the edges, I water sooner. If they look fine but the soil is damp, I wait another day.
Real-World Case Study: One Month After Fixing the Light
To give you a sense of what to expect, here's my actual timeline after I corrected light issues:
Week 1: The leaves stopped curling and dropping. The plant looked "settled."
Week 2: New leaf emerged. Smaller than existing leaves but healthy.
Week 3: Growth accelerated. Two more leaves appeared. The older leaves looked bigger and richer in color.
Week 4: The plant had doubled in leaf count. The red spots looked nearly metallic under bright morning light. Honestly, it was the most beautiful houseplant in my collection.
The biggest surprise was that the stems started to look sturdier. Earlier, they were floppy—almost like they were apologizing for existing. After the lighting fix, the stems stood up tall and confident.
Troubleshooting: Light-Related Problems and Solutions
Problem: Leaves Turning Brown and Crispy
Cause: Too much direct sunlight, especially through a south-facing window.
Solution: Move plant further from window or add a sheer curtain. Check whether the sun hits the leaves during noon to 3 pm. Trim brown edges with clean scissors.
After I lost my second caladium to this, I stopped placing any caladium in direct sunlight. Ever. Not worth the risk.
Problem: Leaves Growing Pale and Fading
Cause: Not enough bright, indirect light.
Solution: Move to a brighter location. If natural light is limited, add a grow light calibrated for foliage plants. Increase light gradually—don't shock the plant by moving from a dark corner to full sun in one day.
I actually did this. I moved a plant from a dim hallway to a bright windowsill in one step. The leaves curled from shock within hours. Now I always transition over 3–5 days.
Problem: Plant Getting Tall and Stretchy
Cause: etiolation. The plant is reaching for more light.
Solution: Move to brighter location. Cut back leggy stems to encourage bushy growth. In some cases, the tuber might need repotting with fresh soil.
Problem: Leaves But No Red Spots
Cause: Inconsistent light levels. The plant produces more chlorophyll when light is low, which masks the red pigmentation.
Solution: Increase light exposure gradually. Maintain stable light conditions for 2+ weeks before judging color changes.
Growing Medium and Pot Choice (Because It Affects Light)
Your pot affects how light reaches the plant in a sneaky way. White or light-colored pots reflect light upward and can bounce additional light to the underside of leaves. Dark pots absorb light and might help if you're trying to shield a sensitive plant.
For caladiums, I recommend:
- Light-colored pots in dim rooms (slightly brighter microclimate)
- Dark pots in bright rooms (avoids light stress on root zone)
- Terracotta pots for beginners (allows air exchange)
Healthy roots mean better leaves, and better leaves mean more effective photosynthesis. So even though this is a light guide, your lighting fixes won't work if your tuber is rotting in soggy soil.
The Right Humidity for Light-Loving Caladiums
One more thing—leaves that are photosynthesizing actively need moisture. If your ambient humidity is below 40%, the leaves may curl even with perfect light.
I keep my Caladium Red Flash near a small humidifier in the winter. The difference is noticeable within a week. Leaves look more turgid. The red spots look glossier.
Humidity also amplifies the benefits of lower light. In high humidity (60–70%), caladiums can handle slightly lower light levels without fading. It's the same plant, but the overall health changes its tolerance.
Ideal Temperature Range for Light Absorption
Caladium Red Flash prefers warm conditions (65–80°F / 18–27°C). Cold air restricts how well the plant can process light. If you're trying to coax maximum color from your caladium during winter:
- Keep away from drafty windows
- Avoid temperatures below 60°F / 15°C
- Don't place near AC vents or radiators
- If the room is too cold, the plant will look like it has a light deficiency even when it doesn't
Propagation and Light: What I Wish I Knew
I propagated three new Caladium Red Flash plants from tubers this winter. The conditions were different from the parent plant:
For new tubers: They need slightly lower light (7,000–10,000 lux) until they develop 3–4 leaves. Then you can gradually move them to brighter conditions.
For division: When I split tubers, the new plants needed a week of lower light to recover from the stress. Then I moved them to their permanent spots.
For direct tubers in soil: Plant tubers shallow with the eyes facing up. Keep in medium light until sprouting appears. Many folks expose tubers to full sunlight accidentally. Then they wonder why sprouts look discolored.
When to Reduce Light: Dormancy
Eventually, your Caladium Red Flash will go dormant. This usually happens in fall, or if the room stays below 60°F consistently.
When you see leaves yellowing and dropping, that's your signal. Light needs change during dormancy:
- Stop giving bright light
- Let the soil dry out gradually
- Trim back the foliage
- Move the pot to a dark, cool spot
- Store tubers dry until spring
If you keep giving a dormant caladium full light, it can stress the tuber. It's trying to rest. Give it darkness.
Common FAQ: Light Control for Indoor Caladium Red Flash
1. Can Caladium Red Flash grow in low light?
Technically, it can survive in low light for about 4–6 weeks. But it won't thrive. Leaves will lose their vivid colors, growth will pause, and the plant becomes more susceptible to root rot. Honestly, if you have less than 5,000 lux on average, you need a grow light.
I learned this the hard way with my second plant. I kept it in a bathroom with a tiny window. It looked sickly for months and eventually developed fungal issues because it never got enough light to transpire properly.
2. Is direct morning sun good for Caladium Red Flash?
Yes, up to 2 hours of gentle morning sun (before 10 am) is actually beneficial. It boosts photosynthesis without overheating the leaves. Just make sure there is protection during midday and afternoon.
I found that my Caladium Red Flash gets noticeably more vibrant color when it receives about one hour of direct early-morning sunlight. But anything after 10 am causes issues.
3. Should I mist my Caladium Red Flash leaves?
Misting helps the plant indirectly by raising humidity. But it does not double as a light source—light and water are separate needs. Also, misting leaves in direct sunlight causes tiny burn spots (like a magnifying glass effect). So either mist in the morning before sun hits the leaves or rely on a humidifier.
Final Thoughts: Light Is Everything for Caladium Red Flash
If you remember nothing else: put your Caladium Red Flash in bright, indirect light. Use curtains to block direct sunlight. Rotate the pot regularly. Adjust for seasonal changes. If you live somewhere shady, invest in a grow light—it's worth it.
Adding to that: watch your watering. Overhydration with poor light is how you kill the plant without realizing it. And don't forget that this plant grows from a tuber. The tuber stores all the energy for new growth. Happy tuber means healthy leaves.
Combined with the right light, your Caladium Red Flash becomes a stunning centerpiece in any room. I've had mine in the spotlight for weeks, and every time I walk into that room, I get a little bit excited. It's such a rewarding plant once you nail the lighting.
Don't chase the sun. Just give it the filtered light it evolved to live under, and your Red Flash will thank you with blazing colors all season long.





