 bluename
 How to Overwinter Caladium White Christmas: Dormancy Guide
I killed three caladiums before I figured this out. The secret to overwintering Caladium White Christmas is not about keeping it warm and cozy. It is about letting it completely die back and storing the tuber bone-dry in a dark, cool place. Stop watering the moment leaves start yellowing, dig up the tuber after the foliage collapses, and ignore it for 2 to 3 months. That is the whole trick, honestly. I used to panic and keep watering, thinking I could save the leaves. Big mistake. The plant needs that dry dormancy period to store energy for next season. If you keep the soil moist, the tuber rots in weeks. And trust me, waking up to a mushy mess after months of care feels terrible.
Let me walk you through exactly what I do now with my White Christmas tubers. I will share the mistakes I made, the timeline I follow, and the specific steps that finally worked. You will also learn why watering, light, and pot choice trip up nearly every beginner. I will include a real 2-week observation log from my own garage. Stick with me, and you will never throw away a caladium again.
Why Caladium White Christmas Needs A Hard Rest
Caladiums are tropical perennials from South America. They grow from tubers that look like small, rough potatoes. In their natural habitat, they experience a distinct dry season. During that dry period, the plant dies back to the ground. The tuber sits in dry soil, waiting for rain. This is survival instinct, not a death sentence. When we grow them in pots or gardens, our indoor warmth and watering schedule destroy that natural cycle. We keep the soil moist, so the tuber never gets the cue to rest. Instead, it tries to grow, exhausts its stored energy, and eventually rots.
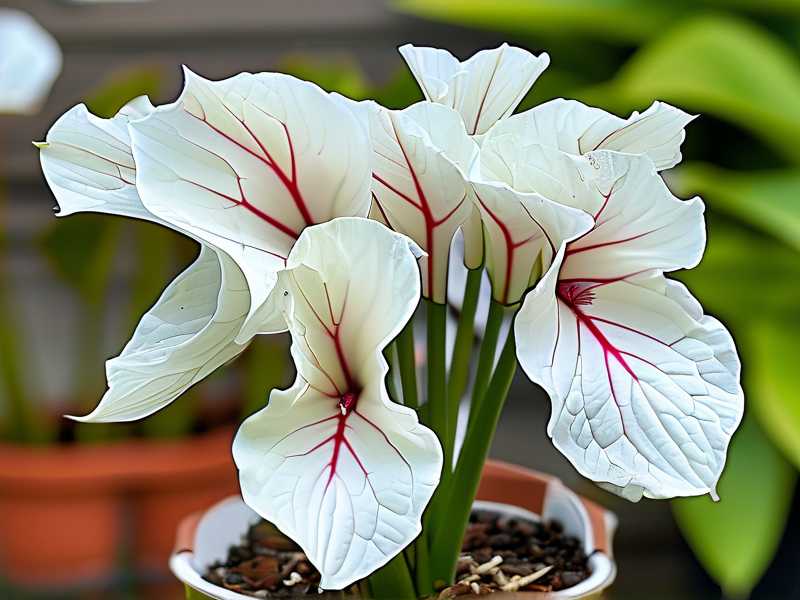
The leaves of Caladium White Christmas are stunning. They are pure white with green veins and edges. But that delicate beauty comes with a price. White-leaved caladiums have less chlorophyll than green varieties. This means they need more light to photosynthesize effectively. However, they still store energy in the tuber for next year. The tuber is the real plant. The leaves are temporary solar panels. Overwintering is simply the process of letting those solar panels shut down and banking the energy they collected.
I learned this the hard way. I used to treat my caladium like a fern, misting it and keeping it evenly watered all winter. The tuber turned to jelly by January. The soil smelled like rotten vegetables. It was disgusting. I now know that "How to Overwinter Caladium White Christmas" is less about providing care and more about understanding when to stop caring.
The 3 Biggest Beginner Mistakes That Kill Tubers
Before I give you the step-by-step guide, let me address the elephant in the room. These three errors are why most people fail. I committed every single one of them.
Mistake 1: Watering Overload
This is number one for a reason. 90% of indoor plants die from overwatering, and caladiums during dormancy are even more sensitive. When the leaves start to fade, your instinct screams "feed me, water me." You see dry soil and think the plant is thirsty. But the plant is not thirsty. It is shutting down. The tuber does not absorb water during this phase. It is going to sleep.
I remember checking my White Christmas every day. The soil looked dry, so I gave it a tiny splash. Just a little, I told myself. That little splash was enough to keep the tuber semi-active. Instead of resting, it started to push out a weak, pale leaf in November. That leaf drew energy from the tuber with no sun to replace it. The tuber shriveled. By spring, it was hollow.
You must stop watering completely. I mean it. Do not even mist the soil surface. The leaves will yellow and wilt. This is normal. The tuber is pulling nutrients back from the foliage into its storage tissue. Water at this stage interrupts that process. Let the soil go bone dry. Let the leaves die.
Mistake 2: Light Position Confusion
Here another tricky part appears. Many people think that since the plant is dying back, it wants shade. So they move it to a dark corner. That is wrong for two reasons. First, the final weeks of active growth require strong light to build tuber reserves. Second, do not move the plant around during this transition.
I used to rotate my pots every week to give all sides equal sun. That was fine in summer. In October, I decided to move my fading White Christmas to a shadier spot to "protect" it. The stress of the move, combined with the light drop, caused the tuber to panic. It produced a confused midget leaf in the middle of winter. Again, that wasted energy.
Keep the plant in its usual bright spot until the leaves fully yellow and collapse. Do not chase the sun. Do not move it to a cold room early. Let the light trigger the dormancy naturally. The decreasing day length and cooler evening temperatures will tell the tuber it is time to rest. Trust that process.
Mistake 3: Wrong Pot Strategy
This one shocks people. I used to think a bigger pot meant a happier tuber. I was so wrong. For overwintering, the size of the pot matters less than the drainage and how you store it. Many people leave tubers in the soil and store the whole pot. That is fine only if the pot is not glazed ceramic holding moisture.
I tried storing a pot in my basement that had no drainage holes. It was a decorative cachepot I had planted directly into, a rookie error. The tuber sat in damp soil for three months. It developed a fungal infection called Pythium. The tuber looked fine on the outside but was brown mush inside.
I now have a clear rule. If I want to store the tuber in soil, I use a terracotta pot with drainage. If I lift the tubers, I store them dry in a paper bag. Mixing those strategies causes disasters. Lifting and storing is the safest method for beginners. I will explain that below in detail.
My Step-by-Step Dormancy Process
Here is the exact routine that worked for me. I follow this every October. My last three winters had a 100% survival rate for my White Christmas tubers.
Phase 1: The Transition (2 Weeks Before Digging)
I stop fertilizing completely at the beginning of September. Caladiums are heavy feeders during the growing season. But feeding them after September wakes them up. I use a balanced liquid feed every two weeks from May through August. Once September hits, I switch to plain water.
In early October, I dial back watering frequency. I used to water every 3 days. I stretch it to every 5 days, then every 7 days. The soil starts to dry out more between waterings. This mimics the dry season onset. I watch the oldest leaves. They start to yellow and droop slightly. It looks sad, but it is the signal.
Phase 2: The Digging
Once the leaves have yellowed significantly or a frost threatens, I dig them up. If the plant is in a pot, I stop watering completely for 10 days first. This lets the soil dry out fully. Dry soil clings to the tuber less, and dry tubers are less prone to bruising.
I do not pull the tuber out of the soil by the stem. That snaps the stem off flush with the tuber. It leaves an open wound for bacteria. I gently turn the pot over on a tarp. I let the soil ball fall out naturally. I then softly crumble the soil away from the roots. I leave the dead leaves and stems attached for now.
Phase 3: The Curing Process
This step is crucial. I place the whole tuber with its dead foliage on a wire rack in my garage. I do not wash it. I let it sit there for 7 days. This air-drying period, also called curing, lets the stem detach naturally. The skin of the tuber hardens and heals any small cuts.
The garage temperature is around 60°F to 65°F (15°C to 18°C) in October. There is no direct sun. Just a dry, dark space. After a week, the stems shrivel up. A gentle tug removes them with a small pop. I check the tuber surface. It should feel firm and look light tan. No soft spots, no mold.
Phase 4: Storage
I store my cured tubers in two ways. Sometimes I put them in a paper bag with slightly damp sphagnum moss. Other times I just leave them loose in a cardboard box with a little vermiculite. The key is darkness and a temperature between 55°F and 60°F (13°C to 15°C). My basement closet is perfect.
If I use the moss, I make sure it is almost dry. I mean, I squeeze it out completely and then let it air dry for an hour. The idea is to provide slight humidity so the tuber does not shrivel like a raisin. But too much moisture guarantees rot. I check the tubers once a month. I squeeze them gently. They should feel dense. If one feels spongy, I toss it. It is already rotting from the inside.
Week 1 and 2 Observation Log From My Own Garage
I want to give you a realistic timeline, not a perfect textbook version. This past November, I dug up my White Christmas tubers on November 3rd. Here is what I saw.
Days 1-3: The leaves were still semi-green, but I cut the water two weeks prior. The soil was very dry and light. When I upended the pot, the soil crumbled into dust. The tuber was sitting near the top, about 2 inches down. It looked plump. The roots were dry and stringy. I left the whole clump, soil, roots, tuber, and leaves attached. I placed it on a wire rack.
Days 4-5: Nothing dramatic. The leaves started to curl inward. The white parts of the leaves turned papery. The green veins remained, but the whole leaf was losing turgor. I checked for insects, noticed a few mealybugs on the stem. I was annoyed but did not panic. I took a cotton swab with rubbing alcohol and dabbed each bug. I made a note to recheck after curing.
Day 7: The stems had begun to separate from the tuber. I gave one a gentle pull. It came off with a dry snap, no wet breaking. The base of the stem showed a clean, healed attachment point. The tuber skin felt papery and firm. I was relieved. I trimmed the dried roots with clean scissors.
Day 10: I checked the tubers for the mealybugs again. They had migrated to the shriveled leaf remnants. I simply removed all dead foliage entirely and bagged it for trash. I did not compost it. That stops insects from overwintering in the bin.
Days 12-14: I placed the tubers in a paper bag with a handful of dry vermiculite. I folded the top shut. I put it in the corner of my closet, away from the furnace vent. That is critical. The furnace dries the air so fast. I made sure the bag was not touching the floor. I put it on a shelf about 3 feet off the ground. My humidity gauge read 45%, which is acceptable. The temperature held steady at 58°F (14°C).
How I Restart Them in Spring
You asked me about dormancy, but I will give you this bonus because it completes the picture. Around mid-March, I check the tubers for eyes. Little pink or white buds will appear on the knobby side. I take the tubers out of the bag.
I soak them in lukewarm water for 24 hours. This rehydrates the tuber skin. I then plant them shallowly in a pot with fresh, well-draining potting mix. I place the pot in a bright, warm spot, about 75°F (24°C). I do not water thoroughly yet. I mist the soil surface every other day. I wait for the first sprout.
Importantly, I stagger my planting. I plant half of my tubers in early March for early color. The other half goes in early April. This gives me a continuous display of leaves from May through October. It also spreads the risk. If I mess up one batch, I still have the other.
What Happens If You Skip Dormancy
Some people ask if they can just keep the caladium growing indoors all winter. You can, but I do not recommend it for the white varieties. The winter light is too weak. The leaves will come out small and greenish. The plant loses its defining white color.
More importantly, without a dormant rest, the tuber's energy reserves deplete. A caladium can only grow continuously for about 9 to 12 months before it exhausts itself. After that, it produces smaller leaves, stops flowering, and becomes susceptible to disease. It will eventually collapse. The dormancy reset button is essential for tuber health. According to the RHS, tuberous plants need a period of rest to reset their internal growth clock. Skipping it will shorten the plant's lifespan.
Similarly, the AHS notes that caladiums are not cold-hardy. They are tropical. Exposing them to frost for even one night will kill the tuber. Their recommendation is to lift and store tubers when nighttime temperatures drop below 60°F (15°C). I follow that closely.
Real Talk on Temperature and Humidity
My basement is the perfect zone. But your house might be different. If you live in an apartment, a bedroom closet on an exterior wall can get too cold in winter. If the temperature dips below 50°F (10°C), the tuber may enter a deep freeze and suffer cell damage. If it goes above 70°F (21°C), the tuber might break dormancy and sprout prematurely. Sprouting indoors without enough light creates weak, white, etiolated shoots that collapse.
I keep a cheap digital thermometer in my storage closet. I check it once a week. It costs me fifteen dollars. It saved my collection many times. My friend thinks I am paranoid. But she lost all her calla lily tubers one year when her landlord turned off the heat during a pipe burst. I never take risks now.
Understanding Tuber Anatomy for Better Care
Hold a caladium tuber in your hand. You will notice it has a flat top with a little depressed ring. That is where the stems emerge. The bottom has maybe some fibrous roots attached. The "eyes" are located in the top depression.
When you store the tuber, it is vital to keep the top side facing up. If you bury it upside down, the sprouts will grow downward first. They will waste energy curling around the tuber to find their way up. Often, they die trying. I write "UP" on my paper bags with a marker.
For white caladiums like Christmas, the tubers can be smaller than pink varieties. Do not panic about size. Small tubers still work. They just produce fewer leaves in the first year. With proper care, they increase in size annually. My largest White Christmas tuber is now the size of a tennis ball. It produces about 15 leaves per season. I stored it correctly for three years straight.
Signs Of A Healthy Tuber During Storage
When I inspect my tubers in January, I look for these signs. The tuber feels heavy for its size, not hollow. The skin is smooth and clean without dark depressions. There is no powdery residue, which indicates mold. There is no sour smell. If I squeeze it gently, it does not give way at all. It feels like a hard apple.
If you find a problem, do not wait for spring. If you see a tiny soft spot, use a clean, sharp knife. Cut it out completely. Dust the cut area with sulfur powder. Let it dry for 48 hours before returning it to the bag. This radical approach saved two of my lily tubers last year. It seems scary to cut into the plant, but better to excise a small rot than lose the entire tuber.
Common FAQ About Overwintering Caladium White Christmas
Q1: Can I overwinter caladiums in pots without digging them up?
Yes, you can. But the pot must be moved to a frost-free, dark place. The soil must be completely dry. I tried this successfully with one pot last year. I stopped watering in September. The leaves died back on their own. I moved the pot to my unheated garage. The temperature stayed around 50°F (10°C). In March, I brought it inside and started watering. It sprouted like clockwork.
The risk is the soil staying damp. If your garage experiences big temperature swings, condensation can form on the soil surface. That moisture trickles down and wets the tuber. To counter this, I put a layer of plastic wrap over the pot surface to stop condensation. It looked ridiculous, but it worked. Leave a small air gap. Do not seal it airtight.
Q2: When exactly should I dig up the tubers?
The official rule is to dig them up before the first frost. For me, that is early to mid-November. However, I also watch the leaf condition. If the leaves are still very green and healthy in late October, with no frost forecast, I leave them in longer. The longer the leaves stay green under bright spring-like days, the more energy they pack into the tuber. I do not rush this step.
Here is what I suggest to beginners. Check your local frost date. Dig up the tubers two weeks before that date. This gives you a safety margin. If you leave it too late and a frost catches you, the foliage will turn to black mush overnight. That is okay, though. The tuber underground is still safe from a light frost. You can dig it up the next day.
Q3: Do I need to treat the tubers with fungicide before storing?
I used to dust my tubers with a systemic fungicide. I changed my method. Now I focus on thorough curing and good drainage. Curing creates a protective callus over wounds. This is nature's own fungicide. It works well.
If you have experienced chronic rot issues, a fungicide dip might help. But I find it unnecessary. I also worry about exposing myself to chemicals indoors. Instead, I use a cinnamon powder dusting. Cinnamon has natural antifungal properties. It is mild and smells great. I dust the cut stem bases with a fine layer. My tubers have stayed clean since I started this.
Final Thoughts For This Season
I keep my expectations realistic. Some tubers will just not make it through winter. Mother Nature has a high mortality rate for caladiums in the wild. If you have a 90% success rate, you are doing better than most gardeners.
In my view, treating the tuber with indifference is the highest form of respect. You have to ignore it for several months. That goes against every nurturing instinct you have. But that neglect is precisely what the plant evolved to expect.
I remember my first successful winter. I opened the paper bag in March. The tubers looked plump and had sprouted little pink eyes. I felt a surge of pride. I had not killed them. I had not overwatered them. I had not moved them around. I just left them alone. And they rewarded me with months of stunning, snow-white foliage in the summer.
That is the beauty of growing Caladium White Christmas. It teaches you when to act and, more importantly, when to step back. If you follow this dormancy guide, you will master the art of doing nothing at the right time. Your future plants will thank you. Give it a shot this year. I promise the payoff is worth it.





