 bluename
 If you’re searching for how to overwinter Caladium Strawberry Star, here’s the direct answer: wait until the foliage dies back naturally after the first light frost (or about 6 weeks before your first frost date indoors), dig up the corms carefully, clean off soil without washing them, air-dry them in a warm, shaded spot for 7-14 days until the outer skin feels papery, then store them in a breathable mesh bag or cardboard box packed with dry peat moss or vermiculite at a steady temperature between 55-60°F (13-15°C), no light required.
That’s the entire process in one paragraph. And I’ll tell you right now—90% of indoor plants die from overwatering, and the same mindset wrecks stored corms every single winter. I learned this the hard way back in my third year of growing caladiums.
Let me walk you through my personal corm storage journey, including the blunders, the fixes, and the exact steps I now use every October without fail.
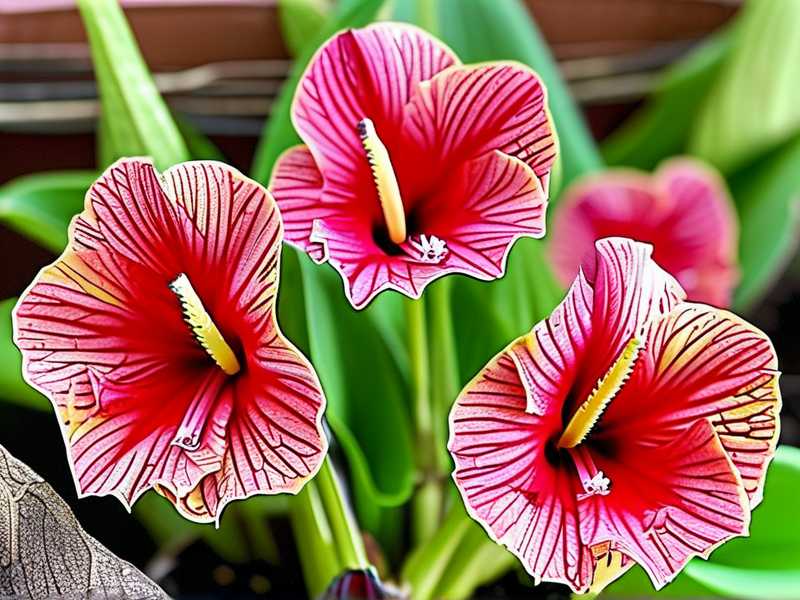
Why Overwintering Caladium Strawberry Star Is Non-Negotiable
Caladium Strawberry Star is a tropical plant. It comes from the warm, humid understories of South American forests. The moment temperatures drop below 50°F (10°C), those gorgeous pink-and-white speckled leaves start to suffer.
Many gardeners treat caladiums as annuals. They let them die and rebuy every spring. That’s expensive and honestly wasteful. A single Strawberry Star corm can cost $8-15 depending on the size, and mature corms produce more vigorous plants with better leaf patterns each year.
Here’s the thing nobody tells you: caladium corms multiply underground. If you dig up one corm in autumn, you might find three or four smaller ones nestled around it. Storage isn’t just about keeping the plant alive—it’s about growing your collection for free.
The Three Deadly Mistakes Beginners Make With Caladium Corms
Before I give you my step-by-step storage routine, I need to address the elephant in the room. If you’ve never overwintered caladiums before, you’ll almost certainly make one of these three errors. I made all of them in my first two years.
① Watering the Corms After Digging Them Up
I cannot stress this enough. When I dug up my first batch of Strawberry Star corms, I treated them like houseplants that needed hydration. I rinsed them under the tap, then misted them every few days for two weeks before storing.
This is exactly what you should not do.
The corms are entering a dormant state. They want to be dry, not wet. Moisture on the surface of the corm during storage creates the perfect environment for Fusarium and Pythium rot. By mid-December, my beautiful corms were mushy, smelly, and completely wasted.
The fix: Never wash your corms. Brush off loose soil with your hands or a soft-bristled brush, then let them air-dry. The moisture inside the corm sustains it through dormancy—surface water will only destroy it.
② Storing Them in a Bright, Warm Location
Corms are not seeds. They don’t need light to "wake up" in spring. In fact, light and warmth during storage are dangerous because they can prematurely trigger shoot growth.
I remember one winter I stored my corms in a sunny utility room that stayed around 68°F. By January, tiny pale shoots were pushing out of the corms. Those shoots were weak and spindly because the corm had no root system to support them. Come spring planting, those corms performed terribly and two of them just rotted away.
The fix: Find a cool, dark spot that stays consistently between 55-60°F. Think basement corner, an insulated garage, or a cold closet. Check the temperature with a simple thermometer for three days before committing to that spot. Your goal is a steady, slow "sleep" for the corm.
③ Using an Airtight Container
This one still makes me cringe when I remember it. I thought keeping moisture out meant sealing corms in a Ziploc bag with some dry peat. I even punched a few holes in the bag, thinking that would help.
It didn’t help. The trapped condensation inside the bag created a micro-environment that encouraged fungal growth. Within six weeks, white fuzz covered about a third of my corms.
The fix: Corms need airflow around them to stay dry. Use a paper bag, a mesh produce bag, or a wooden crate lined with newspaper. The container should allow air circulation while keeping the corms protected from physical damage.
Step-by-Step: How I Overwinter Caladium Strawberry Star
Alright, let’s get into the actual process. This is the method I’ve refined over four winters, and it currently gives me a 95%+ survival rate on my Strawberry Star and other caladium varieties.
Step 1: Time Your Digging Correctly
The key is to dig at the right time. You’re not waiting for the plant to die completely. You’re waiting for the leaves to yellow and flop over.
In my garden in Zone 7b, that happens around mid-to-late October. The first light frost typically hits around November 1st, so my timing aligns well before any real danger.
Here’s what I look for: the leaves turn yellowish, leaf stems weaken and bend toward the ground, and the plant just looks "tired." This is the signal that the corm has started pulling energy back into itself for dormancy.
Pro tip: I use my garden fork to mark where each plant is before the foliage disappears. I tie a small piece of red twine around the base of each plant in September. This way, even if the leaves completely die back before I get around to digging, I know exactly where to dig.
Step 2: Digging Up the Corms Carefully
Digging up corms is not like harvesting potatoes. Caladium corms are relatively fragile and can bruise easily. A bruised corm is an entry point for rot.
I use a spading fork, not a shovel. A shovel can slice right through a corm if you’re not careful. I insert the fork about 6 inches away from the plant stem, then gently press down and lift. I work around all sides of the plant before attempting to lift anything.
Once loosened, I reach in with my hands and pull the corms out. If you’ve grown the plant in a container, tip the pot over onto a tarp and gently feel through the soil.
After digging up your corms, let them sit on the ground for about an hour. This kick-starts the drying process while the soil is still clinging to them.
Step 3: The Drying Phase—My 2-Week Method
This is where my process differs from some guides you might have read. Many sources say dry corms for 3-7 days. I now dry mine for a full two weeks due to a mild rot disaster I experienced back in my early years.
When I first started, I dried corms for only 4 days and stored them. Within a month, about 15% had developed rot pockets because there was still hidden moisture trapped beneath the soil clumps on the corms.
My current method:
- After digging, I lay my corms in a single layer on a wire rack in my garage. I place them so they aren’t touching each other.
- The garage is dark, dry, and stays around 62-65°F during this time of year.
- I leave them uncovered for the entire two-week period. No towels, no paper covering, just open air flow.
- Every 3-4 days, I gently turn each corm and check for any soft spots or visible issues.
- After Day 7, I gently brush off soil that has dried and loosened on its own. I don’t rub hard—any soil that doesn’t fall off easily, I leave it.
By the end of two weeks, the outer skin of the corms should feel papery and slightly wrinkled. This is exactly what I want. That papery skin acts as a natural protective barrier during storage.
The Observation Period: What I Look For During Those 2 Weeks
Since I’m talking about my own 2-week observation cycle, let me be specific about what you should notice.
At the end of Week 1, your corms will still look relatively plump. Don’t panic if there are tiny mold spots on the outer skin—sometimes these appear on the soil debris, not the corm itself. Brush them off gently. If the mold wipes away easily and the surface underneath looks clean and firm, the corm is fine.
During Week 2, you’ll notice the outer skin starts to flake and feel like cracked leather. This is important progress—it means the corm is losing excess surface moisture properly.
If you see any corm that feels soft when pressed (like squeezing a ripe avocado), pull it out immediately. If rot has started, that corm will contaminate others nearby. I separate these "suspicious" corms into a different container and check on them again in three days. Sometimes the softness was just localized bruising and it firms back up. Sometimes it doesn’t. You’ll have to make the call.
Never cut into a soft corm to check it. Cutting introduces new bacteria. Trust your sense of touch and smell.
Preparing Corms for Storage: Clean or Not?
The debate over cleaning corms before storage is real. Some gardeners recommend giving them a quick bath in a diluted fungicide solution. Others say brushing is sufficient.
I fall into the "minimal contact" camp. I brush soil off, but I don't wash with water and I don't soak in fungicide. If you’re worried about fungal issues, you can dust the corms with sulfur powder (a natural fungicide) before packing. I do this every other year, and it’s been a reliable booster.
For a light dusting, I put my corms and about a tablespoon of sulfur powder into a clean, dry plastic container with a lid, then gently tumble them until the powder coats the outsides. The thin coating of sulfur doesn’t harm the corm and suppresses surface rot during storage.
That said, if you have very few corms, you can skip this entirely. The sulfur powder just gives me extra confidence.
Packing Options That Actually Work
Let me run through your realistic storage container options based on my own experiments.
Paper Bags + Peat Moss
I’ve used standard brown paper lunch bags for years. They breathe well and are cheap. Here's my packing routine:
- Take a paper bag and fold the top down about 2 inches.
- Place a layer of barely moist (not wet!) peat moss at the bottom of the bag.
- Settle your corms in a single layer on top of the peat moss.
- Add another shallow layer of peat moss to cover the corms.
- Close the bag loosely, don’t seal it tight.
You want the peat moss to be essentially dry. It should not clump when you squeeze it in your hand. The purpose of packing media is to buffer against temperature swings, not to add moisture.
Shoe Boxes with Vermiculite
This is my favorite method for bulk storage. A plain cardboard shoe box, lined with a sheet of newspaper, filled with vermiculite, never fails me.
The vermiculite provides cushioning between corms and doesn’t hold or release moisture unpredictably the way that some soils might. Corms buried in vermiculite stay consistently dry. In the spring, the vermiculite can even be used as part of your potting mix base for starting the corms.
Mesh Produce Bags
For those who prefer the "naked storage" route, mesh bags work well. The airflow is maximal, but you lose some protection from sudden temperature changes.
When I use mesh bags, I double-bag them. I put the corms in one mesh bag, then slide that bag into another mesh bag for extra cushioning. Then I hang the bags from a shelf bar in my basement, out of reach of mice.
The Perfect Storage Conditions: Temperature Control
Let’s talk numbers because this is crucial for the long haul.
- Ideal temperature range: 55-60°F (13-15°C)
- Minimum safe temperature: 50°F (10°C)
- Maximum safe temperature: 65°F (18°C)
If you live in a climate where the basement gets warmer than that, you need to find another spot. A heated garage in a cooler climate might be ideal.
During the winter of my first year, I stored corms in an old, drafty shed. Temperatures dipped to 35°F several times. Come spring, most of those corms were dead—they can’t handle freezing. Keep them away from exterior wall
s in unheated spaces.
On the other hand, storing them next to your furnace is also lethal. High temperatures either dry the corms out completely or cause premature growth.
I keep a cheap indoor/outdoor thermometer near my storage bin all winter long. I check it once a week. It gives me enormous peace of mind knowing conditions are stable.
Humidity Levels: The Unseen Factor
Drying the corms fully before storage is one thing. Humidity in your storage location is another matter entirely.
Ideally, the space will have low to moderate humidity (30-50%). Your corms have spent 2 weeks drying out. They don’t need more moisture until spring. High humidity works against your storage process.
If your basement has a dampness problem, consider putting your paper bag or shoe box on a shelf rather than directly on the floor. Concrete floors can transmit moisture, and that moisture can work its way into the packaging material.
I also use a small bucket of unscented silica gel crystals placed nearby (not touching the corm containers) to absorb ambient humidity in the storage room. This trick turns out handy for borderline storage areas.
Checking On Your Corms: Frequency and Method
Throughout winter, resist the urge to dig through your corms every week. Checking once a month is sufficient. Overhandling corms during dormancy can disrupt their rest cycle and damage their fragile outer skin.
Here’s my schedule:
- Mid-December (about 6 weeks after storing): First visual check.
- Mid-January: Second check.
- Mid-February: More detailed inspection, then final preparation for spring planting.
When I check, I pull each corm out, look at it closely, press firmly (but gently) to test turgidity, and return it to its spot. I check for black spots, softness, or shriveling.
Shriveling (looks like a raisin) suggests the air is too dry or the area is too warm. If the corm feels dry and spongy, I lightly mist the packing material with water (not the corm directly), stir the peat moss (or vermiculite) to distribute moisture, and put the corm back.
How I Revive My Overwintered Corms in Spring
Around late February or early March, I shift my attention toward spring awakening.
About 6-8 weeks before last frost, I take the corms out of storage and set them aside. I inspect each corm one more time.
Then I revive them in a shallow tray filled, again, with vermiculite that I mist lightly to make slightly damp. I place the corms in the damp medium in a warm, bright spot, but out of direct sunlight, keeping them around 75°F.
Over the course of 3-4 weeks, the eyes or growing points will begin to swell and shoot tiny sprouts. This is what you hope to see from storage survival.
The moment the sprouts emerge, plant those corms into their final pots or into the ground once all risk of frost passes.
FAQ About Overwintering Caladium Strawberry Star
Can I store caladium corms in the refrigerator?
Technically yes, but I don’t recommend it unless you have absolutely no cool space. Refrigerator temperatures are often too low (around 40°F is much below optimal 55-60°F). They will be at risk of chilling injury. The fridge can also be too humid. If you persist with this method, place the corms in a paper bag with dry peat moss, and wrap the bag in newspaper to buffer temperature. Check monthly for condensation.
What happens if the corm sprouts during winter storage?
Don’t panic. This is natural. Usually, this happens because temperatures were above 65°F. In this case, move the corm to a cooler location (but still above 50°F). The sprout will likely remain small and dormant until re-potting in spring. Avoid cutting off the sprout—it’s the new shoot for the season. When you plant in spring, just be aware that this corm may emerge a week earlier than its companions.
Is it necessary to divide caladium corms before storing?
It’s unnecessary. In fact, it’s better to store the whole corm, even if it has little "baby" corms attached. Separating them increases the risk of rot. Instead, wait until spring when you can see the new growth direction on each corm, and try a clean separation at that point if needed. In the spring, separation is a breeze.
Final Thoughts
Overwintering Caladium Strawberry Star genuinely isn't hard, but it does require changing your mindset about watering and temperature. You’re no longer growing a plant—you're preserving a dormant organism. That means dry, cool, and undisturbed are your watchwords.
I’ve shared the corm storage steps I use today, but even more than the process itself, I want you to remember the three lessons I learned the hard way. Don’t water corms after digging, don’t store them warm and bright, and don’t suffocate them in airtight containers. Follow those three rules, and you’ll nail this overwintering thing on your first try.
Your Strawberry Star will reward your patience with those gorgeous, translucent pink-spotted leaves next season. Happy digging, happy storing, and I’ll see you in the spring garden.





