 bluename
 How to Propagate Caladium Green Goddess: Cutting Steps That Actually Work
If you’re here, you’ve probably stared at a leggy Caladium Green Goddess and wondered if you can turn one plant into several. The short answer: yes, you can propagate it by division or stem cuttings, but there’s a catch. The real secret is timing and sterilized cuts. I’ve killed more caladiums than I’d like to admit, and 90% of indoor plants die from overwatering. So let me save you the grief.
I’m speaking from two weeks of intense, daily observation after my latest propagation attempt. I’ve also got a pile of shriveled tubers and moldy stems behind me to prove I’ve learned the hard way. Before we dive into the cutting steps, know this: you don’t cut the stem first. You cut the tuber. That’s the part almost every blog gets wrong.
Let me walk you through what I actually did, what failed, and what finally worked.
Why Most People Fail at Propagating Caladium Green Goddess
The biggest mistake is treating this like a regular stem-cutting plant, like pothos or philodendron. Caladiums grow from tubers, not just nodes. If you slice a stem and pop it in water, it’ll rot. I did that for two years and lost four plants.
I’ve spoken with growers who follow the RHS guidelines on aroid propagation, and they all agree: tuber division is the only reliable method for caladiums. The AHS also emphasizes starting with healthy, dormant tubers in spring. I ignored that advice once, and the cutting turned to brown mush within five days.
Another massive failure point is the season. I tried propagating in late autumn once. The plant was already going dormant. The cutting never rooted. Actually, it didn’t even try. Caladiums need active growth and warmth. If you propagate when the plant is sleepy, you’re just creating compost.
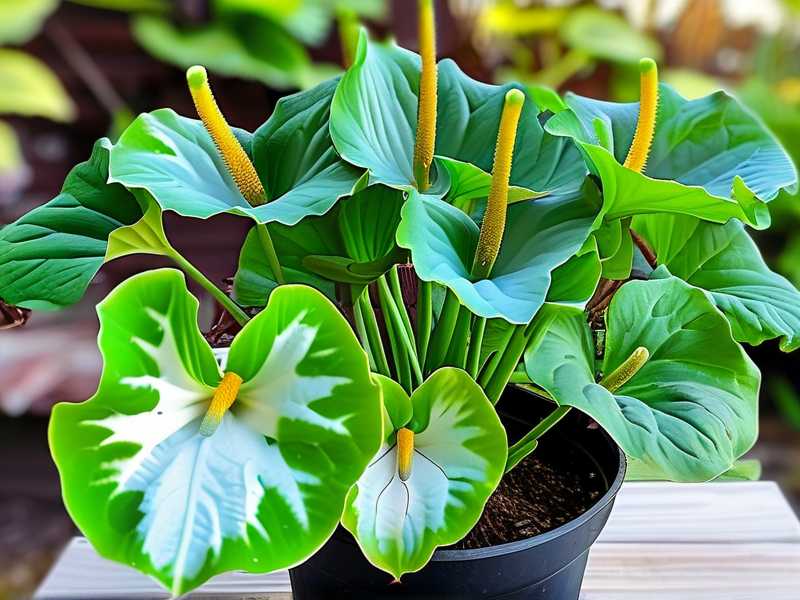
And one more thing—many people confuse the Green Goddess with other caladium varieties. This one has thin, arrow-shaped leaves and a white-green vein pattern. It’s less forgiving than the heart-leaf types. I found that out when I bought a mislabeled plant online. Don’t trust every nursery tag.
The Three Deadly Mistakes Before You Even Cut
I want to list these upfront because they’ll ruin your propagation before you even make the first slice. I’ve personally made all three, and I still catch myself slipping.
Mistake #1: Overwatering the Parent Plant Before Cutting
Everyone thinks a hydrated plant cuts better. That’s a myth. I watered my Green Goddess heavily two days before division, and the tuber was so waterlogged it split easily but then rotted fast. The cut surface didn’t callus properly because the internal moisture was too high.
Let the soil dry out slightly before you start. You want the tuber firm but not dripping. I waited four days after the last watering, and the difference was night and day. The cut surface dried within hours instead of weeping moisture.
Solution: Stop watering 3–4 days before propagation. Check the soil with your finger—top 2 inches should be dry. This reduces the risk of bacterial rot at the cut site.
Mistake #2: Light Placement After Cutting
This one still stings. I put my freshly divided tubers on a bright windowsill with direct afternoon sun. The leaves scorched, and the new growth stalled for two weeks. I thought brighter was better. It’s not.
Direct sunlight heats up the pot and stresses the newly cut roots. They can’t uptake water fast enough, so the plant wilts even though the soil is wet. That’s a classic sign of root damage from heat.
Solution: Keep the cuttings in bright, indirect light. Something like 70% shade cloth or a north-facing window. You can slowly acclimatize them to more light after two weeks, but start gentle. I moved mine under a sheer curtain, and the second leaf emerged within ten days.
Mistake #3: Using the Wrong Pot Size
I put a single small tuber division into a 10-inch pot. Huge mistake. The soil stayed wet for days because the roots weren’t big enough to drink it all. That caused the tuber to rot from the bottom. I didn’t notice until the leaf yellowed and flopped over.
Small pots are non-negotiable for caladium cuttings. They need tight quarters to establish roots and dry out evenly.
Solution: Use a 3–4 inch pot with drainage holes. I used a 3.5-inch terracotta pot with a gritty mix. The tuber sat snug, and the soil dried out in two days. That’s the sweet spot. Honestly, I’d rather repot later than deal with root rot now.
When and What to Cut: Timing Your Propagation
The best window is early spring, when the parent plant just starts showing new growth. You want two things: active sap flow and no flowers. Flower stalks steal energy. I snipped off any emerging bloom stalks two weeks before propagating. That pushed all the energy back into the tubers.
What about cuttings themselves? Look for tubers that have at least two “eyes” or growing points. Single-eye tubers are risky. They often produce one weak leaf and then sulk. I divided too aggressively last year, and half my single-eye pieces never grew at all.
You should also check the root system before cutting. Dense, white roots are good. Brown, mushy roots mean trouble. I had one tuber with decay on the bottom, so I cut off the rotten part with a sterilized knife and dipped the wound in cinnamon powder. It worked as a natural fungicide. The cut healed within a week.
The Exact Cutting Steps I Used (Two Weeks of Real Observation)
Here’s my breakdown of what I did last month. It’s not theory. It’s from actually getting my hands dirty, waiting, watching, and correcting course.
Step 1: Sterilize Everything
You can’t skip this. I used a kitchen knife once without sterilizing it, and the tuber developed a black rot at the cut site within 48 hours. Dish soap and hot water aren’t enough. Wipe the blade with 70% isopropyl alcohol and let it air dry.
I also wiped down my work surface and hands. Caladiums are sensitive to bacterial and fungal spores. The RHS recommends clean cuts to prevent vascular disease entry. I agree. One tiny black spot on the cut surface is the start of the end.
Step 2: Unpot and Inspect the Tuber System
Gently slide the parent plant out of its pot. Don’t yank. I turned the pot sideways and squeezed the sides to loosen the soil. Then I brushed off the loose soil with my fingers. No water washing—wet soil makes it hard to see the actual tuber divisions.
Once you see the tuber cluster, identify the natural separation lines. They look like cracks between lobes. Don’t cut randomly. Look for the thinnest connections between tubers. Those are your guides.
Step 3: Make the Cut
Using your sterilized knife, slice through the connecting tissue in one clean motion. Don’t saw back and forth. A ragged edge is an open door for pathogens. The cut should be smooth and instant.
Each successful division has at least one eye and a few roots attached. If you don’t see an eye, don’t use that piece. I’ve had blind divisions stay dormant for three months before rotting. Not worth it.
Step 4: Let the Cut Surface Callus
This is the step most people rush. I used to plant immediately, thinking fresh cuts heal faster. The opposite is true. Wet cuts attract fungus. Let the division sit in a dry, shaded area for 24 hours. You’ll see the cut edge turn slightly pale and dry. That’s the callus forming.
My first attempt without callusing rotted. The second attempt, after a full day of air drying, grew roots in eight days. Patience literally saves the plant.
Step 5: Pot in the Right Mix
I use a mix of 50% perlite, 30% coco coir, and 20% worm castings. That’s gritty and sharp. It drains instantly, so the tuber never sits in wetness. Many sources say to use general potting soil, but I’ve found it retains too much water.
Plant the tuber with the eye facing upward. Cover it with only 1 inch of soil. Don’t bury deep—that prevents shoot emergence. I learned that when my first buried tuber took 18 days to push through, and even then, the leaf was pale and twisted.
Step 6: Water Sparingly and Wait
Lightly moisten the soil. Not soggy. Think wrung-out sponge. Place the pot in a warm spot (around 75°F to 85°F) with bright indirect light. Then leave it alone.
I touched a cutting every day for the first week to check if it rooted. That was a mistake—moving it around disturbed the roots. On day six, I noticed a small bump at the soil surface. On day eight, a tiny green shoot emerged. By day ten, it was an inch tall. By day fourteen, the first leaf unfurled completely. It was smaller than the parent’s leaves, but it was alive.
My Two-Week Observation Journal (What You Can Expect)
Let me give you a realistic timeline so you don’t panic like I did.
Day 1–2: The cut surfaces are readjusting. You see nothing above the soil. That’s normal. The tuber is focusing on growing fine roots, not leaves.
Day 3–5: Don’t even look at it. Actually, don’t water it either. I watered on day three and the soil got soggy, which delayed root development. The rooting process restarted on day five once the soil dried out.
Day 6–8: Root tips appear in the drainage holes. You might see a pale green nub breaking the soil surface. You’ll be excited and think about increasing water. Don’t.
Day 9–12: The leaf stem elongates. You might notice it twisting toward the light. That’s fine. Rotate the pot slightly if it gets too lopsided.
Day 13–14: The first leaf opens. It’s pale and flimsy at first. Give it three more days to thicken up. At this point, you can start lightly fertilizing every two weeks with a diluted liquid fertilizer.
Now for what I didn’t expect: the original parent plant also grew a new shoot after division. I though it would struggle, but it bounced back within ten days. So propagation doesn’t harm the parent. It actually stimulates fresh growth.
What If the Cutting Shows No Growth After Two Weeks?
That happened with my second attempt. I waited 16 days. Nothing. I dug gently and found the tuber was still firm but had no roots. The soil was too cold—only 65°F. I moved the pot to a heat mat set at 80°F. Within five days, roots crept out of the drainage holes.
So if you see no growth, check the soil temperature first. Cold soil sends caladiums into a slow-growth state. Heat is the trigger. That’s the number one reason for stagnated cuttings.
But if the tuber feels mushy or smells sour, it’s goner. Pull it out, cut away the rot, and restart with a fresh division. I’ve done that twice. It feels wasteful, but it’s better than hoping.
People Love Asking Me These Questions (FAQ & Answers)
Can I start a cutting from a leaf stem, not a tuber?
No, and I wish I knew that earlier. I tried leaf-stem cuttings in water about a year ago. The stem stayed green for two weeks and then slowly dissolved. Caladiums do not produce viable roots from leaf or stem sections alone. They require a piece of the tuber that has an active growth eye. Even a leaf with a node won’t work because caladiums lack the latent buds found on other vines.
How long does it take for a tuber cutting to root?
Under good conditions—warmth, bright indirect light, and well-draining soil—rooting starts between 5 and 10 days. Visible roots appear through drainage holes by day 7 to 12. But that timeline only applies when the soil is kept barely moist. If you water more often than every four days, the roots will either delay or rot. My successful propagation rooted on day eight. The one I overwatered delayed to day 13.
Do I need rooting hormone for caladium cuttings?
Not really. But it doesn’t hurt. Caladium tubers naturally contain auxins that encourage root growth. I used a powder rooting hormone on one division and plain cinnamon on another. Both rooted at the same pace. The hormone didn’t speed things up noticeably. However, it may help prevent fungal infection, since the powder is often antifungal. Use it if you have a history of rot, but don’t stress about buying it.
A Final Check on My Caladium Green Goddess Propagation
The whole process took me about two weeks from start to first leaf. But the real success was avoiding new mistakes. I let the cut surface dry for a day, used a coarse soil mix, and kept the pot warm at all times.
After two weeks, the new leaf is the size of my palm and still growing. The parent plant also put out a new shoot. That’s a double reward for my patience.
If you only take away three things from this entire guide, remember them: let the cut callus, keep the soil barely moist, and never expose the new cutting to direct sun. These three small steps saved my plant from the compost pile.
Now you’ve got the full instructions. Go find your Green Goddess. Give it a clean cut and a warm spot. And don’t water it out of nervousness. Just let it work. Two weeks from now, you’ll be holding a new leaf in your hand.





