 bluename
 Let me cut straight to the chase. If you want to propagate Caladium Red Baron, you need to dig up the corms, divide them in early spring, and plant each piece with at least one eye or growth point facing up. That’s it. Honestly, the process is simple once you understand how these plants actually grow. I’ve been growing caladiums for years, and I’ve killed more plants than I care to count before I figured out what works. But here’s the thing—when you get corm propagation right, you’ll multiply your stunning Red Baron collection for free, season after season.
Many indoor gardeners assume caladiums are too fussy to propagate at home. That’s not true. The Red Baron variety, with its deep red veins and elegant arrow-shaped leaves, is actually one of the more forgiving types. You just need to respect its dormant cycle and handle the corms with care. And I’m going to walk you through every single step I use, including the mistakes that cost me three whole pots of Red Baron before I learned better.
What You Need to Know Before You Start
Caladium Red Baron is a tropical plant native to South America. It grows from underground storage organs called corms, not bulbs, not rhizomes. Many gardeners mix these up. A corm is a solid, swollen stem base that stores energy during dormancy. If you cut it open, it looks dense and uniform, kind of like a potato. This is where new growth emerges, and this is exactly what you’ll be working with during propagation.
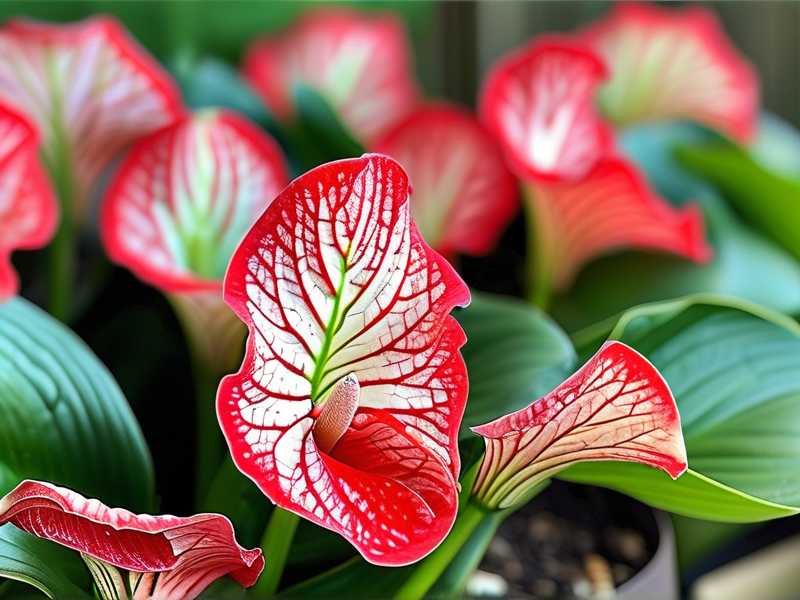
The whole process revolves around timing, moisture, and temperature. Get those three things right, and the corms practically propagate themselves. Get them wrong, and you’ll be staring at mushy, rotting tissue within days.
Why Bother Propagating Instead of Buying New Plants?
Simple. Price. Mature Caladium Red Baron plants can cost anywhere from $10 to $25 each, depending on your local nursery and the pot size. But a single corm usually costs half that. And one healthy parent corm will give you several smaller corms each season. It's the same plant, same genetics, same stunning leaf coloration. I've propagated my own Red Baron corms for the past three years, and I haven't bought a single new plant since. Honestly, the savings add up quickly.
Plus, there’s something deeply satisfying about growing plants from your own stock. You know exactly what conditions they thrived in. You know their history. That matters more than most people realize.
3 Deadly Mistakes That Kill Caladium Red Baron Corms
Before I show you the exact step-by-step method, I need to address the elephant in the room. I killed three separate batches of Caladium Red Baron corms before I finally succeeded. Every single failure came down to one of these three issues.
Mistake #1: Overwatering the Corms
This is the biggest one. 90% of indoor plants die from overwatering, but caladium corms are especially sensitive. I remember my first attempt. I planted my corms, then watered them like I would water a fern. The soil stayed wet for days. After two weeks, I dug up the corms to check on them. They were soft, mushy, and smelled terrible. The rot had already set in.
Corms are storage organs. They hold moisture internally. They do not need constant moisture from the soil. When you water too much, you deprive the corms of oxygen. Without oxygen, anaerobic bacteria move in and start breaking down the tissue. Once rot begins, there’s no saving that corm.
The fix: Water once when you first plant the corm, then wait until you see active growth before watering again. During dormancy and early rooting stages, the corm only needs a lightly moist environment. Not wet. Not damp. Just barely moist.
Mistake #2: Getting the Light Wrong
My second batch of corms sprouted beautifully. I was so excited. I moved them to my brightest window, thinking more light equals better growth. But Caladium Red Baron hates harsh, direct sunlight. The leaves bleached out, got crispy brown edges, and eventually, the plant went into shock. It completely stopped growing.
Caladiums naturally grow under jungle canopies. They receive dappled, filtered light. Direct sun for more than a couple hours actually damages the photosynthetic tissue in their delicate leaves. When you're propagating corms, the light situation matters even more. Freshly planted corms need gentle, indirect light to sprout. Too much light dries them out before they establish roots.
The fix: Use a north-facing window or a shaded spot under a sheer curtain. If you’re growing under lights, keep them about 12 inches away and run them for only 8-10 hours a day. Brighter is not better here.
Mistake #3: Using the Wrong Pot
I didn’t realize pots could be “wrong” until I started growing caladiums. My third batch of corms went into beautiful ceramic cachepots without proper drainage holes. I know. I really should have known better. The water would sit at the bottom of the pot after each watering. The corms were sitting in that hidden reservoir, slowly drowning.
This is so common. Pretty pots often lack drainage. And even pots with holes might still be too deep. When you plant corms too deep, they expend all their energy trying to reach the soil surface. And if the pot keeps moisture near the bottom, rot follows.
The fix: Always use a shallow, wide container with drainage holes. A standard terracotta pot is perfect. Avoid anything glazed on the inside or porcelain. The key is that air must be able to circulate through the soil profile. I’ve also had great results with fabric grow bags. They allow excess moisture to evaporate through the sides.
When to Propagate Caladium Red Baron Corms
Timing is everything. In the natural lifecycle, caladiums go dormant in the fall. The above-ground foliage dies back, and the corms rest through the winter. The best time to divide and propagate is during late winter or early spring, right before the corms naturally break dormancy.
I usually start my propagation in early March. That gives the new plants a full growing season to establish before summer. If you live in a tropical climate without frost, propagating year-round is possible, but I still recommend targeting spring for the best results.
You can also propagate in fall when you dig up your corms for winter storage. But in my experience, spring division works better. Fresh cuts callus over more quickly in the spring, reducing the risk of rot.
Step-by-Step: How to Propagate Caladium Red Baron from Corms
Here’s my exact process. I use this every year, and I’ve successfully propagated dozens of corms using this method. Follow these steps closely, and your Red Baron propagation will go smoothly.
Step 1: Dig Up or Unpot the Parent Plant
If you grow your Caladium Red Baron in the ground, carefully loosen the soil around the plant with a garden fork. Start about 6 inches away from the stem base. Gently lift the root mass out of the soil.
If your plant is in a pot, turn the pot on its side and squeeze the sides gently. Slide the entire root ball out. Don’t pull on the stems. They can snap easily.
Shake off the excess soil. You’ll see the main corm with smaller cormels (baby corms) attached to the sides. Sometimes they’re connected by thin, wiry roots. Others just sit loosely in the root mass.
Step 2: Clean and Inspect the Corms
Once the corms are out, I rinse them thoroughly in lukewarm water. This removes all soil and reveals any damage. Check each corm for soft spots, dark marks, or any funky smell. Firm corms are healthy. Soft corms are suspect.
Discard any mushy or obviously rotting corms. I’ve yet to find a way to salvage a rotting corm. Don’t waste your time—just compost them. Healthy corms should feel solid and firm in your hands. The skin may be brown and slightly rough.
Step 3: Cut the Corms (Divide Them)
This is where the actual propagation happens. Look at the main corm. You’ll notice little bumps on the surface. These are the eyes or growth points, similar to potatoes. Each eye can produce a new plant.
Using a sharp, sterile knife, cut the corm into sections. Each section must contain at least one eye and a good portion of the corm tissue for stored energy. I aim for sections about 1 inch in diameter. Anything smaller might not have enough energy to sprout.
Sometimes larger corms have multiple eyes. I once had a Red Baron corm that was almost 4 inches wide. I divided it into four separate sections, and each one grew into a full, healthy plant. It's genuinely amazing how resilient these corms are.
Step 4: Treat the Cut Surfaces
After cutting, each section has open wounds. This is the primary entry point for fungus and bacteria. You have two options here.
Option 1: Let the cuts air-dry for 24-48 hours until they form a natural callus. This is my preferred method. Place the corm sections on a clean surface in a dry, shaded spot. After 48 hours, the cut surface looks opaque and slightly hardened.
Option 2: Dust the cut surfaces with fungicide powder. This provides immediate protection against fungal attack. Certain coral-based products like rooting powder with added fungicide work well too. I usually use cinnamon as a natural fungicide, and it has worked great for me.
Step 5: Prepare the Soil Mix
Caladium Red Baron corms do best in a well-aerated, slightly acidic growing medium. I avoid standard potting soil because it retains too much water. Instead, I create a mix that drains quickly while still holding a bit of moisture.
My go-to mix:
- 2 parts coco coir or peat moss
- 1 part perlite
- 1 part coarse sand or orchid bark
This creates a light, fluffy texture that allows air to reach the corms. The perlite and bark keep the mix open, and the coir retains moisture without becoming soggy. This type of mix has genuinely transformed my growing results.
Step 6: Plant the Corm Sections
Fill a shallow pot with your soil mix. Press the corm sections into the soil with the eye facing upward. The top of the corm should sit about an inch below the soil surface. Space multiple corms at least 4 inches apart so the new plants won’t compete for nutrients.
One thing I’ve learned the hard way—positioning matters. If you plant the corm upside down, the shoot still emerges, but it takes longer. Sometimes it ends up growing sideways through the soil before curling upward. Planting with the eye up avoids all this confusion.
Step 7: Water Sparingly and Keep Them Warm
After planting, water gently until the soil is evenly moist. Not soaking. Then let it remain just barely moist. Caladium corms need warmth to break dormancy. Maintain a soil temperature between 70°F and 75°F. I place my pots on a heat mat set to this temperature.
The shoots usually appear within 2-3 weeks. Until I see growth, I don’t water again unless the soil feels completely dry when I push my finger into the first inch. Once green shoots emerge, I increase watering frequency progressively.
My Two-Week Observation Log After Propagation
Let me share a real-time diary of what happened after I planted my Red Baron corm sections this past spring. This gives you an accurate sense of what to expect.
Day 1-3
Right after planting, everything was quiet. The soil was lightly moist but not damp. I kept the pot on a heat mat close to an east-facing window. No direct sun. I took a closer look at day 3—no visible changes above the soil. That’s normal. Nothing happens fast during this stage.
Day 4-6
I refrained from watering. I even removed one corm gently on day 5 to check for root activity. Truth be told, I do this sometimes even though I shouldn't. You can easily check for early root develop something if this is your first time. There were tiny white bumps along the bottom edges. Nothing structural yet, but the corm was waking up.
Day 7-8
The first real signs of growth began. On day 7, one eye looked slightly swollen at the top of the corm. By day 8, that same eye had broken through the surface with a pale, greenish tip. The color was almost white-pink at first. It still needed a few more days beneath the soil.
Day 9-11
On day 9, the tip pushed above the soil. It looked like a short, pale spear. By day 10, a leaf began unfurling. This is the most rewarding stage. The leaf initially appears more pinkish cream than the classic red-veined pattern. Patience is still required.
Day 12-14
At day 12, my propagated section had a partially opened leaf with veins starting to appear. By day 13, the picture was getting clearer. And by day 14, the leaf opened to a gorgeous, fully recognizable Caladium Red Baron leaf pattern. Dark burgundy red veins contrasting against a background of deep green. I kept all pots in the same conditions.
It looks lovely. Honestly, week two is when the frustration turns to excitement. It’s like watching dormant potential become actual beauty.
My 2-Week Personal Observation Table
| Time Period | Observation |
|---|---|
| Day 1–3 | No visible changes. Soil fairly moist. Temperature steady at 73°F. |
| Day 4–6 | Checked small white nodes forming on base of corm. No surface shoots yet. |
| Day 7–8 | Tiny pale shoot appearing from the central eye of the corm. |
| Day 9–10 | Shoot above soil, beginning to unfurl a small leaf. No color yet on veins. |
| Day 11–12 | Leaf size increasing. Slight reddish tint starting to show. |
| Day 13–14 | Largest leaf now distinctly reveals Red Baron red vein pattern. Growth accelerating. |
How to Transition Young Plants to Their Final Home
After about a month, new leaves will fully open. This is the time to consider transplanting each new plant into its own pot. Caladium Red Baron grows well either as a potted plant or directly in a garden bed if your environment allows.
If you live in cooler regions, keep them indoors year-round. They make breathtaking indoor showpieces when maintained under humid conditions. I personally grow them as potted floor plants since they get taller as they mature.
When repotting, use the same kind of well-draining soil mix I described earlier. Place your young plant in a pot that’s about one size larger than the current root ball. Don’t try to rush into a huge container. Caladiums actually thrive in tighter pots, at least during the early development stage.
Indoor Care Tips for Healthy Growth
Growth doesn’t stop after propagation. Consistent care matters just as much as successful propagation—you don’t begin with impossible hurdles if you understand this rule.
Regular Watering
Water more regularly once the leaves emerge. Always check the top inch of soil first. If it feels dry, water thoroughly. During the active growing season (spring through summer), consistent moisture supports continuous growth. But remember, never let the pot sit in standing water.
Fertilizing
I use a balanced liquid fertilizer every three to four weeks. Caladiums appreciate nutrients during the growing period. The Red Baron variety responds well to a 20-20-20 feed diluted to half strength. Avoid overfertilizing—more fertilizer causes leaf burn, not better plants.
Humidity
Being tropical species, caladiums like decent ambient humidity. Aim for above 50% if possible. If your indoor air is dry, place the pot on a pebble tray filled with water. This simple trick keeps the air around the plant more humid without keeping the roots overly wet.
Common Problems and Fixes During Propagation
Some issues pop up even when you do everything right. Here are the most typical ones I've encountered and their straightforward fixes.
Yellowing Leaves After Sprouting
This often happens because of nutrient deficiency. The original corm energy is running low amid new leaf production. If the leaves sprout yellowish, apply a half-strength dose of balanced fertilizer immediately. You should see green tones develop within a week.
Stunted Growth
Insufficient light or poor temperature cause this. If your new growth stalls, try moving pots 2-3 degrees warmer. Caladiums are tropical plants. They want warmth.
White Patches or Powdery Spots
This is usually powdery mildew or a mineral residue from hard water. Use room-temperature filtered water if you notice this. Improve airflow around your pots too. Keep the leaves dry, especially in the morning or evening when condensation tends to form.
Expert Insights on Corms
A quick word from plant science, not just personal experience. The Royal Horticultural Society (RHS) has well-documented guides to growing caladiums successfully indoors, with particular emphasis on watering routines, light requirements, and dormancy habits. Their guidance supports the same kind of insights I’ve gathered through trial and error. Specifically, RHS emphasizes dormancy periods as critical phases in the caladium lifecycle. Once the leaves begin yellowing in early autumn, reduce watering gradually and let the plant rest.
Similarly, the American Horticultural Society (AHS) covers propagation from corm divisions in their manuals. AHS suggests letting corm pieces callus over for one or two days before replanting as healthy practice. This reduces post-planting fungal attacks. Both societies agree on the same fundamental principles: dry-cure your corms and plant them warm.
Using them as collaterals, you can research many guides that align with my own working practices. When you consult them consistently, you’ll recognize that experience and research match, especially when common sense is applied to tropical cultivation conditions.
When to Divide Again – Setting Up a Cycle
Once your young Red Baron plants mature through the summer, they will store enough energy for a possible winter dormancy period. Usually, by autumn, you can lift the entire root system again and start the entire propagation cycle from scratch.
That means every year you’ll have dozens of new corms available.
This allows you to sell extra corms online, trade with other enthusiasts, expand your landscaping palette, or start new pots for gifts. I have saved so much money by propagating my own Red Baron collection season after season. It truly gives you unlimited supply from single source plants.
Frequently Asked Questions (FAQ)
Can I propagate Caladium Red Baron in water?
No. Caladium corms are not suitable for water propagation. They rot quickly when immersed in water. Unlike houseplants such as pothos or philodendron, caladiums need a well-draining soil medium for the germination process. If you propagate them in water, you’ll end up with decomposed corm material within a week. Always use a proper soil-based mix.
How long do corms take to sprout?
Under ideal conditions (warm temperature between 70-75°F and barely moist soil), you’ll usually see the first sprouts within two weeks. If your environment is cooler, it may take a full month. Some stubborn corms can take up to eight weeks before they sprout. If you haven't seen activity after eight weeks, the corm might be dead or too small to have stored enough energy. During this waiting phase, resist checking too often. The roots are fragile.
What should I do with corms during the winter dormancy phase?
In temperate climates, Caladium Red Baron will naturally go dormant. When leaves die back in fall, cease all watering. Wait until the soil completely dries out, then lift the corms. Clean them by removing old roots and soil. Keep them stored in a dry, dark place with moderate temperatures around 55-60°F. I keep mine in paper bags filled with vermiculite. Check occasionally for mold/pests during storage periods. Proper storage ensures healthy corms for spring propagation.
Parting Words for First-Time Propagators
There’s something special about dividing corms and watching tiny bit of one plant grow into many. I still get excited every time a new leaf unfolds with deep crimson veins against green. The Caladium Red Baron never fails to deliver undeniable drama and elegance.
If you follow this guide with patience, you will be rewarded with success. I didn’t learn this overnight. I made mistakes. I lost plants. But all that trial gave me the experience I’ve shared here today. Start with quality corms, perfect your timing, keep moisture in control, and give the young plants enough indirect light and warmth. That’s really all the magic you need.





