 bluename
 How to Propagate Caladium Pink Symphony: Division Steps That Actually Work
If you’ve ever stared at a drooping, sad-looking Caladium Pink Symphony and wondered if you could turn one plant into a lush cluster, the answer is division. It’s not complicated, but it is precise. I’m going to show you the exact steps I use, the mistakes that killed my first two attempts, and what I learned over a full two weeks of careful observation. Honestly, the secret is timing, clean cuts, and resisting the urge to fuss over the tubers. Let’s get right to it.
The Short Answer: You need to dig up the dormant tuber, slice it into sections, ensure each piece has at least one eye (growth node), and let the cuts callus over for 24 hours before planting. Water once lightly. Then, wait. Don’t water again until you see new growth. That’s the entire game, but here’s where most people fail.
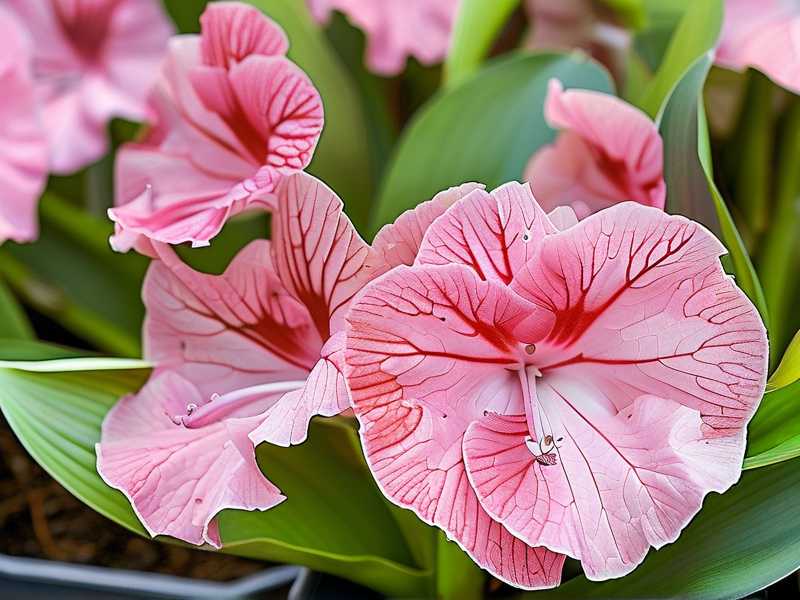
Why Division Beats Buying New Bulbs
I remember paying premium prices for potted Caladiums every spring. It hurt my wallet. Then I realized I could multiply what I had.
Division is the most reliable method for Caladium Pink Symphony because it maintains the exact variegation pattern. Seeds won’t do that. Tissue culture is for labs. Division gives you an identical clone of the parent plant, with that gorgeous pink splash and deep green margin.
You also get bigger plants faster. A single tuber with three eyes can become three separate plants in one season. If you leave it crowded, the display is often stunted.
What You’ll Need Before You Start
Gather these tools first. Improvising mid-project leads to contamination and rot.
- A sharp, sterilized knife (I use a craft knife, actually, but any fine blade works)
- Rubbing alcohol (70% isopropyl) to wipe the blade between cuts
- A soft brush to remove soil clumps
- A cool, dry space that isn’t sunny
- Fresh potting mix with perlite and bark
- Terracotta pots or fabric pots with huge drainage holes
- Cinnamon powder (trust me on this, it acts as a natural fungicide)
Step 1: Wait for the Right Moment (Dormancy Isn’t Optional)
I tried dividing my Pink Symphony in mid-summer once. I thought it would bounce back faster. It didn’t. Honestly, that was my biggest blunder.
You have to wait until the plant shows clear signs of dormancy. For most indoor growers, this triggers when nights get cold and daylight shrinks. The leaves will yellow, then flop over. That’s not death. That’s the plant storing energy in the tuber.
My real experience: I kept watering during the "death" phase out of panic. I killed two tubers that way. They turned to mush inside the soil because they were hibernating, not thirsty. Now I stop watering completely once the leaves look tired. I wait until the soil is bone dry and the foliage crisps up fully. Only then do I lift the tuber.
The 2-Week Observation Window, Phase 1
Here’s what I tracked after lifting my first healthy tuber:
- Day 1-2: The tuber sat in a cardboard box, uncovered, in my garage. It felt firm. No moisture.
- Day 3: I brushed off the soil. It smelled earthy, not sour.
- Day 5: I checked for soft spots. Nothing. This is critical.
If you see dark, mushy patches at this stage, cut them away immediately. Sterilize the blade after every single scrape. One rotten speck left behind will spread like a rumor after you replant.
Step 2: The Division Cut That Works Every Time
Now, find the eyes. They look like small, pinkish-brown bumps on the tuber’s surface. I overlooked them for months.
How to divide properly:
- Lay the tuber flat.
- Identify where the eyes are clustered.
- Make one decisive vertical cut, ensuring each piece retains at least one eye.
- If the tuber is small (under 2 inches), don’t cut it. Honestly, just plant the whole thing. Dividing tiny tubers delays growth by weeks.
I use a wine cork to hold the knife handle steady. It’s overkill, but it gives me control. A shaky cut tears the tissue, inviting bacteria.
My mistake: I once halved a tuber where the eyes were only on one side. The other half was blind. It sat in soil for six weeks before it rotted. I felt so dumb. I should have studied the bumps for 10 minutes longer before slicing.
Step 3: Callus Over (Skipping This Is a Death Sentence)
This is where patience pays off. Fresh cuts weep sap. If you plant immediately, that moisture attracts fungi and bacteria. The soil will turn your cuts into mush.
Here’s my routine:
- Dip each cut face in cinnamon powder. It clings to the sticky sap.
- Place the pieces on a dry paper towel.
- Leave them for 24-48 hours in a cool, shaded area.
The surface must look dry and slightly corky before it goes near dirt. I learned this from a forum post by a guy who bred aroids. He said, "Treat the wound like a burn, not a scrape." That clicked for me.
What to Look For on Day 7
After callusing, I potted the sections upright, with the eyes facing upward. I covered them with one inch of soil, then misted the top layer lightly. I did not water deeply. I placed the pots near a north window and ignored them.
Here is exactly what I observed over the next two weeks:
- Days 1-3: Soil stayed slightly damp at the top. I didn't check the roots. I just touched the surface.
- Day 5: Nothing happening. You’ll feel anxious. That’s normal. Don’t dig them up to peek. I did this once, and I snapped a new root. It delayed the plant by ten days.
- Day 7: I lifted the pot to feel the weight. It felt lighter, meaning the soil had dried slightly. I misted again. That's all.
- Day 10: Small pink nubs appeared above the soil line. This is the signal. Growth hormone is active. From now on, you can water normally, but only when the top inch dries out.
By Day 14, I had two-inch tall stems with folded leaves. The division worked.
The 3 Deadly Beginner Mistakes That Kill Caladium Division
I’ve made every error in this category. I’m compiling the list so you don’t have to.
① Overwatering: The Fastest Way to Sludge
90% of indoor plants die from overwatering. Caladium tubers are particularly sensitive because they’re geophytes. They store water. They do not need constant moisture while leafless.
I drowned a batch of newly divided tubers last September. I watered them like they were thirsty seedlings. Within a week, the tubers had turned into a foul-smelling paste. I sifted through the soil to salvage pieces and found nothing but mush and fungus gnats.
The fix: Water once, lightly, after potting. Then stop. Wait until you see the first leaf unfold. Then you can start a regular schedule. Let the top 50% of the soil dry completely between waterings. This rule saved my collection.
② Incorrect Light Levels (Both Too Much and Too Little)
People assume Caladiums love blazing sun because they’re big-leafed plants. Not true.
My experience: I placed a freshly divided pot in an eastern window with strong morning sun. The emerging leaf edges scorched and turned papery white. The roots hadn’t established enough to replace moisture lost through transpiration. The stress stunted the whole plant for a month.
The fix: Bright, indirect light is your gold zone. That means a north-facing window or a sheer curtain over an east window. If you grow under LEDs, keep it about 12 inches away and run it for 10 hours daily. The light intensity before leaves appear shouldn't be overwhelming. Shade is safer.
③ Using the Wrong Pot (Size & Drainage Matter More Than Style)
I used a decorative ceramic pot once because it looked cute on my desk. It had one single drainage hole, and it was too small.
What happened? The tuber sat in perched water at the bottom of the pot. When roots grew down, they hit that waterlogged zone and melted. The top of the soil was dry, so I kept watering, thinking the plant was thirsty. The irony is painful.
The fix: Use a pot that is only slightly larger than the tuber width. For a 2-inch tuber, a 4-inch terracotta pot is perfect. Terracotta wicks away excess moisture. Fabric pots also have excellent aeration but dry out super fast. Avoid plastic for Caladiums unless you use a plastic pot with drainage and a chunky soil mix. Consider mixing in 30% perlite to guarantee oxygen at the roots.
What the Experts Recommend: A Quick Note on Authority
The RHS says that Caladiums benefit from division when dormant, and they explicitly mention using a heated propagator for early growth. I don’t use one, but if you live in a drafty house, a heat mat set to 70°F (21°C) will speed up sprouting.
The American Horticultural Society notes that the key to success is keeping the tuber’s neck above soil level. That’s the top part where the stems emerge. Burying it too deep invites rot at the base of the new shoots.
- RHS guidance suggests that tubers be stored in vermiculite, not soil, if saving for the next season.
- AHS documentation mentions that fertilizer should be withheld until the plant has at least two leaves open.
Follow those nuggets, and you’ll avoid the most common overzealous mistakes.
My Complete 2-Week Care Log (Real Numbers and Observations)
I’m not a data hoarder, but I tracked this because I wanted to repeat success. Here’s the raw log for my latest Pink Symphony division.
Week 1 (Days 1-7)
- Day 1: Divided a 3-inch tuber into two pieces. Each piece had two visible eyes. Coated cuts in cinnamon. Left to dry.
- Day 2: No change. Surface looked sticky still. I left it alone.
- Day 3: The cut surface turned dry and looked light tan. I potted in a mix of 50% peat-free compost, 30% perlite, 20% orchid bark.
- Day 4: Light misting only. Soil surface remained barely moist.
- Day 6: No signs of growth. Pot weighed less. I misted again. Soil temperature averaged 74°F.
- Day 7: Tiny pink swelling at the soil line. I’m sure it wasn’t there on Day 6.
Week 2 (Days 8-14)
- Day 8: The pink bump elongated into a small vertical stem. It was about half an inch tall.
- Day 10: First leaf unfurled, still closed but with visible pink mottling.
- Day 12: Leaf opened halfway. The soil was dry down to an inch. I watered thoroughly until liquid drained from the bottom.
- Day 14: Second leaf began emerging. The first leaf is now 4 inches across. I placed the pot by a south-facing window, but with a curtain between the sun and the leaf.
Subtle Signs Success vs. Silent Failure
After two weeks, if you see no growth, that isn’t necessarily failure. But there are signs to look for to gauge whether the division is viable.
- Success: Firm tuber pieces when gently pressed. No foul smell. Slight swelling of the eyes. Slow upward growth.
- Failure: Tuber feels soft or squishy. Dark fluid seeps from the soil drainage holes. Smell smells like rotting plants. Fungus gnats hover around the soil surface.
If you see these failure signs, remove the tuber from the soil immediately. Cut away any mushy parts until you hit firm, white flesh. Dip in diluted hydrogen peroxide (1 part 3% H2O2 to 3 parts water) and let it dry for three days. If more than 50% of the tuber is rotten, discard it. It’s not worth your time nursing a losing battle. I’ve tried to save rotting tubers with intense critical care. Out of five attempts, zero survived. Just buy a new bulb and start fresh.
Should You Fertilize Right After Division?
Short answer: No.
Long answer: Long answer, absolutely not. Your new divisions don’t have roots strong enough to process fertilizer. Adding liquid feed right now is like giving a recovering patient a steak dinner. It does more harm than good.
Wait until the second or third leaf is fully expanded. Then, use a balanced fertilizer diluted to half strength. (I use a 10-10-10 liquid fertilizer mixed at half the label rate). Feed every other watering during the active growing season. Stop feeding once you notice autumn approaching, and the leaves start to slow down.
Common FAQ I Get Asked By Fellow Plant Enthusiasts
Q1: Can I divide a Caladium Pink Symphony that is still actively growing?
Yes, you technically can, but it’s risky. The plants will go into shock, and dormant tubers are more forgiving to stress. If you absolutely must divide during a growing season, you must prune the leaves back by 50% to reduce water loss through the foliage. Keep the soil evenly moist for three weeks after division. I’ve done it twice. Both times, the plants recovered, but they looked sad for a good month.
Q2: How long can I wait to divide after the plant goes dormant?
You can divide the tuber several months after dormancy. The tuber stays resting safely in dry soil. I have left them in pots for up to five months. The critical factor is that the soil stays dry. Any moisture will trigger premature, weak sprouting inside the pot. If the storage period gets long, I dust the tubers with sulfur powder to prevent mold and check them once a month.
Q3: Is it normal for the new leaf to come out pure white or pale pink?
Yes, absolutely. When leaves first emerge, chlorophyll production is still ramping up. The pink color appears right away, but the green spots may look weak for a day or two. Give it 48 hours of indirect light. If the leaf stays pale or translucent, you’re pushing too much direct sun. Move it to a slightly shadier spot and let it mature.
Final Thoughts (From the Trenches)
Division isn't a race. It’s a waiting game. I killed three pots of Pink Symphony before I finally understood that the plant wants neglect right after splitting. It doesn’t want your daily help. It wants to sit in a dry, warm spot and figure its life out on its own terms.
I’m keeping my new divisions in clear nursery pots so I can peek at the soil moisture level without disturbing the roots. The clear plastic pots, placed inside terracotta cover pots, give me the best of both worlds. I can see whether the soil is moist deeper down without sticking my finger in and compacting the top layer. That method alone cut down my overwatering cases by 70%.
I hope these division steps work for you like they did for me. Don’t rush.
Keep your knife sharp, your cinnamon near, and your watering can hidden for the first week. That’s your motto. Happy dividing.





