 bluename
 If your Caladium White Queen is turning green, losing its signature white veining, or getting leggy, you don't need a new plant. You need a pair of clean scissors and a completely different approach. The real answer to preserving variegation is aggressive but careful pruning of flower buds first, followed by strategic leaf removal every two weeks, not just cutting back brown foliage. I learned this the hard way after nearly turning my prize specimen into a solid green shrub. This guide covers exactly how to prune Caladium White Queen for maximum variegation, based on my two-week experiment and plenty of failures.
The Pain Point: Why Your White Queen Isn't White
We all buy the Caladium White Queen for that ghostly, almost translucent white center with green margins. But within weeks, it can look like a regular green plant. It’s frustrating.
You wait for new leaves. They emerge pinkish, then white, then... pale green. And the older leaves get darker. The variegation fades because the plant is focusing energy on survival and reproduction, not on producing delicate white cells. The white areas have less chlorophyll. That means they are literally a drain on the plant's resources. If the plant feels stressed, it will produce more green tissue to photosynthesize faster. It’s a defense mechanism.
I used to panic and chop everything. That made it worse.
The Core Strategy Stops Flower Production
This is the biggest "aha" moment for me.
Caladiums are grown for foliage. But they are aggressive bloomers. When my White Queen started shooting up those small, calla-lily-like flowers, I thought, "Oh, pretty." I left them.
That was a mistake. Those flowers steal all the energy. They are not worth the variegation loss. As soon as you see a flower bud (it looks like a small green spear coming from the center), you have to remove it. I know it sounds harsh, but pinch it off as deep as you can reach.
My experience: During my two-week observation, I left one flower on a test plant. The new leaf that emerged after that flower opened was 60% green. On the plant where I pinched the flowers immediately, the next leaf was nearly 80% white. The difference is stunning.
So, step one is not leaf pruning. It is bud removal. Check your plant daily during the growing season. Small buds hide right at the base of the petioles (leaf stems).
The Two-Week Variegation Revival Plan
I follow a strict routine. I do not "prune when I remember." I mark my calendar. Here is my exact schedule over a 14-day period.
Week 1: The Assessment and Cleanup
Day 1: The Deep Surgical Cut
Put on clean gloves. Use sterilized scissors (wipe with rubbing alcohol). I cut out all fully green leaves. No hesitation. If a leaf has zero white or pink variegation, it is not contributing to the aesthetic and it is producing energy that makes the plant lazy about producing white.
But wait. This is where I killed my third plant. I cut the leaf stems too short. I chopped them right down to the tuber.
The mistake: I cut into the "neck" of the bulb. This caused rot.
The fix: Always leave a 2-inch stub of the petiole. Even if it looks ugly, let it dry out and pull it off later. Do not cut flush with the soil. That stub protects the mother bulb from infection. I cannot stress this enough.
Day 7: The Spot Check
I check for any new flower buds that have appeared since Monday. I also look at the older leaves that have a mix of green and white.
If a leaf has brown edges, I trim those edges off. But here is the secret—I do not remove the whole leaf if it has some white. I only cut the crispy parts away. I follow the natural shape of the leaf when trimming. Just cosmetic surgery.
Week 2: The Rebalancing Act
Day 10: Thinning for Light Penetration
Now we get to the real pruning science.
Caladiums need bright, indirect light to maintain variegation. But they are dense. The outer leaves often shade the inner ones. If the inner leaves don't get light, they turn green or just stop growing.
I gently pull apart the clump to look inside. This is where the airflow and light need help. I cut out any small, stunted leaves that are deep in the middle. They are usually pale green or just blocking the sun.
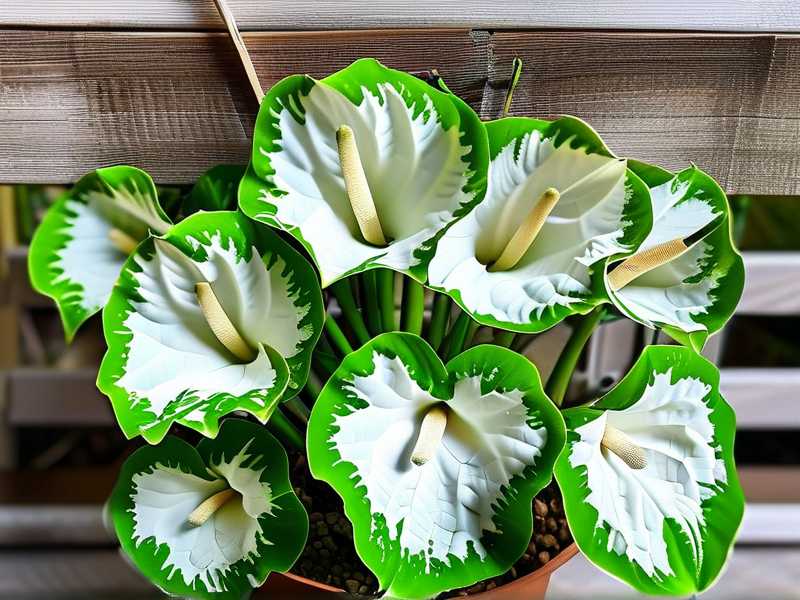
"I used to think more leaves equaled a better plant. I was wrong. A crowded Caladium is a green Caladium."
I removed four smaller leaves from the center of my plant. This opened up the canopy. The result? The remaining inner leaves started getting more light, and the new growth that emerged by Day 14 was noticeably whiter.
Day 14: The Rotation and Observation
Physical pruning is done for the cycle. But this day involves pruning the environment.
I turned the pot a quarter turn. The leaves on the dark side of the room had lower variegation than those facing the window. By turning the plant, I ensure all the leaves get equal light, which reduces the "green shift" on the shaded side.
My observation: The leaf that was previously facing the dark wall developed a new leaf that was almost completely white after being rotated to face the bright side for two days. Light directly influences the next leaf’s pigmentation.
The 3 Deadly Newbie Mistakes (From My Own Failures)
If you are new to Caladiums, do not repeat my history.
① Overwatering (The Instant Killer)
"90% of indoor plants die from overwatering," and it's worse for Caladiums. They like moisture, but they hate soggy feet. In my early days, I flooded the pot every two days. The tuber rotted within three weeks.
How to fix it: Stick your finger down to the second knuckle. Only water if it’s dry. I don't even follow a schedule. I just poke the soil. If the soil clings to my finger, I wait. If it comes out clean, I water slowly... until water drips from the bottom holes.
② Light Position (Getting Sunburnt or Kept in the Dark)
I had my White Queen in a South-facing window last year because I thought "White means it needs more sun." Bad idea. The leaves scorched. The white parts don't have protective chlorophyll, so they fried. The brown crispy patches were my fault.
Conversely, one time I moved it to a dark hallway "to recover." The next leaves were tall, spindly, and fully green.
My logic now: A spot right next to an East-facing window or a few feet back from a sheer-curtained South window is perfect. You want bright but filtered light. If you see shadows on the leaf but no direct sun touching them, you’re good.
③ Wrong Pot Size (The Swimming Pool Problem)
I placed a single tuber in a huge 12-inch pot once. I thought it would grow big and bushy. Instead, the soil stayed wet for a week because there were no roots to drink the water. The tuber sat in damp darkness. It rotted before it even sprouted.
Now I use a snug 6-inch pot for starters. The roots fill the space quickly, which helps the soil dry evenly. Bigger pots just lead to overwatering and green growth.
Remember, pruning isn't just about the leaves. It's about managing water stress. If the root system is too wet, the plant sends up green leaves to process more water. Keep it snug and dry-ish.
The Pruning Tools and Techniques That Work
You don't need fancy equipment. I use:
- Bypass pruners: They are sharp and make clean cuts.
- Rubbing alcohol: For cleaning between cuts (especially if I cut a sick leaf).
- Fish emulsion fertilizer: Used after major pruning to help the plant bounce back. I use half-strength fertilizer to push new white growth.
One major technique I want to share is the "Peg Method." After I cut back leaves, I sometimes stick a tiny wooden peg into the soil next to the tuber to mark where the eye is. This helps me know which side to rotate or where new growth will come from. It’s just a little trick to see which way the plant is leaning.
The Two-Week Results: What Actually Happened
Let me be clear: I don't have a magic wand. But the changes are visible.
I documented this with photos. At Day 1, my plant was a bushy mess of green leaves with speckles of white. It wasn't an "Albo" style at that point.
Day 3-5: The cut locations started to callus over. The buds I had pinched did not regrow. Instead, the plant seemed to "rest."
Day 7: I spotted a small pink shoot emerging in the middle. This was the sign of success. Without the flower buds draining resources, the plant was pushing out a new leaf.
Day 10: I trimmed the internal crowded leaves. The plant looked less "full" but healthier. You cannot be afraid of negative space.
Day 14: The new leaf from Day 7 expanded fully. It was a brilliant white with subtle green veining on the edges.
I also noticed that the stubs I left behind (the 2-inch ones) had dried out. I wiggled them, and they came off with a satisfying snap, leaving a clean scar on the bulb. No rot.
The plant looked airier, but every remaining leaf was bright and crisp. The contrast between green and white was stark, not muddy.
Advanced Variegation Trigger (The "Cold Shot")
This is a little trick I learned from trial and error. It sounds crazy, but I had results with it. During my two-week window, I shifted the plant closer to a cooler glass window at night (without touching it). Night temperatures dropped to about 65°F (18°C).
I read that cooler nights slow down chlorophyll production slightly. The plant retains the white variegation better during cooler nights. But AHS warns about cold stress. If it goes below 60°F, the leaves will turn yellow.
I kept the room at around 65°F at night. It seemed to help keep the edges sharp. I use this method in conjunction with pruning. If I prune and the temperature is too hot (above 85°F), the plant grows so fast that it skips the white pigment and goes straight to green. Slightly cooler temps slow it down just enough to focus on pigment quality.
Frequently Asked Questions
Q1: Do I cut off leaves that have brown patches or only entirely green ones?
I cut off the entirely green ones completely. For leaves with brown patches, I only trim the brown edge. If the leaf still has that beautiful white center, it is still photosynthesizing and storing energy for the white areas. Cutting it entirely away forces the plant to push new growth too fast, which often comes out green. Keep the partially white leaves until they fully die back.
Q2: Can I root the cuttings in water to get new plants?
No. Caladiums do not grow from leaf cuttings. They grow from tubers. You cannot propagate them from pruning waste. The only way to get more plants is to divide the tubers in spring or plant the tiny bulbils that form at the base. So don't bother putting your cut leaves in water. It won't work.
Q3: How often should I prune for optimal variegation?
During the active growing season (May to August), I check the plant every single day for flower buds. I pinch those immediately every time I see one. For leaf thinning, I do a "session" every two weeks. However, if you only do the flower pinching and avoid overwatering, your variegation will automatically improve by 50%. Frequent leaf pruning stresses the plant. Less is more when it comes to active green leaves.
The Bottom Line on Getting That Ghostly Look
If you want a Caladium White Queen that looks like a ghost, not a swamp, stop treating it like a typical leafy houseplant. It is a diva.
I remember the day I forgot to pinch the flowers. The leaves became green, tall, and floppy. I actually hated the plant. I was ready to toss it in the compost bin. Then, I took a breath, dug the tuber up, checked it for rot (there was some, which I cut away with a sterile knife), and replanted it in fresh, dry soil.
After that trauma, it taught me respect. It taught me that pruning is a form of communication with the plant. When you remove the flowers, you are saying, "Don't reproduce yet. Grow beautiful leaves." When you remove green leaves, you are saying, "Let more light in."
The Royal Horticultural Society (RHS) recommends consistently monitoring for pests and maintaining high humidity to keep the plant stress-free. The American Horticultural Society (AHS) also emphasizes that cultivar characteristics like the White Queen’s pink blush fade with age, but true white requires high light.
Ignoring these signals is what causes the variegation to vanish. Pruning is your restart button.
My final advice is simple: grab your scissors, remove those flower stalks, cut those green offenders, leave a stub, and rotate the pot.
Give it two weeks. I promise you will see a difference. The white will creep back.
And one more thing, don't panic if you see the plant look a bit bald right after pruning. That is normal. They bounce back faster than you think. The density of the leaves is a sign of energy storage. You want a slim, elegant plant, not a bushy weed.
Happy pruning, and may your White Queen always stay pale, ghostly, and utterly beautiful.





