 bluename
 How to Grow Caladiums with Hostas: Leafy Garden Pair for a Stunning Shade Oasis
I love shade gardening, but for years, my shady corners felt like a challenge. I craved vibrant color and dramatic foliage, not just a sea of green. If you’ve ever looked at a dimly lit garden bed and wondered how to make it pop, you’re not alone. The struggle to combine bold color with elegant texture in low-light conditions is real. That’s why I embarked on a two-week experiment to pair two shade-loving champions: the fiery, heart-leaved Caladium and the cool, sculptural Hosta. This journey into creating a leafy garden pair taught me not just about plant compatibility, but about unlocking a new level of depth and beauty in my garden. Let me walk you through exactly how to grow Caladiums with Hostas successfully, sharing every step, observation, and valuable lesson from my hands-on trial.
Why Caladiums and Hostas Are the Perfect Shade Pairing
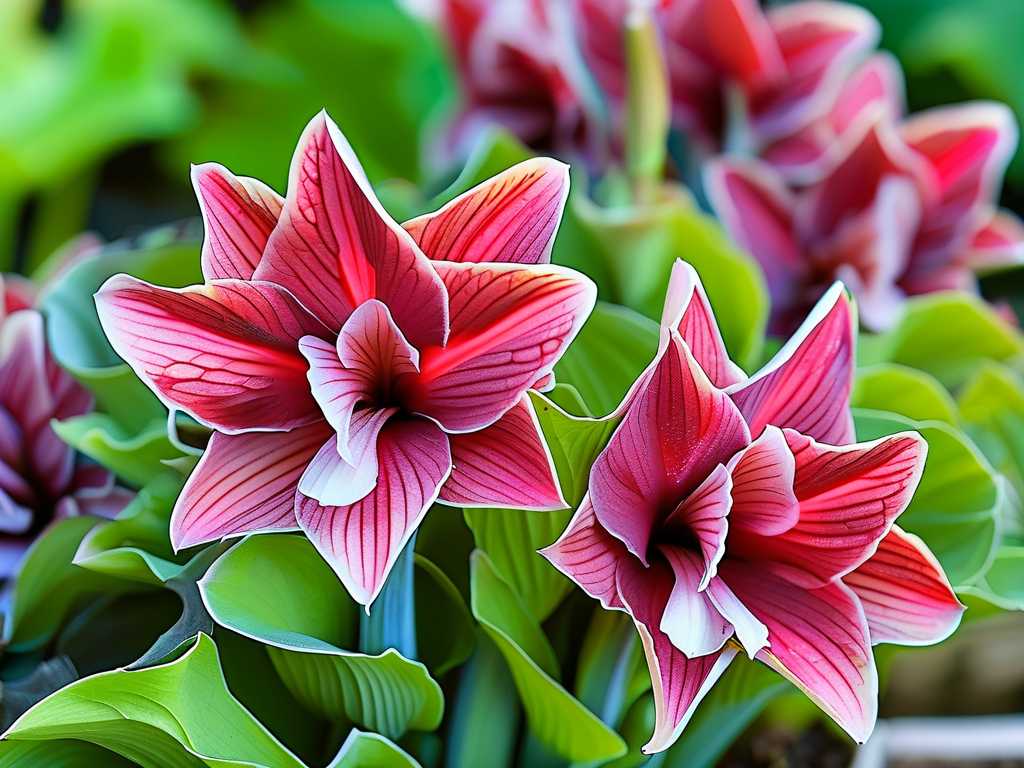
At first glance, they seem like opposites. Caladiums scream with reds, pinks, and whites, while Hostas offer a calming palette of blues, greens, and golds. But that’s the magic. This combination is a masterclass in contrast and harmony. The American Hosta Society (AHS) emphasizes that Hostas are unparalleled for their foliage architecture and variety. Pairing them with the ephemeral, paint-like splashes of Caladiums creates a living tapestry. The key is leveraging their shared needs: dappled shade, consistent moisture, and rich, well-draining soil. This shared foundation is what makes learning how to grow Caladiums with Hostas so rewarding—you’re meeting core requirements for two spectacular plants at once.
My Two-Week Planting and Observation Diary
I decided to document this pairing from day one, tracking progress, adjustments, and results.
Week 1: Site Preparation and Planting My goal was a layered, natural look. I chose a north-facing bed that receives only gentle morning sun. The soil was decent but heavy. Following expert advice from resources like the Royal Horticultural Society (RHS), I knew drainage was paramount, especially for Caladium bulbs which can rot. I amended the entire area with a generous amount of compost and peat moss to improve both fertility and structure.
- Planting the Hostas: I started with my established potted Hostas (‘Halcyon’ for blue tones and ‘Patriot’ for bright variegation). I spaced them generously, considering their mature spread, and planted them at the same depth they were in their pots.
- Planting the Caladiums: Here’s where I hit my first snag. I purchased plump, healthy Caladium bulbs (variety ‘White Queen’ and ‘Red Flash’). The packaging said to plant them 2 inches deep. However, after planting a few, I felt the soil was still too cool and damp. Worried about bulb rot, I carefully dug them up. I decided to pre-sprout them indoors in shallow pots of moist peat moss for a week. This gave them a head start in a controlled environment. For the ones I planted directly, I shallowed them up, placing them just 1 inch below the surface with the “eyes” or bumps facing up, as a failsafe.
- Initial Watering and Mulch: I watered the entire bed thoroughly and applied a 3-inch layer of shredded bark mulch to retain moisture and regulate soil temperature. The bed looked neat but admittedly bare aside from the Hosta clumps.
Days 3-7: The First Signs and a Watering Lesson By day three, the pre-sprouted Caladiums showed tiny pink nubs. The direct-planted bulbs showed no signs. The Hostas looked comfortable. Then, we had three unexpectedly hot, dry days. The soil surface dried quickly. I noticed the edges of one ‘Patriot’ Hosta leaf beginning to crisp—a clear sign of thirst. I had underestimated how quickly a newly planted, mulched bed could dry out in a breeze. I immediately implemented a deep, slow watering routine every other day, aiming the hose at the base of the plants. This corrected the issue, and no further leaf scorch appeared. The lesson? Consistent moisture for leafy pairs is non-negotiable, especially during establishment.
Week 2: Growth and the Color Show Begins Entering the second week, the pre-sprouted Caladiums had small, unfurling leaves. Their vibrant red veins and pink speckles were already visible against the bright green. The direct-planted bulbs finally broke the surface. The Hostas, now properly hydrated, began to show more robust growth. The visual effect started to materialize. The broad, white-edged leaves of ‘Patriot’ Hosta made the crimson of ‘Red Flash’ Caladium beside it sing. The blue ‘Halcyon’ Hosta provided a cool, calming backdrop for the delicate, almost translucent ‘White Queen’. I spent time simply observing how the light filtered through the different leaf textures—the thick, corrugated Hosta leaves versus the thin, papery Caladium ones. It was a dynamic, engaging display.
Key Factors for Success: Beyond Basic Planting
My experiment solidified several critical care tips for Caladium and Hosta combinations.
Light: The Delicate Balance Both plants thrive in shade, but the type matters. Deep, full shade can lead to leggy Caladiums and slower Hosta growth. I found bright, dappled shade or morning sun with afternoon protection to be ideal. This light level intensified the Caladium colors without risking leaf burn on either plant. The AHS notes that many blue Hostas actually retain their best blue hue in stronger filtered light, which aligns perfectly with Caladium needs.
Soil and Feeding: The Foundation Rich, well-draining soil is the bedrock of this pairing. I used a balanced, slow-release fertilizer at planting time. For ongoing feeding, a diluted liquid fertilizer every 4-6 weeks during the active growing season supports both plants. Remember, you are feeding two heavy foliage producers. The RHS advises against over-fertilizing Hostas, as it can dilute leaf color and promote soft growth, so a gentle but consistent approach is best.
Designing Your Foliage Masterpiece
Think beyond simple rows. Use Hostas as the structural anchor plants. Their large mounds create a sense of permanence. Then, tuck groups of 3-5 Caladium bulbs around and in front of them. Consider color theory: a gold-edged Hosta (‘Guacamole’) makes a stunning partner for a deep green-veined Caladium (‘Miss Muffet’). For a cooler theme, pair blue Hostas with white or pink Caladiums. Don’t forget height; place taller Hostas in back and shorter, more colorful Caladiums along borders. This approach creates a shade garden with vibrant foliage that has depth and movement.
Seasonal Care and Overwintering
As summer wanes, Caladiums will naturally begin to fade. You can reduce watering to encourage dormancy. Once the leaves yellow, carefully dig up the bulbs, let them dry, and store them in peat moss in a cool, dark place for winter. Hostas are hardy and will die back. Simply cut back the spent foliage and let the mulch protect their crowns. This seasonal cycle makes the partnership renewably joyful each spring.
Troubleshooting Common Issues
- Slugs and Snails: This was my second big challenge. Both plants are slug magnets. I saw the tell-tale holes in my beautiful Hosta leaves within days. I tried beer traps with modest success. What worked best was a two-pronged approach: sprinkling diatomaceous earth around the base of plants (reapplied after rain) and nightly patrols with a flashlight. Encouraging natural predators like birds also helps.
- Leaf Burn: If leaves develop brown, crispy edges, it’s likely a water stress issue (too little or inconsistent watering) or too much direct sun. Adjust your watering schedule and consider providing more shade.
- Poor Caladium Color: If Caladium leaves are mostly green with little variegation, they are likely getting too little light. Move them to a brighter shaded spot next season.
Frequently Asked Questions
Can I plant Caladium bulbs and Hostas in the same hole? It’s not recommended. Hostas form dense root clumps that can hinder Caladium bulbs from establishing and emerging. Plant them adjacent to each other, allowing at least 6-12 inches between a Hosta’s center and a Caladium bulb for optimal growth of both.
What do I do when the Caladiums die back but the Hostas are still green? This is normal seasonal rhythm. As the Caladiums fade, you can plant shallow-rooted, fall-blooming shade annuals like impatiens or begonias to fill the gap, or simply let the architectural form of the Hostas take center stage in the late season garden.
Which Hosta varieties are best for pairing with bold Caladiums? For maximum impact, choose Hostas with contrasting leaf colors. Varieties with wide white or gold margins (‘Patriot’, ‘Francee’, ‘Paul’s Glory’) make red or pink Caladiums stand out. Solid blue or blue-green Hostas (‘Halcyon’, ‘Elegans’) provide a stunning, cool backdrop for white or rose-colored Caladiums.
My two-week deep dive into this leafy garden pair transformed a static shade corner into a conversation piece. The synergy between the architectural Hostas and the flamboyant Caladiums taught me that contrast is the key to excitement in the garden. By focusing on their shared love for moist, rich soil and filtered light, you can create a low-maintenance display that offers months of evolving beauty. Start with well-prepared soil, be vigilant with water in the early stages, and don’t be afraid to experiment with color combinations. The reward is a lush, textured, and vividly colorful shade oasis that defies the myth that shade gardens are dull.





